

Standing in front of a squat rack with different bars can feel overwhelming. I get it. I’ve tested every type of squat bar out there, and I want to save you the guesswork.
This guide covers 7 types of squat bars. You’ll learn what makes each bar different, which one matches your goals, and how to pick without wasting cash. We’ll walk through Olympic bars, safety squat bars, front squat bars, and specialty options.
I’ve coached hundreds of lifters. The right bar changes everything. Let me help you find yours.
Why Are There Different Types of Squat Bars?

Different bodies need different tools. Standard barbells work fine for some people, but they create problems for others.
The standard Olympic barbell requires good shoulder mobility. If your shoulders are tight, you’ll struggle to grip the bar properly.
Some people feel pain in their wrists, elbows, or shoulders. The weight sits in one spot on your upper back, which gets uncomfortable during heavy squats.
Bar shape changes how weight sits on your body. A curved bar shifts the load forward or backward. Bars with handles let you hold them in front of your chest, taking pressure off your shoulders and wrists. Padding makes lifting heavy weights more comfortable.
Beginners with limited mobility benefit most from specialty bars. People recovering from injuries need bars that reduce joint stress. Advanced lifters use specialty bars to target specific muscles.
7 Types of Squat Bars You Should Know
Each bar solves a different problem. Here’s what you need to know about the main options.
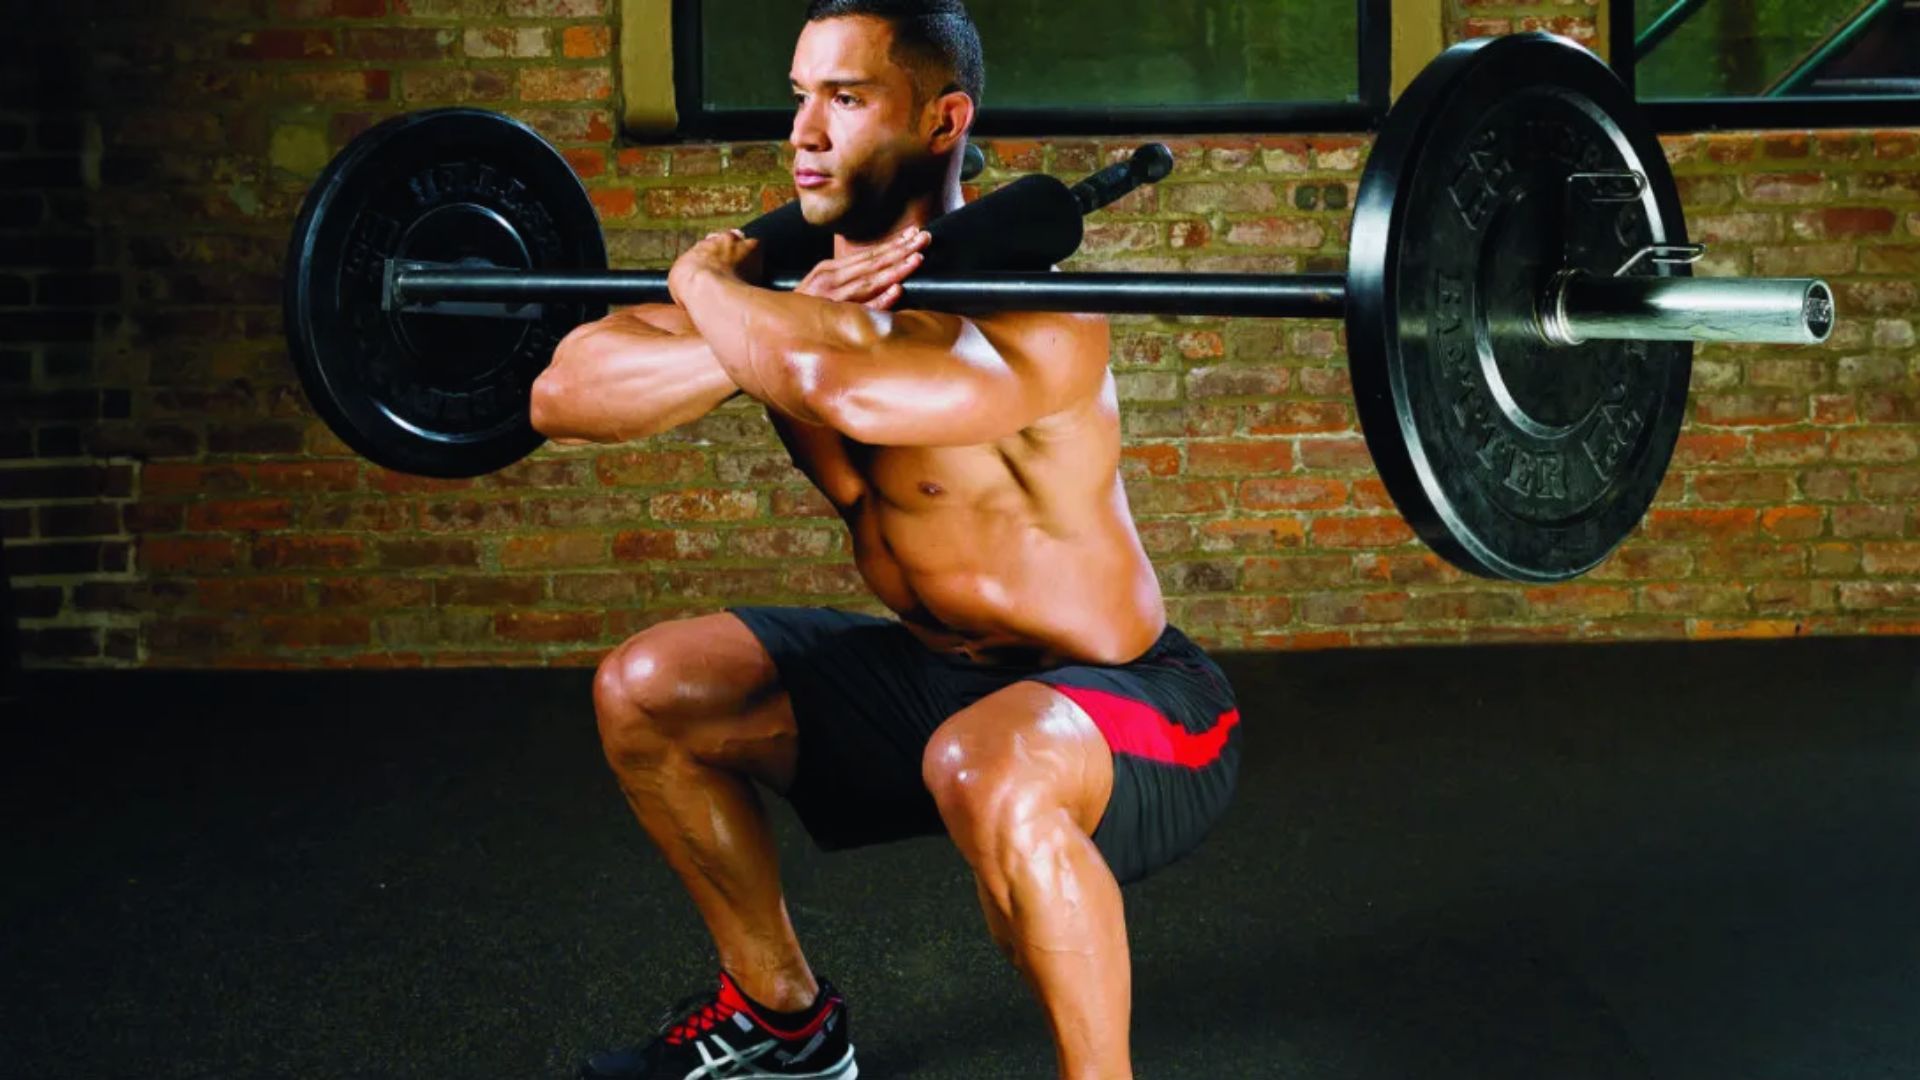
1. Standard Olympic Squat Bar

This is the straight bar you see in every gym. It weighs 45 pounds and measures about 7 feet long.
You hold it across your upper back with both hands gripping the bar. Your shoulders need decent mobility to get into position. The bar sits either high on your traps or lower on your rear delts.
Best for: People with good mobility who want to build overall strength.
Watch out for: Shoulder, wrist, and elbow pain if your mobility is limited.
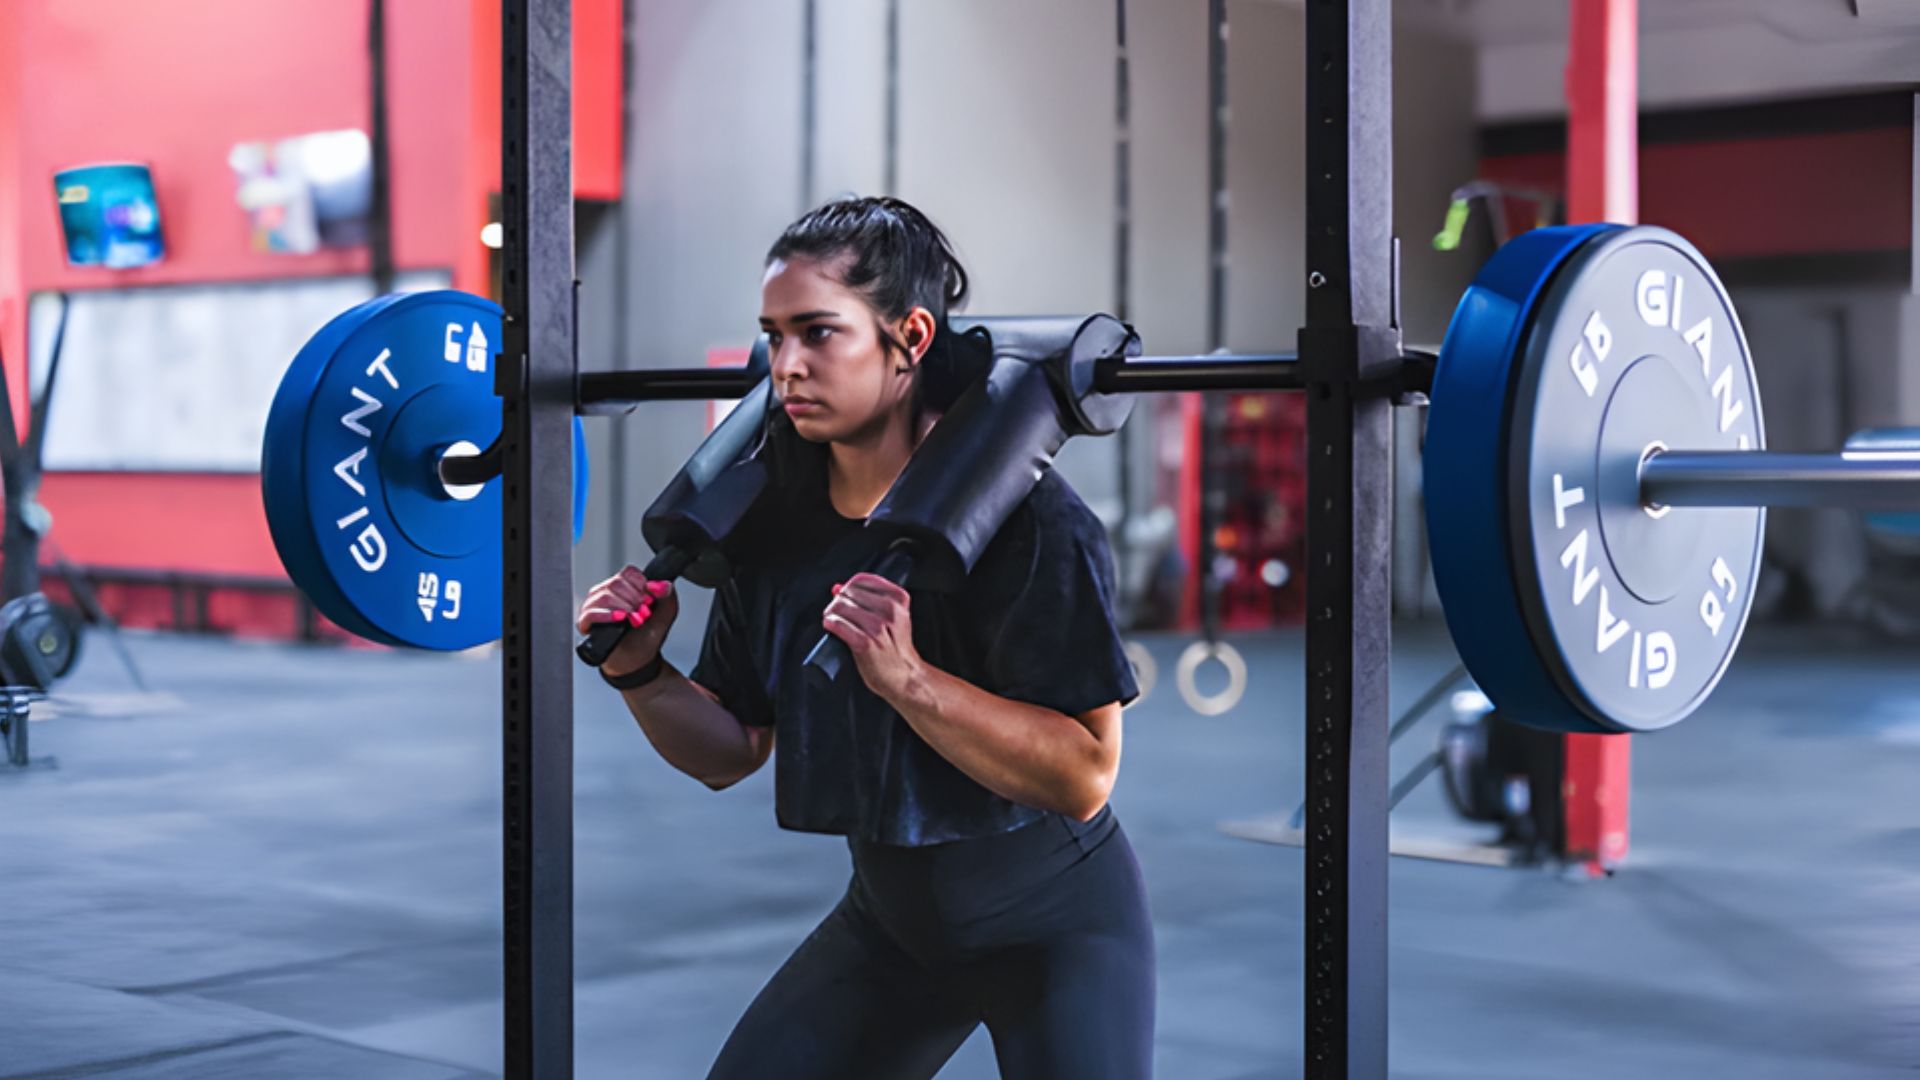
2. Safety Squat Bar (SSB)

The safety squat bar has a curved shape and two handles that point forward. You hold the handles in front of your chest instead of reaching back.
The curve shifts the weight forward slightly. This means you don’t have to lean as far forward to balance. The bar also has thick padding where it rests on your shoulders.
Best for: Anyone with shoulder, wrist, or elbow problems. Great for beginners who struggle with standard bar positioning.
Watch out for: The forward weight shift takes getting used to. Start with a lighter weight than you use on a regular bar.
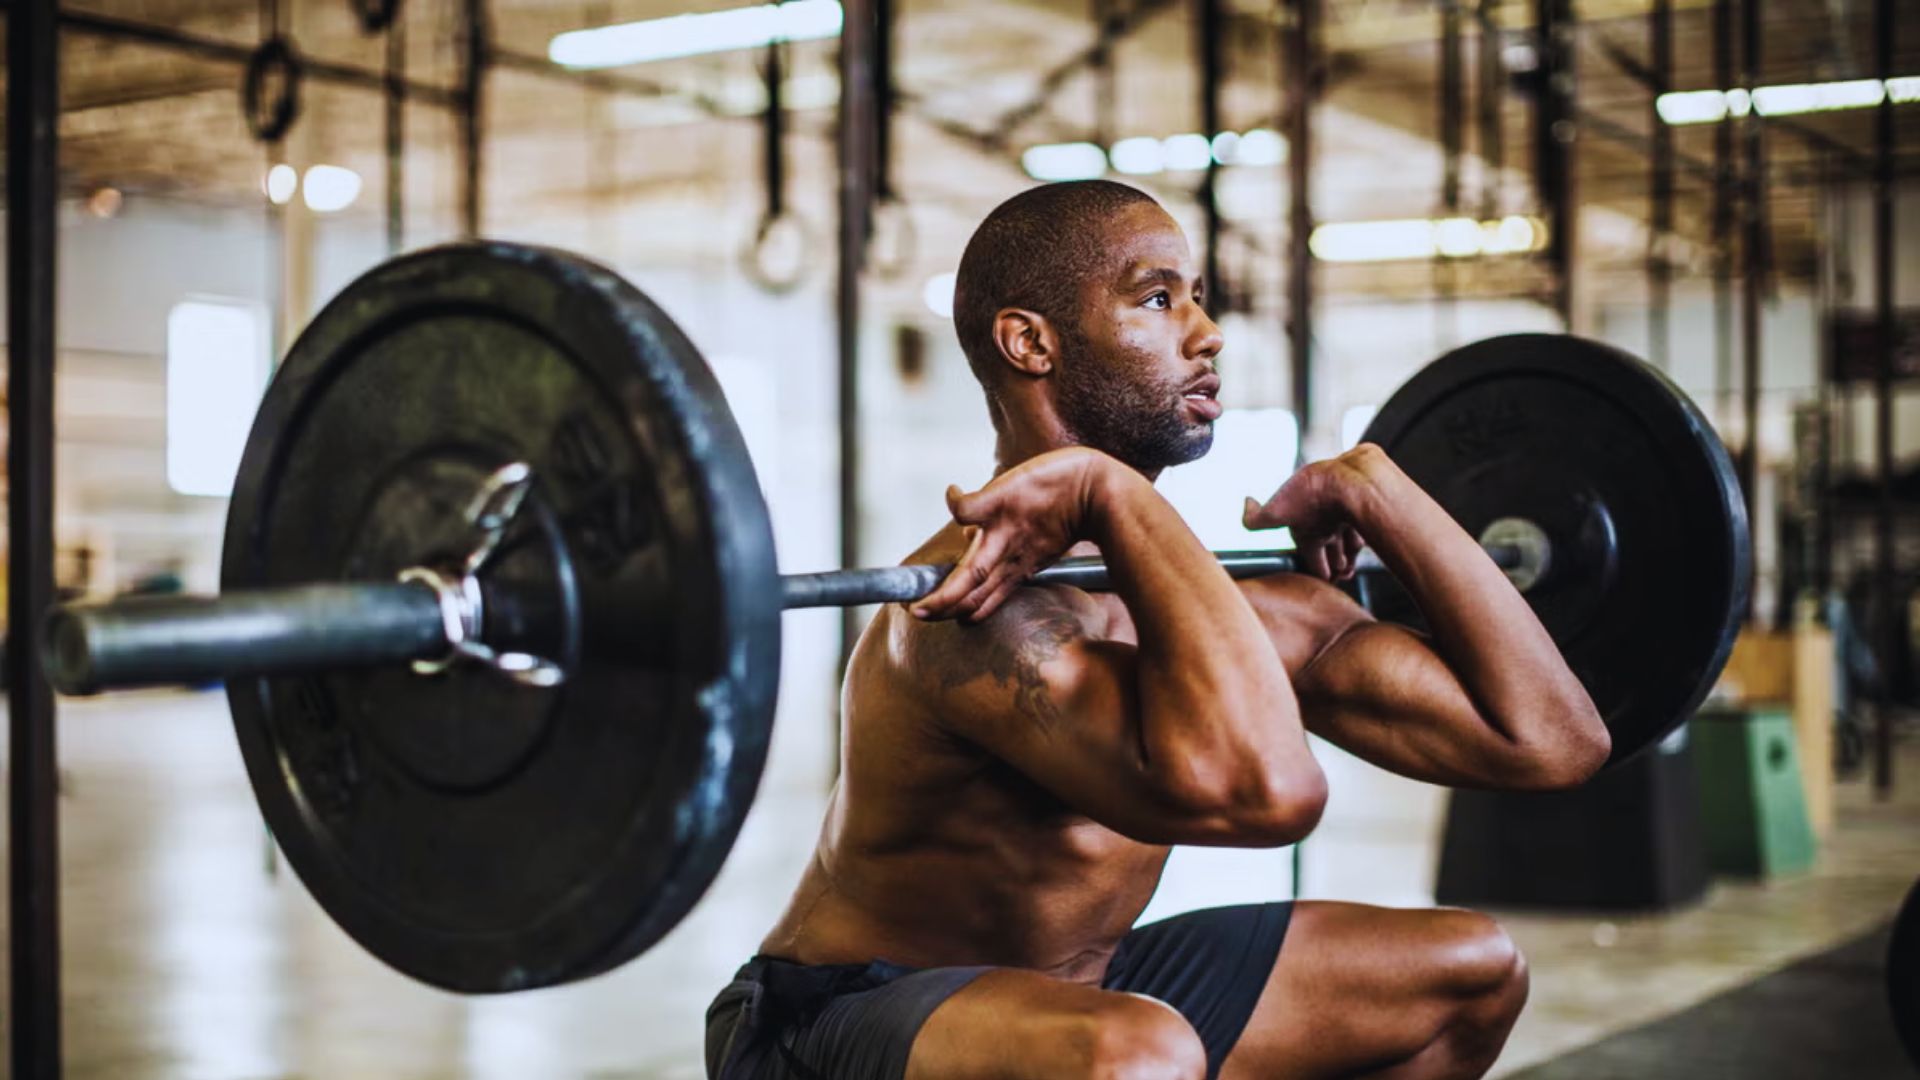
3. Front Squat Bar
This bar lets you hold the weight in front of your body instead of behind your neck. It has handles or a yoke that sits across your shoulders.
Front squats hit your quads harder and put less stress on your lower back. The weight position forces you to stay more upright.
Best for: Building quad strength and improving your squat form. Good for people with lower back sensitivity.
Watch out for: Requires strong core stability. The bar can feel awkward at first.
4. Cambered Squat Bar
The cambered bar has a big curve in the middle. This drops the weight lower than a standard bar, changing your center of gravity.
The lower weight position can reduce stress on your lower back. It also makes the squat feel different, challenging your stability in new ways.
Best for: Advanced lifters looking to vary their training. People working around specific injuries.
Watch out for: Harder to balance. Not recommended for beginners.
5. Buffalo Squat Bar

The buffalo bar has a slight curve that makes it easier on your shoulders. It’s not as curved as a cambered bar, just enough to improve comfort.
The curve lets the bar sit more naturally across your back. This reduces the need for extreme shoulder rotation.
Best for: People who feel shoulder pain with a straight bar but don’t want the full curve of a cambered bar.
Watch out for: Still requires decent mobility. Costs more than a standard bar.
6. Kabuki Transformer Bar

This bar combines features from multiple specialty bars. You can adjust the handles and padding to create different setups.
Some versions let you switch between front squat and back squat positions. Others offer different grip widths.
Best for: Home gyms where space and budget limit how many bars you can own.
Watch out for: A more complex design means more parts that could break. Usually expensive.
7. Marrs Bar
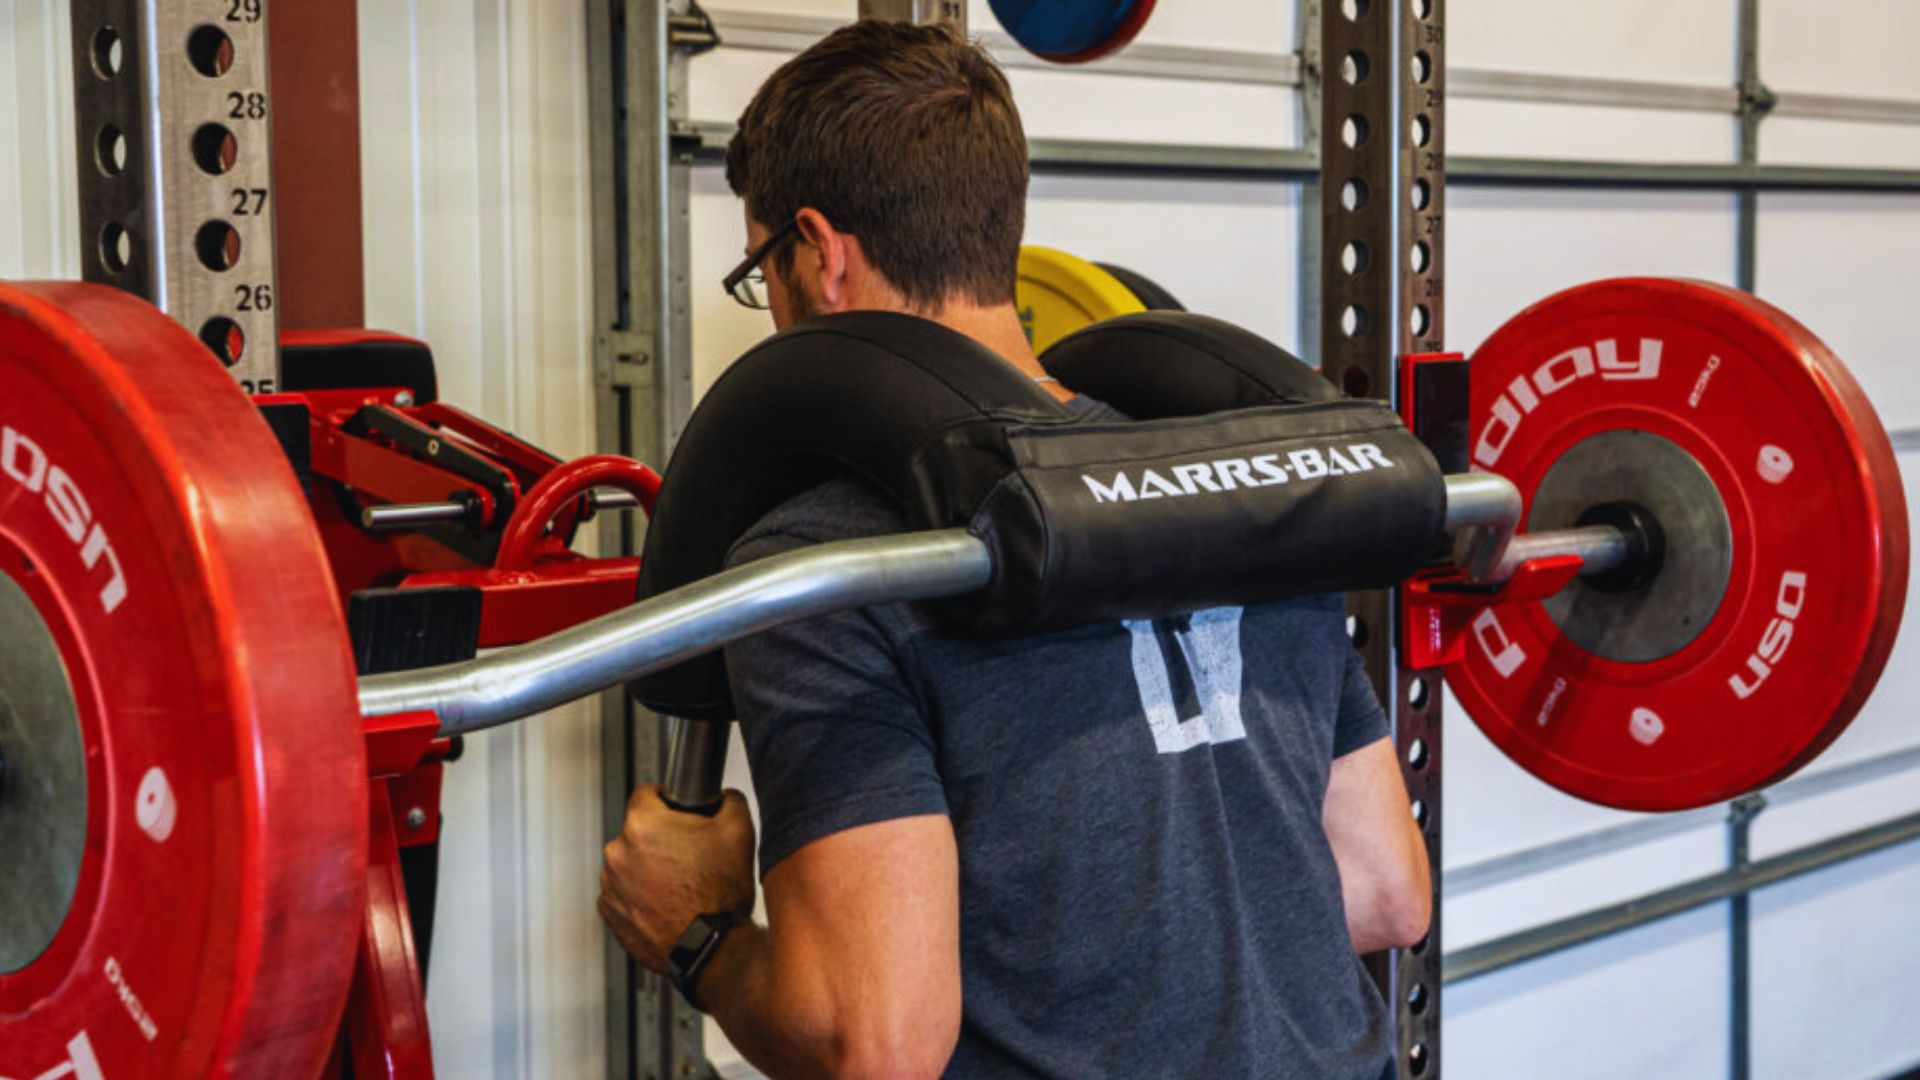
The Marrs bar is designed specifically for hip and glute development. It has a unique shape that changes how you load the squat movement.
This bar is less common than the others. You’ll mostly find it in specialized strength gyms.
Best for: Athletes focused on posterior chain development. Advanced lifters with specific goals.
Watch out for: Very specialized. Not necessary for most people.
Key Features of Different Types of Squat Bars
Understanding what makes each bar different helps you pick the right one. Here are the features that matter most:
- Bar shape: Straight bars keep weight directly over your feet. Curved bars shift the load forward or backward, changing which muscles work harder and challenging your stability.
- Handle placement: Standard bars require you to reach back and grip the bar. Safety squat bars and front squat bars have forward-facing handles that take stress off your shoulders and wrists.
- Load distribution: High bar position keeps you upright. Low bar position lets you lean forward. Front-loaded bars hit your quads harder and reduce lower back stress.
- Padding: Thick padding protects your neck and shoulders from heavy weight. Safety squat bars have the best padding. Standard bars have knurling but no padding.
- Sleeve design: Standard bars have sleeves about 16 inches long on each side. Rotating sleeves reduces wrist and elbow stress. Shorter sleeves limit how much weight you can load.
Differences Between Types of Squat Bars
Each bar creates a different training effect.
Here’s how they compare:
| Bar Type | Stability | Muscle Focus | Joint Stress | Best For |
|---|---|---|---|---|
| Standard Olympic | Most stable | All leg muscles are evenly | High on shoulders, wrists, elbows | Versatile training, all gyms |
| Safety Squat | Front-heavy | Quads and upper back | Removes shoulder and wrist stress | Beginners, shoulder issues |
| Front Squat | Needs constant balance | Quads hardest | Can bother wrists and shoulders | Quad development |
| Cambered | Least stable | Glutes and hamstrings | Reduces lower back stress | Advanced lifters only |
| Buffalo | Similar to standard | All leg muscles are evenly | Less shoulder stress | Shoulder discomfort |
How to Choose the Right Squat Bar as a Beginner?

Picking your first squat bar doesn’t have to be complicated.
Start based on your experience level. Complete beginners should use a standard Olympic bar for the first three months. If you have some experience and feel shoulder or wrist discomfort, try a safety squat bar. Intermediate and advanced lifters can experiment with different bars.
Consider your mobility and injuries. Limited shoulder mobility means you need a safety squat bar. Wrist or elbow pain means you should avoid front squat bars. Lower back sensitivity might improve with front squat bars or cambered bars. No injuries? A standard Olympic bar works great.
Match the bar to your goals and budget. Building overall strength only requires a standard Olympic bar ($150-$300). Quad development needs a front squat bar ($200-$400). Shoulder issues call for a safety squat bar ($250-$500). Tight budget? Stick with the standard bar.
Before buying, try different bars at your gym. Test with lightweight first. Give each bar at least three workouts before deciding. Check the specifications to make sure the bar fits your rack. Buy the bar that feels best on your body.
Most people need just one or two bars maximum.
Conclusion
Different types of squat bars solve different problems. Standard Olympic bars work great for most people, but safety squat bars help if you have shoulder issues. Front squat bars build bigger quads, while cambered bars challenge your stability.
Start with a standard bar and add specialty options only when you need them. Listen to your body and pick the bar that feels best for you.
I’ve trained with all these bars over the years, and here’s what I know. The best bar is the one you’ll actually use consistently. Don’t overthink it. Get under the bar and start squatting.
Drop a comment below and tell me which squat bar you prefer. I’d love to hear what works for you.
Frequently Asked Questions
What is the best squat bar for someone just starting?
A standard Olympic barbell is the best choice for beginners. It helps you learn proper form and works well for building overall strength. Once you master basic technique, you can try specialty bars if needed.
Can a safety squat bar help with shoulder pain during squats?
Yes, safety squat bars reduce shoulder stress significantly. The forward handles eliminate the need to reach back and grip the bar. Many people with shoulder problems can squat pain-free using an SSB.
How much does a good specialty squat bar cost?
Quality specialty bars range from $200 to $600, depending on type and brand. Safety squat bars typically cost $250 to $500. Standard Olympic bars are cheaper, at $150 to $300 for decent quality.
Do I need multiple squat bars in my home gym?
Most people only need one bar. Start with a standard Olympic bar and add specialty bars later if you have specific needs. A safety squat bar makes a good second bar if you have shoulder issues.
Which squat bar is easiest on the lower back?
Front squat bars typically put less stress on the lower back because they force a more upright torso position. Cambered bars can also help some people by changing weight distribution. Test different options to see what feels best.


