

I used to struggle with weak shoulders until I found reverse snow angels. This simple floor exercise changed my upper back strength completely.
In this guide, you’ll learn how to reverse snow angels correctly with step-by-step instructions. I’ll show you proper form, common mistakes to avoid, and how many reps to do.
I’ve tested these techniques myself and refined them based on what actually works. You’ll get practical tips that help you build stronger shoulders and better posture safely.
Let’s fix those rounded shoulders together.
What Are Reverse Snow Angels?
Reverse snow angels are a bodyweight exercise done lying face down. You sweep your arms in an arc motion from your hips toward your head, similar to making snow angels but reversed.
This targets the muscles between your shoulder blades. These muscles get weak from sitting and slouching, causing rounded shoulders and poor posture.
The exercise requires no equipment. You can do it anywhere with floor space. Physical therapists recommend it for shoulder health and correcting muscle imbalances.
Most people feel it working immediately. Your upper back will burn after just a few reps.
How to Do Reverse Snow Angels: Step by Step
Here’s exactly how to perform this exercise with proper form.
Step 1: Lie in Starting Position

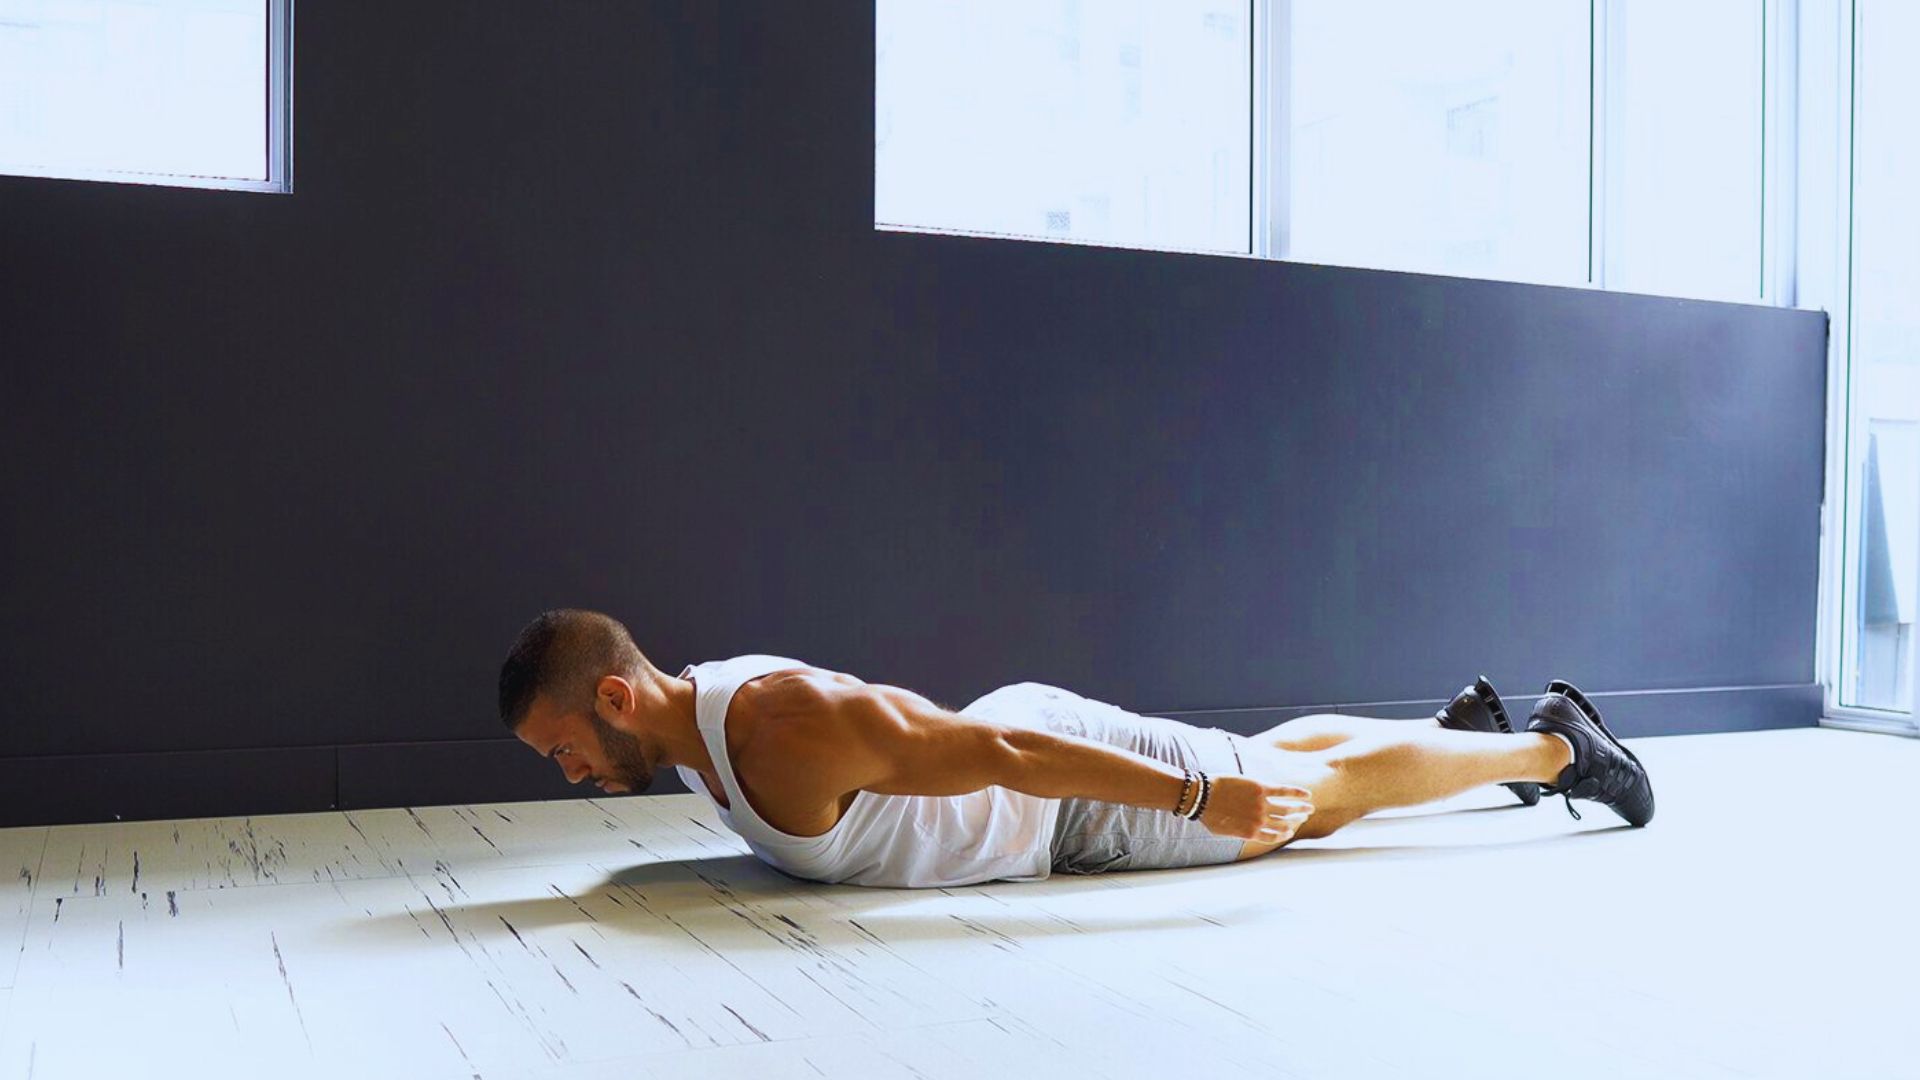
Lay face down on the floor or an exercise mat. Rest your forehead gently on the ground. Keep your legs straight and together.
Position your arms at your sides with palms facing down. This is your base position.Make sure your body forms a straight line from head to heels.
Place a small towel under your forehead if the floor feels uncomfortable. Point your toes so they touch the ground. Relax your shoulders away from your ears before starting.
Step 2: Engage Core and Glutes

Tighten your stomach muscles before you move. Squeeze your glutes too. This protects your lower back from strain.
Keep breathing normally as you hold this tension. Don’t hold your breath.Imagine pulling your belly button toward your spine.
Your glutes should feel firm but not cramped. Maintain this engagement throughout the entire exercise. Practice this bracing before adding arm movements.
Step 3: Begin Arm Movement
Lift your arms slightly off the floor. Keep them straight but not locked. Your palms should face the ceiling now.
Start moving both arms up and out to the sides. Move slowly and with control.Think about leading the movement with your thumbs.
Keep your elbows soft to avoid joint strain. Your arms should hover 2-3 inches above the ground. Focus on smooth, steady motion rather than speed.
Step 4: Lower Arms to Hips
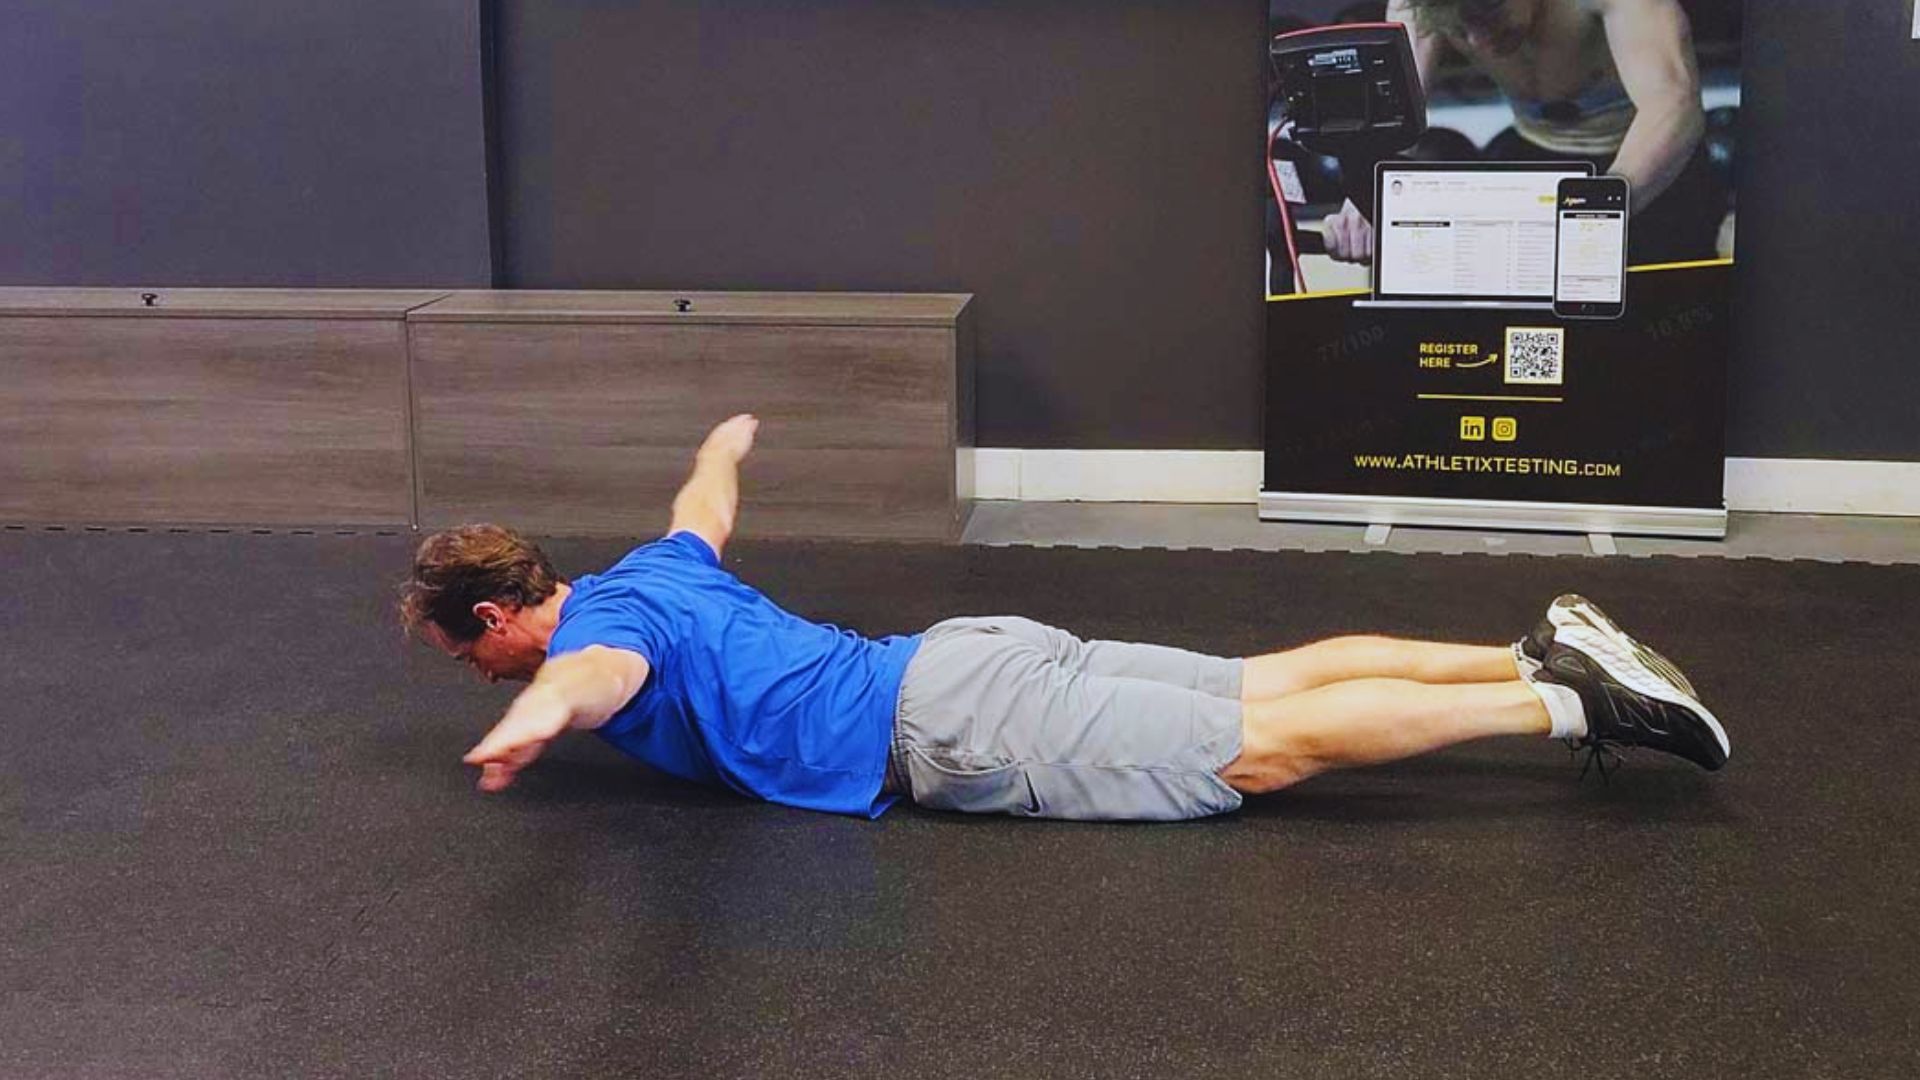
Continue the arc until your arms reach shoulder height or higher. Your body should look like a “Y” shape from above.
Keep your thumbs pointing up throughout the movement. Don’t let your shoulders hunch forward.Don’t let your shoulders hunch forward.
Stop before your arms reach straight overhead if you feel discomfort. Your shoulder blades should squeeze together at the top.
Keep your chest pressed lightly into the floor. Avoid any twisting motion in your torso.
Step 5: Pause and Return
Hold at the top position for one second. Feel the squeeze between your shoulder blades. Then slowly reverse the movement back to the starting position.
Lower your arms with the same control you used to lift them.The lowering phase is just as important as the lift. Count to three as you lower your arms down.
Keep tension in your upper back muscles throughout. Don’t let your arms drop quickly to the floor.
Step 6: Repeat Repetitions
Complete your target number of reps without rushing. Rest briefly between sets. Focus on quality over speed with each repetition. Stop if you feel sharp pain.
Aim for 10-15 repetitions per set for beginners. Take 30-60 seconds rest between sets. Perform 2-3 sets total in your workout. Increase reps gradually as you build strength.
Step 7: Key Form Tips
Keep your neck neutral. Don’t lift your head up. Press your hips into the floor. Avoid arching your lower back. Move through a pain-free range only.
Breathe out as you lift your arms.Start with smaller movements if you’re new to this exercise. Keep your legs engaged to prevent swaying.
Watch for tension creeping into your neck and shoulders. Film yourself from the side to check your form.
Reverse Snow Angels Reps, Sets, and Progression

Start with 2 sets of 10 reps if you’re new to this exercise. Rest 30-60 seconds between sets.
Once that feels easy, increase to 3 sets of 12-15 reps. You can also slow down the movement to add difficulty. Try taking 3 seconds to lift and 3 seconds to lower.
For more challenges, add light weights. Hold 1-2 pound dumbbells in each hand. Or try holding the top position for 3-5 seconds instead of 1 second.
Do this exercise 2-3 times per week. Give your muscles at least one rest day between sessions. Progress gradually over 4-6 weeks.
Tips for Safer and More Effective Practice
Follow these simple guidelines to avoid injury and get the best results from your workouts.
- Start without weights to master proper form first.
- Warm up your shoulders with 10 arm circles in each direction.
- Place a towel under your forehead for comfort and neck support.
- Stop if you feel shoulder pinching. Reduce your range of motion.
- Keep movements smooth and controlled. Jerky motions cause injury.
Conclusion
I do reverse snow angels twice a week now, and my posture has improved noticeably.
You’ll probably feel awkward the first few times, I definitely did, but stick with it. After a few weeks of consistent practice, your shoulders will thank you.
This exercise may look simple, but it’s extremely effective for building upper back strength. Try your first set today, start small, and stay consistent.
Leave a comment below and tell me how your first session went!
Frequently Asked Questions
Can I Reverse Snow Angels Every Day?
No, do them 2-3 times per week with rest days between.
What Muscles Do Reverse Snow Angels Work?
Rear deltoids, rhomboids, middle trapezius, and lower back stabilizers.
Are Reverse Snow Angels Good for Posture?
Yes, they strengthen muscles that pull your shoulders back and improve posture.
Should My Arms Touch the Floor?
Only lower as far as comfortable without pain.
Can I Do This Exercise on a Bed?
No, use a firm surface like a yoga mat or floor.


