Dealing with foot or ankle pain can make everyday activities feel more difficult than they should.
If you're searching for posterior tibial tendonitis exercises, you're likely looking for safe ways to improve strength, support recovery, and move more comfortably.
In this guide, you'll learn the best exercises to try, along with their benefits, proper technique, safety tips, and common mistakes to avoid.
Through reviewing rehabilitation and strengthening strategies, one thing becomes clear: gradual, consistent exercise often plays an important role in supporting foot and ankle function.
If you're just getting started or looking for new ideas, this article will help you find practical exercises that fit your needs.
What Is Posterior Tibial Tendonitis?

Posterior tibial tendonitis is a condition that occurs when the posterior tibial tendon becomes irritated or inflamed. It runs along the inside of the ankle and connects the calf muscle to bones.
Its main job is to support the arch of the foot and help stabilize the ankle while walking, running, and standing.
Over time, repeated strain or excessive stress can cause the tendon to become damaged, leading to discomfort and reduced function.
Common symptoms include pain along the inside of the foot or ankle, swelling, tenderness, weakness, and difficulty with activities that place pressure on the foot.
Some people may also notice their arch becoming flatter as the condition progresses.
What Causes Posterior Tibial Tendonitis?
Posterior tibial tendonitis can develop for several reasons, often involving repeated stress on the tendon.
Overuse from activities such as running, walking long distances, or participating in sports can gradually strain the tendon and lead to irritation.
Flat feet or poor foot mechanics may place extra pressure on the tendon because it has to work harder to support the arch.
A sudden increase in physical activity, such as starting a new exercise program or significantly increasing training volume, can also contribute to the condition.
Wearing footwear that lacks proper support may increase stress on the foot and ankle.
In addition, age-related wear and tear can weaken the tendon over time, making it more vulnerable to injury and inflammation.
Before You Start: Important Safety Tips
Taking a few precautions before starting posterior tibial tendonitis exercises can help you exercise more safely and reduce the risk of worsening symptoms.
- Avoid exercising during severe pain or significant swelling, as this may place additional stress on the affected tendon.
- Start slowly and progress gradually, increasing exercise intensity, duration, or resistance over time rather than all at once.
- Pay attention to pain signals during and after exercise, and stop if an activity causes sharp pain or noticeably increases symptoms.
- Focus on proper form and controlled movements, as poor technique can place unnecessary strain on the foot and ankle.
- Allow adequate recovery between exercise sessions, especially if your tendon feels sore or fatigued.
- Seek professional guidance if symptoms persist or worsen, particularly if walking, standing, or daily activities become difficult.
- Consult a healthcare provider before beginning a new exercise program if you have a history of foot, ankle, or lower-leg injuries.
Best Posterior Tibial Tendonitis Exercises to Try
These exercises focus on improving foot and ankle strength, supporting tendon function, and enhancing stability while helping you gradually return to normal movement.
1. Ankle Alphabet
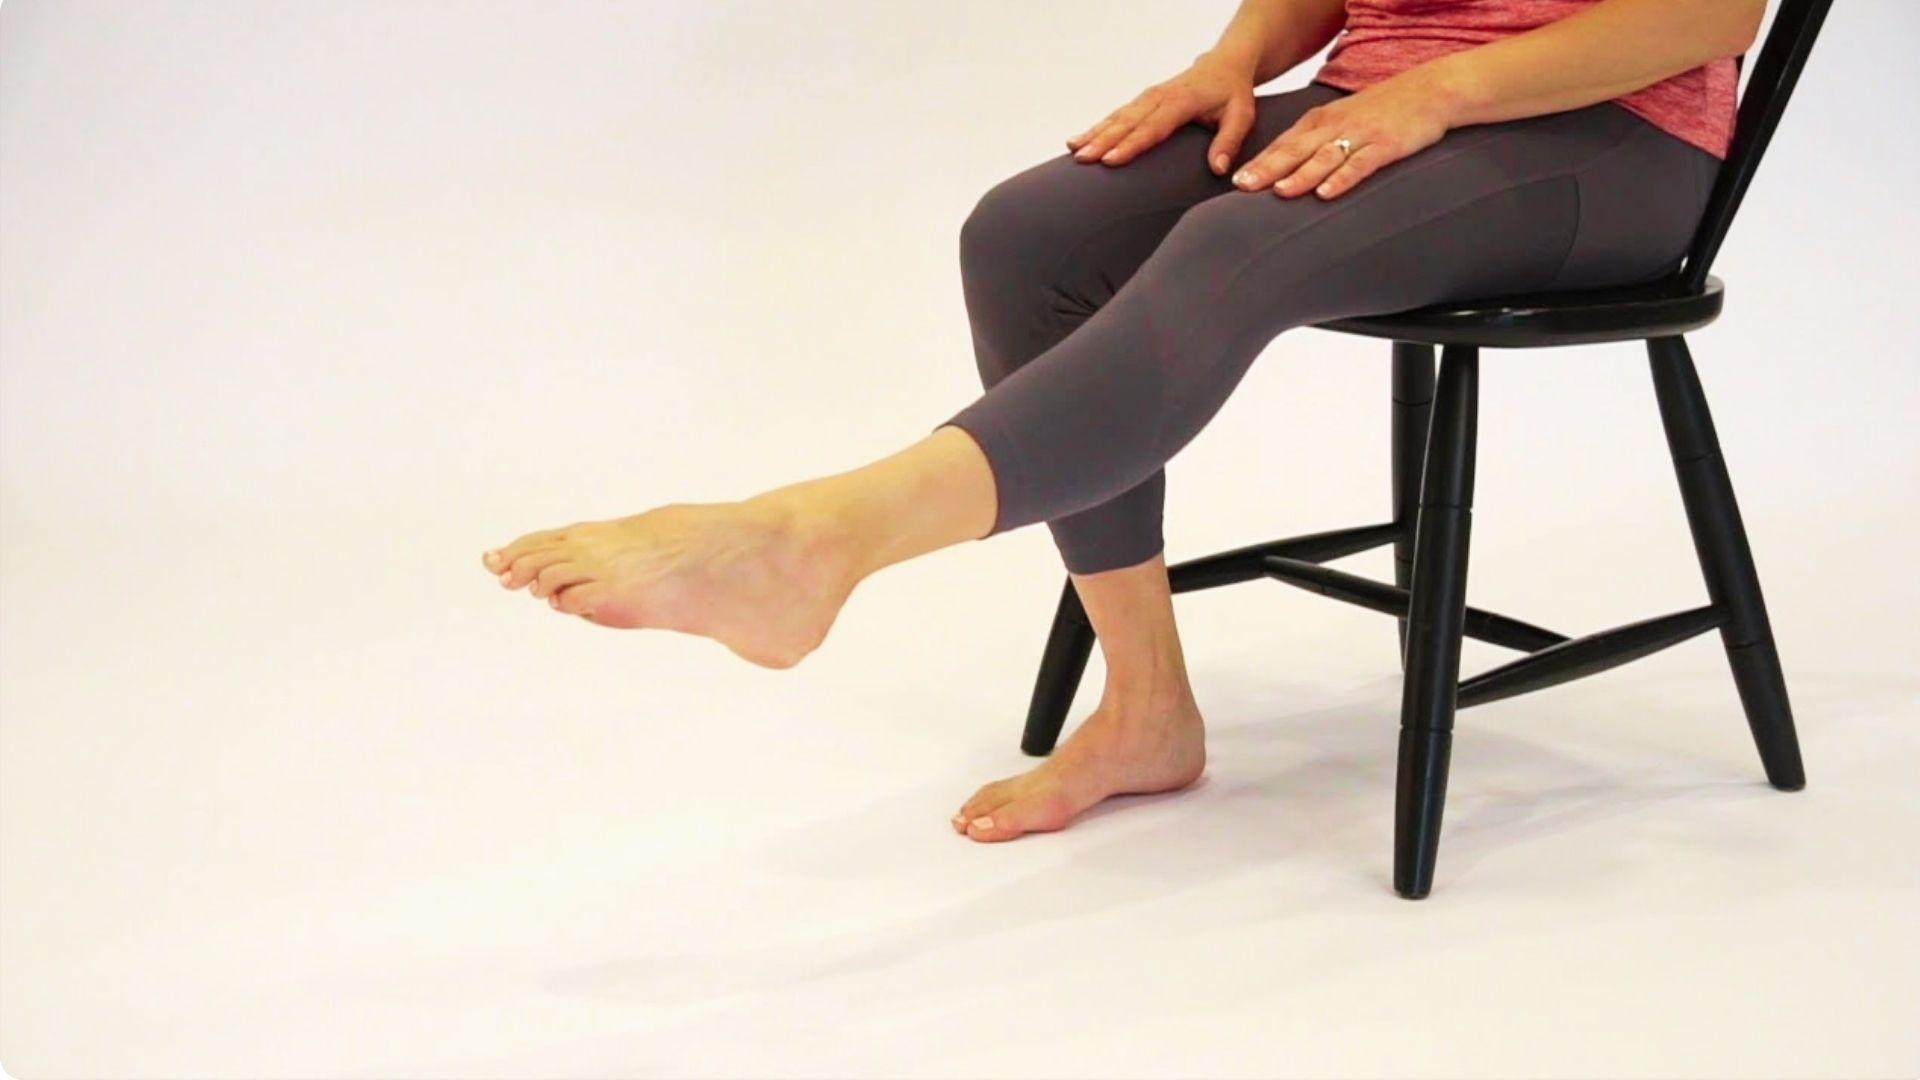
How to Do It: Sit with your leg extended and use your foot to trace the letters of the alphabet in the air.
Benefits: Improves ankle mobility and promotes gentle movement.
Recommended Repetitions: Complete the alphabet 1–2 times per foot.
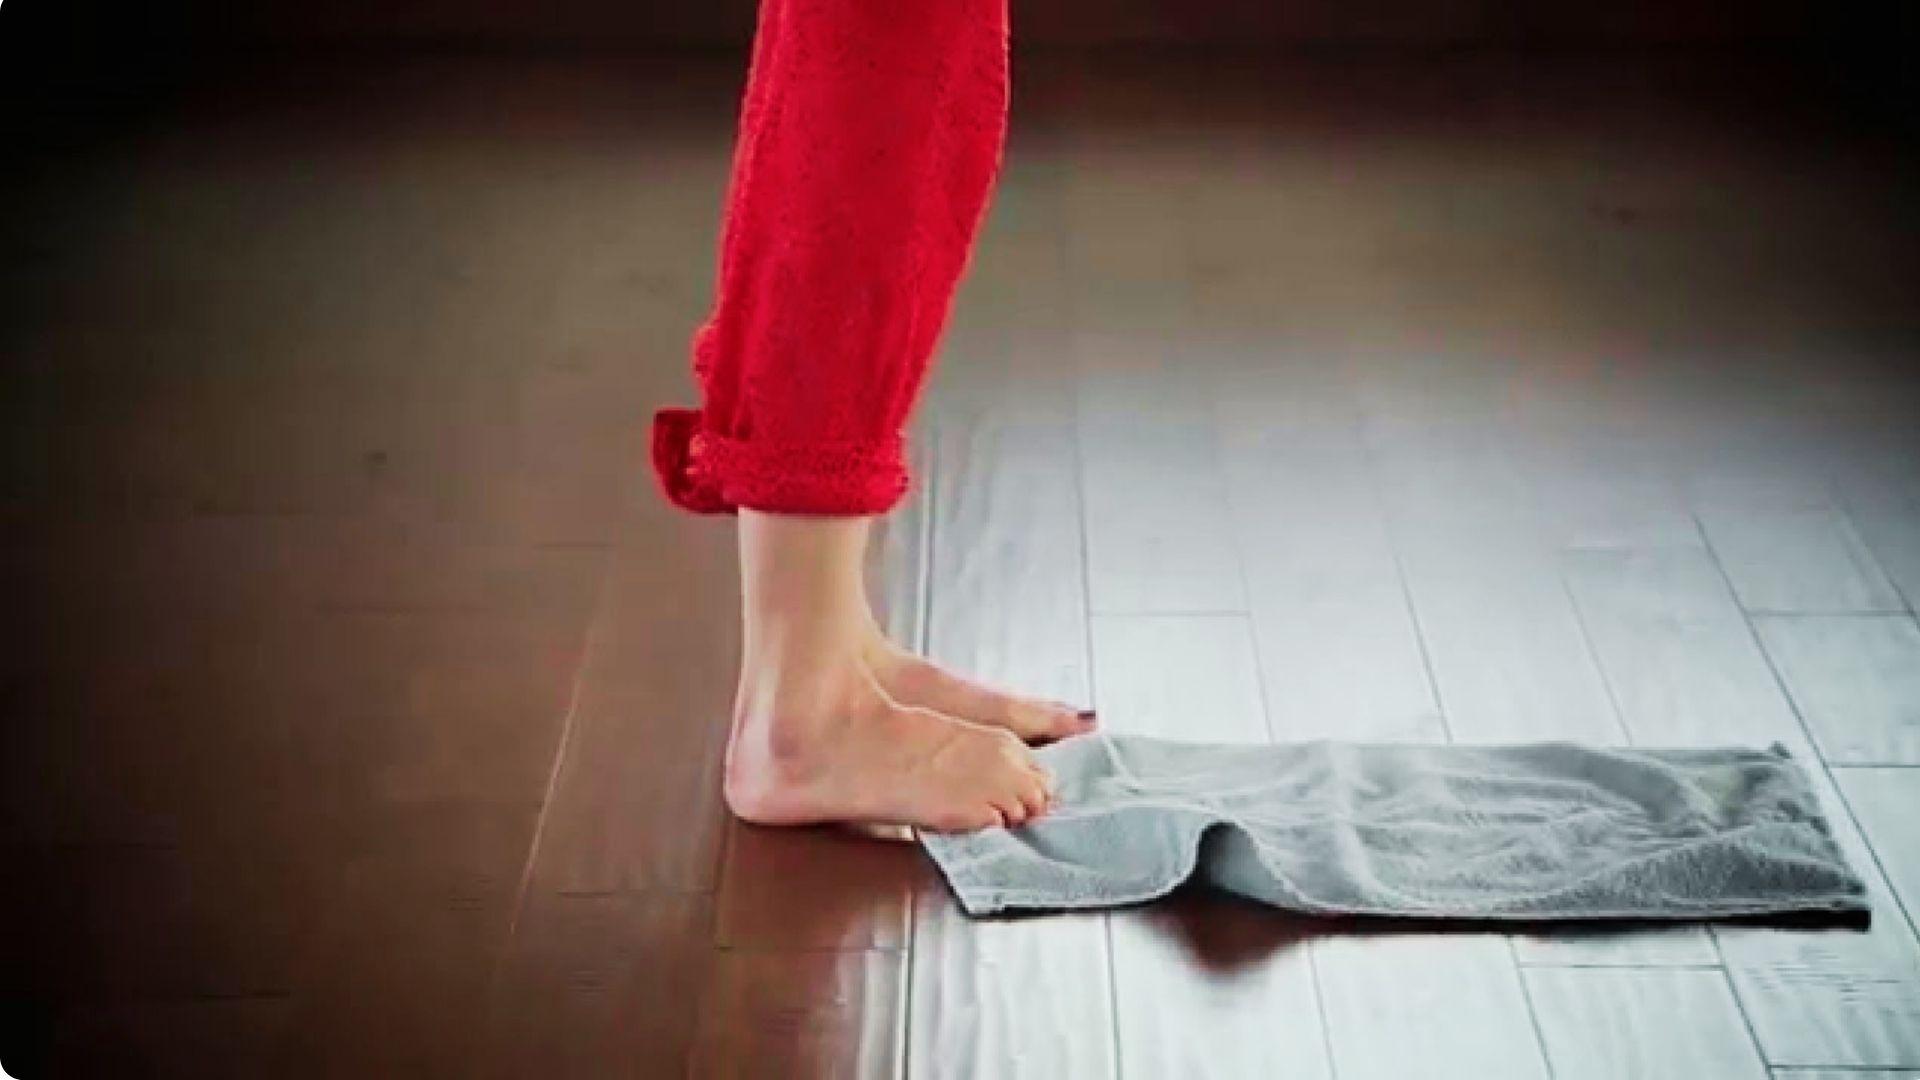
2. Towel Stretch
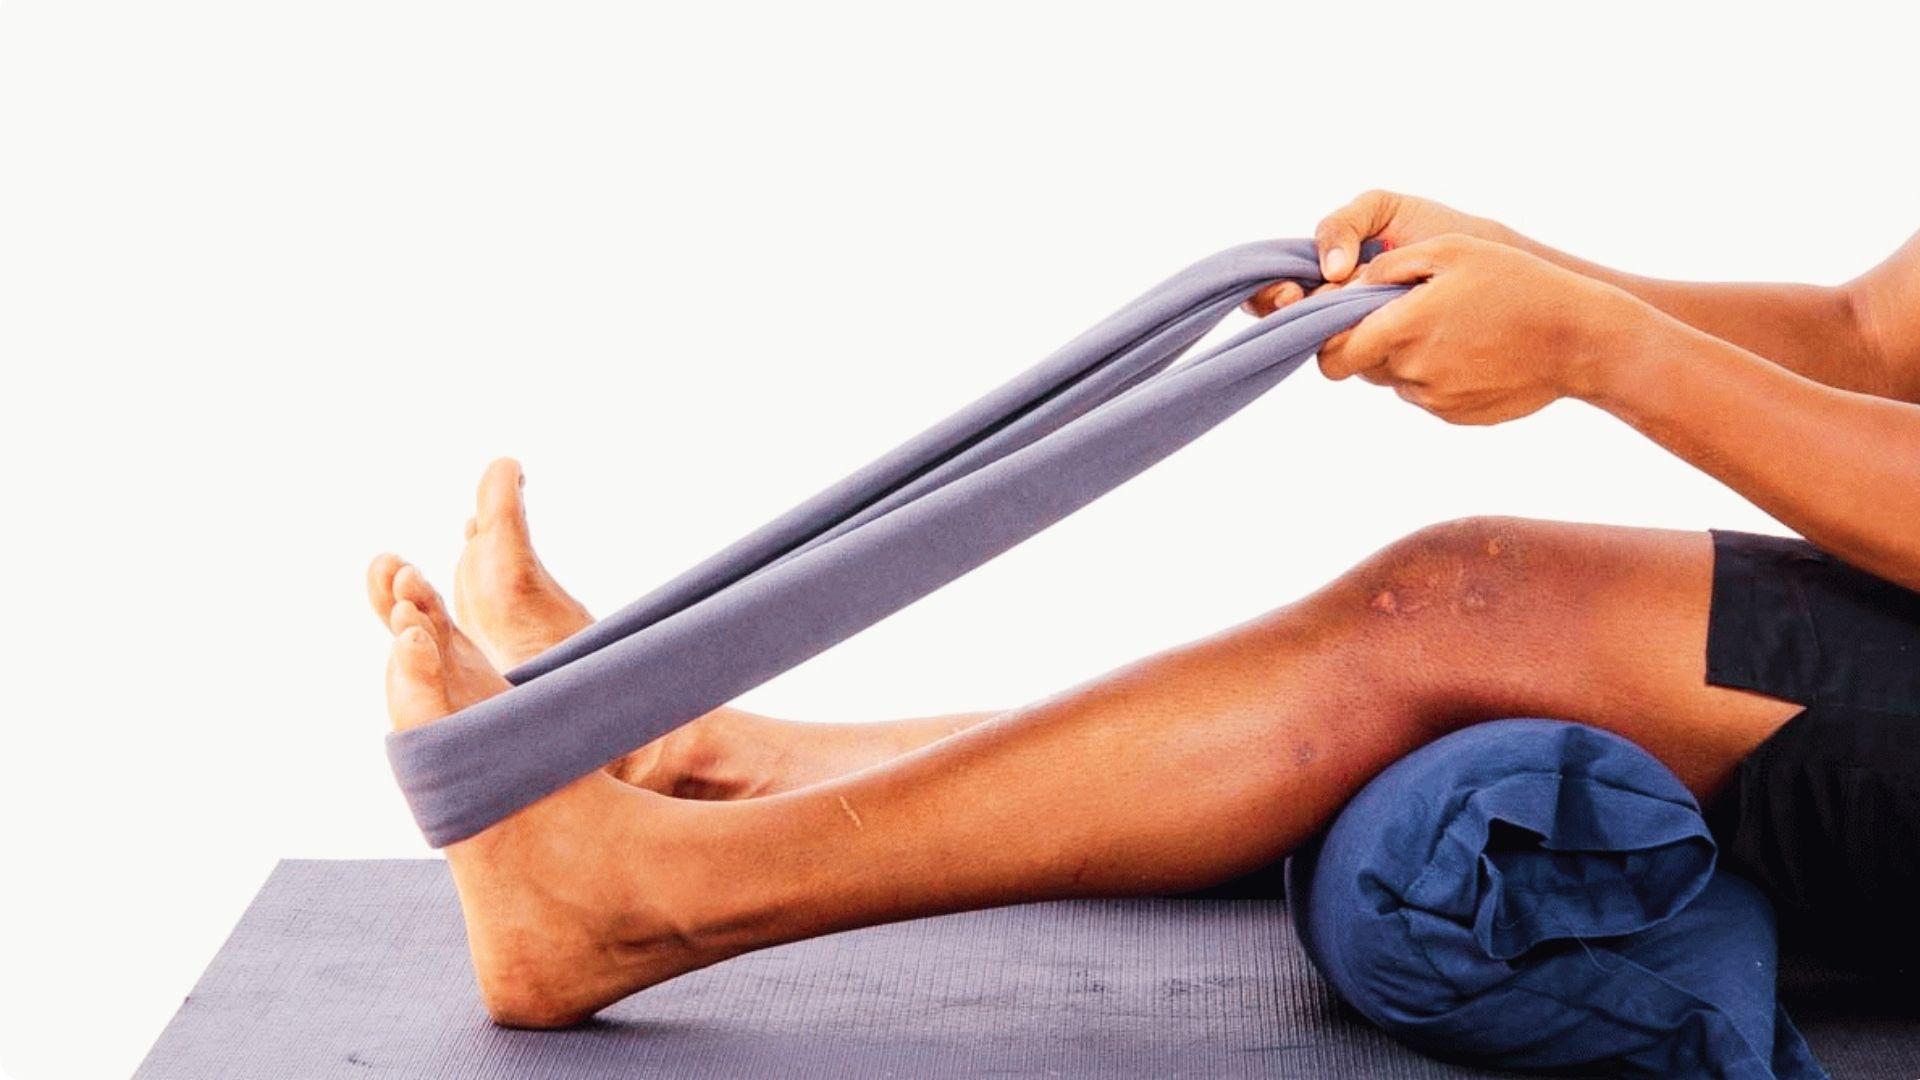
How to Do It: Loop a towel around the ball of your foot and gently pull it toward you until you feel a stretch.
Benefits: Helps improve calf flexibility and reduce tension around the ankle.
Recommended Duration: Hold for 20–30 seconds and repeat 2–3 times.
3. Calf Stretch
How to Do It: Stand facing a wall and lean forward while keeping your back heel flat on the floor.
Benefits: Increases calf flexibility and supports healthy ankle movement.
Recommended Sets: Perform 2–3 sets per leg.
4. Heel Raises
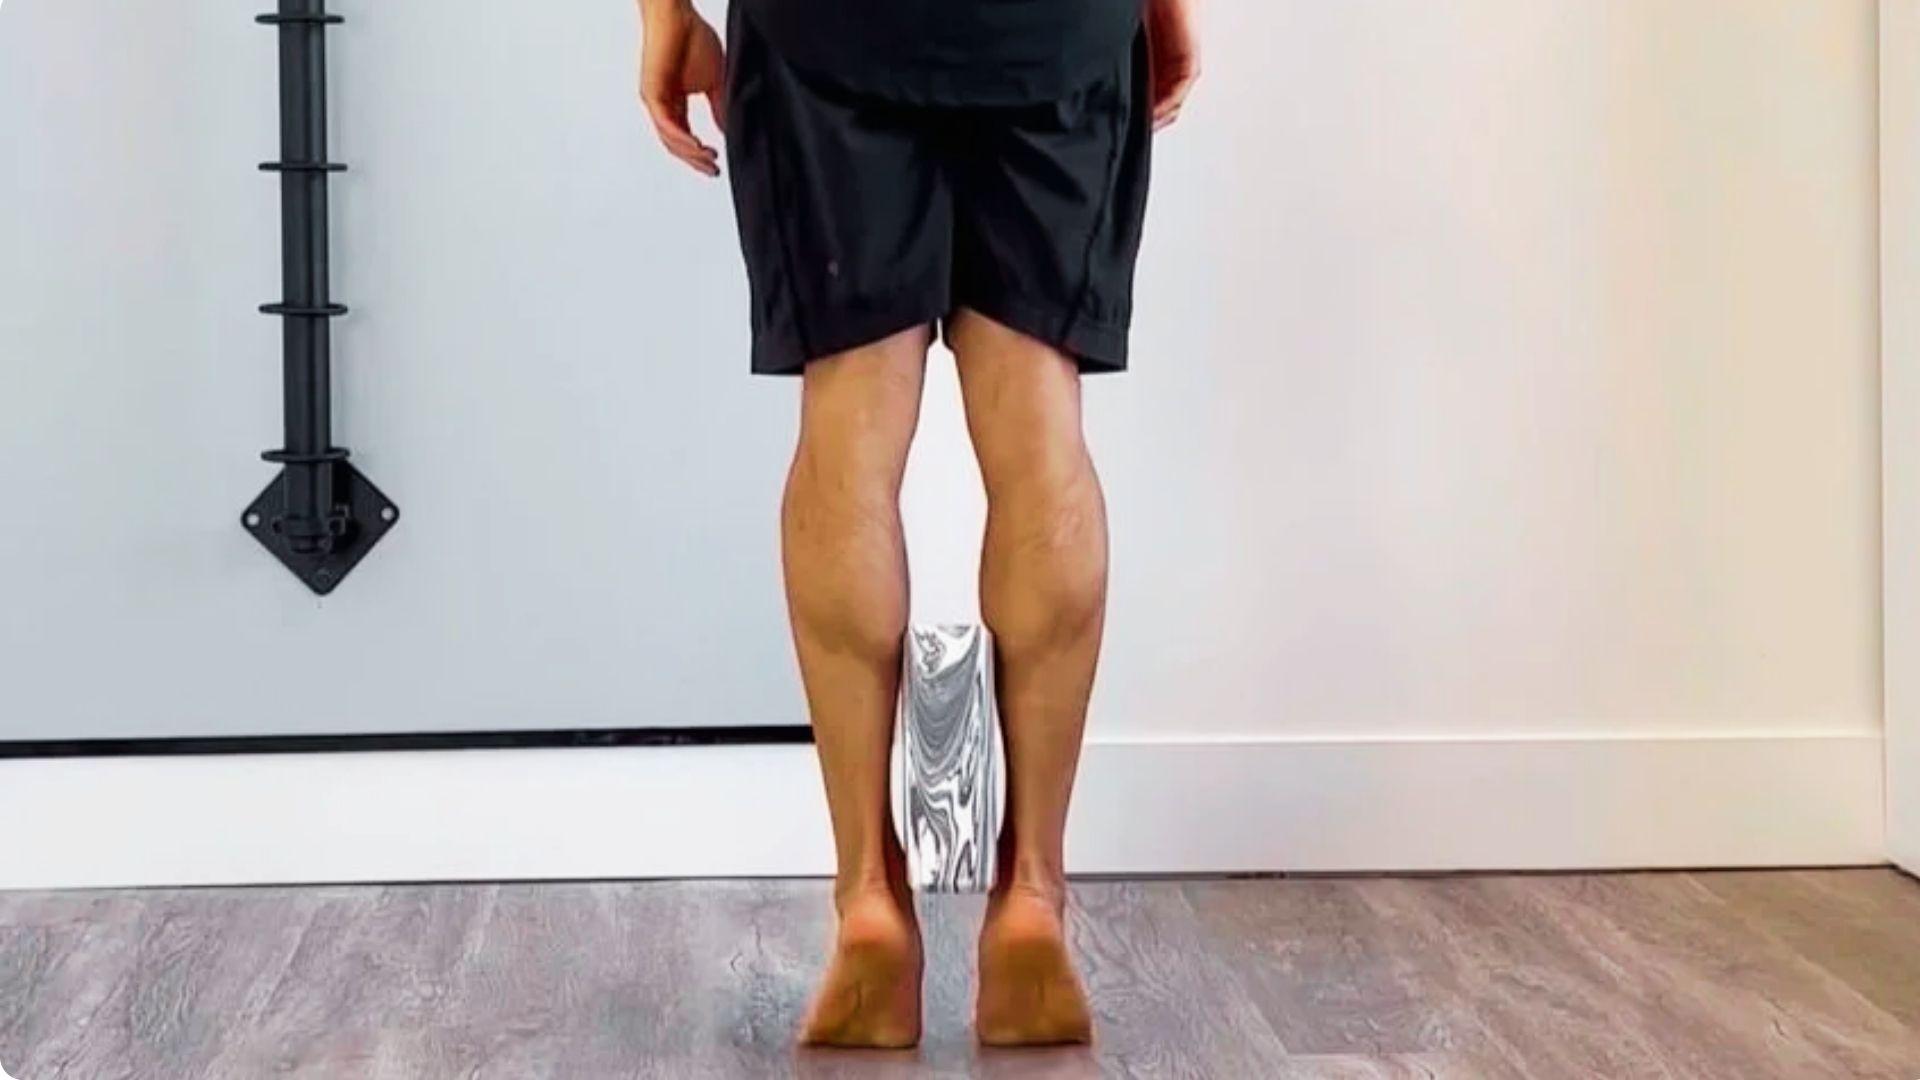
How to Do It: Slowly raise your heels off the floor, pause, and lower them with control.
Benefits: Strengthens the calves and supports foot and ankle function.
Recommended Repetitions: Perform 2–3 sets of 10–15 reps.
5. Single-Leg Heel Raises
How to Do It: Stand on one foot and lift your heel before lowering it slowly.
Benefits: Builds strength while improving balance and stability.
Recommended Repetitions: Perform 2–3 sets of 8–12 reps per leg.
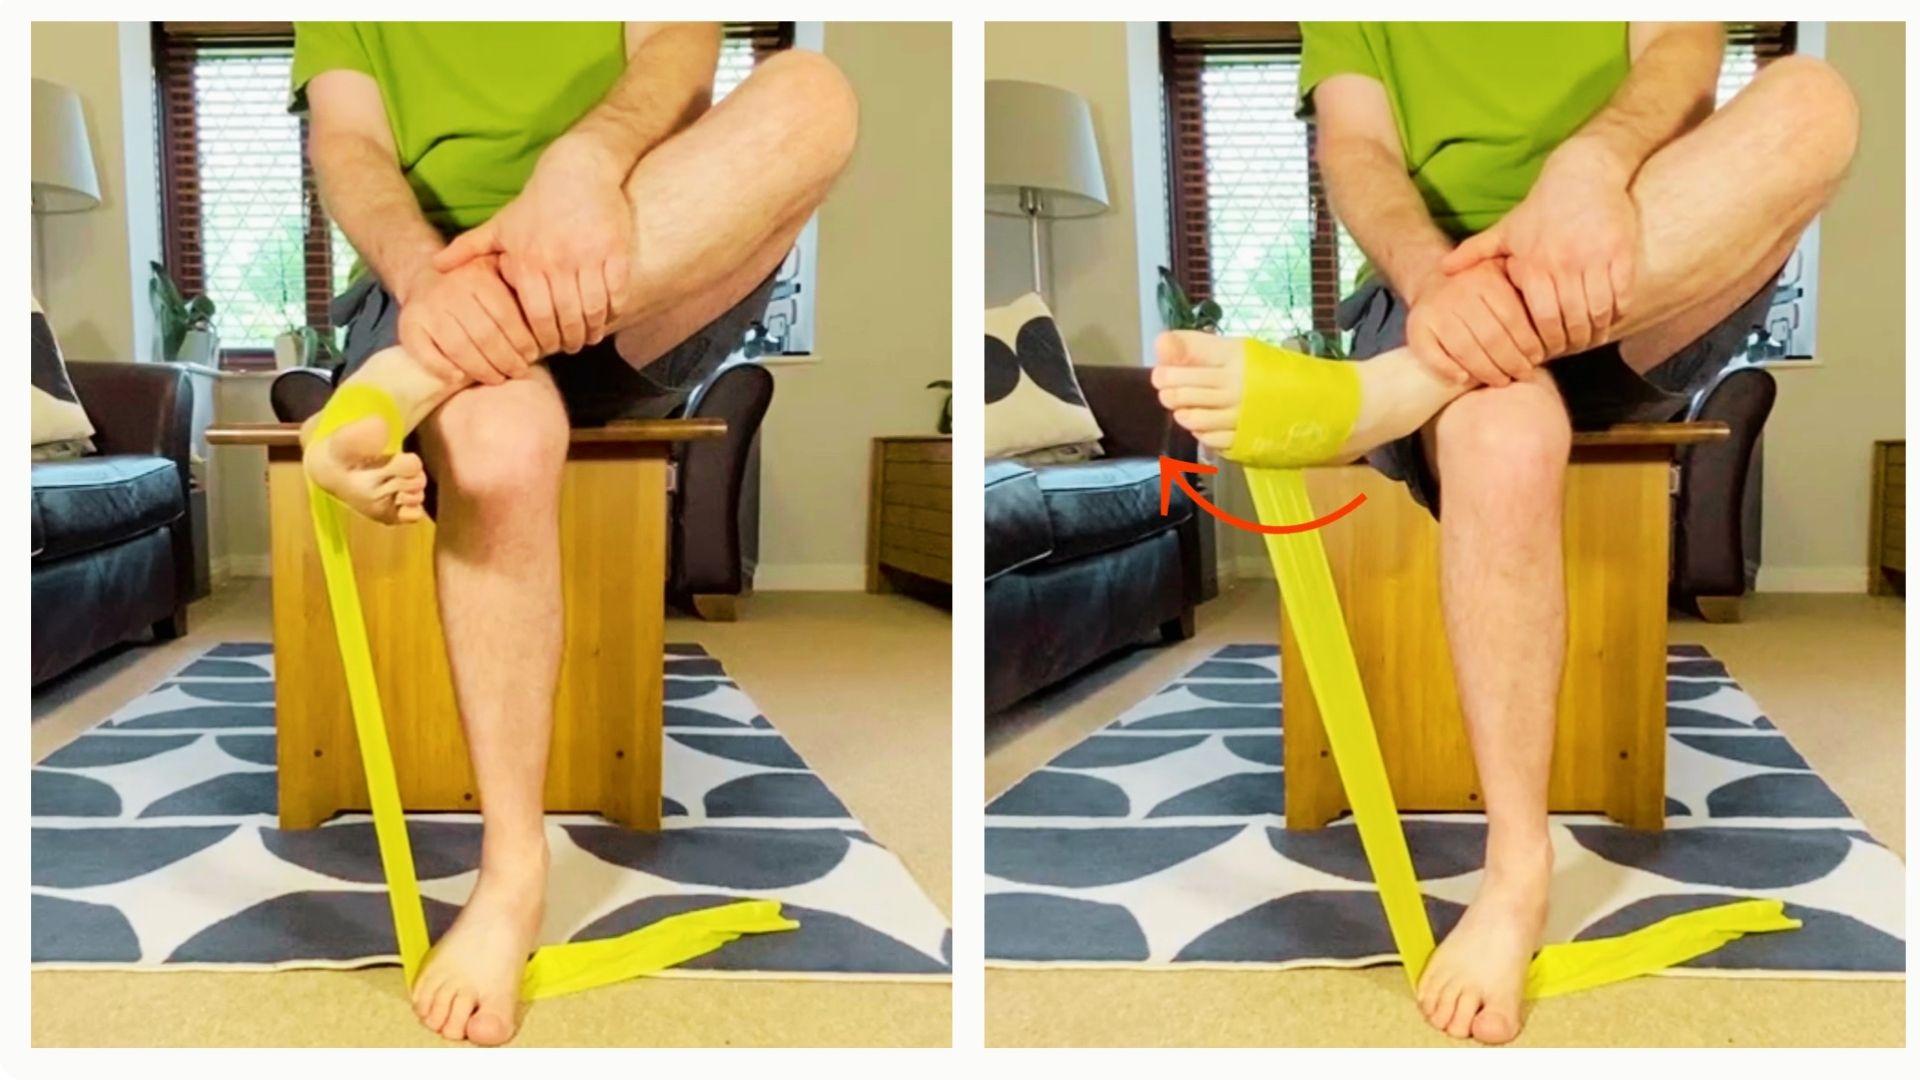
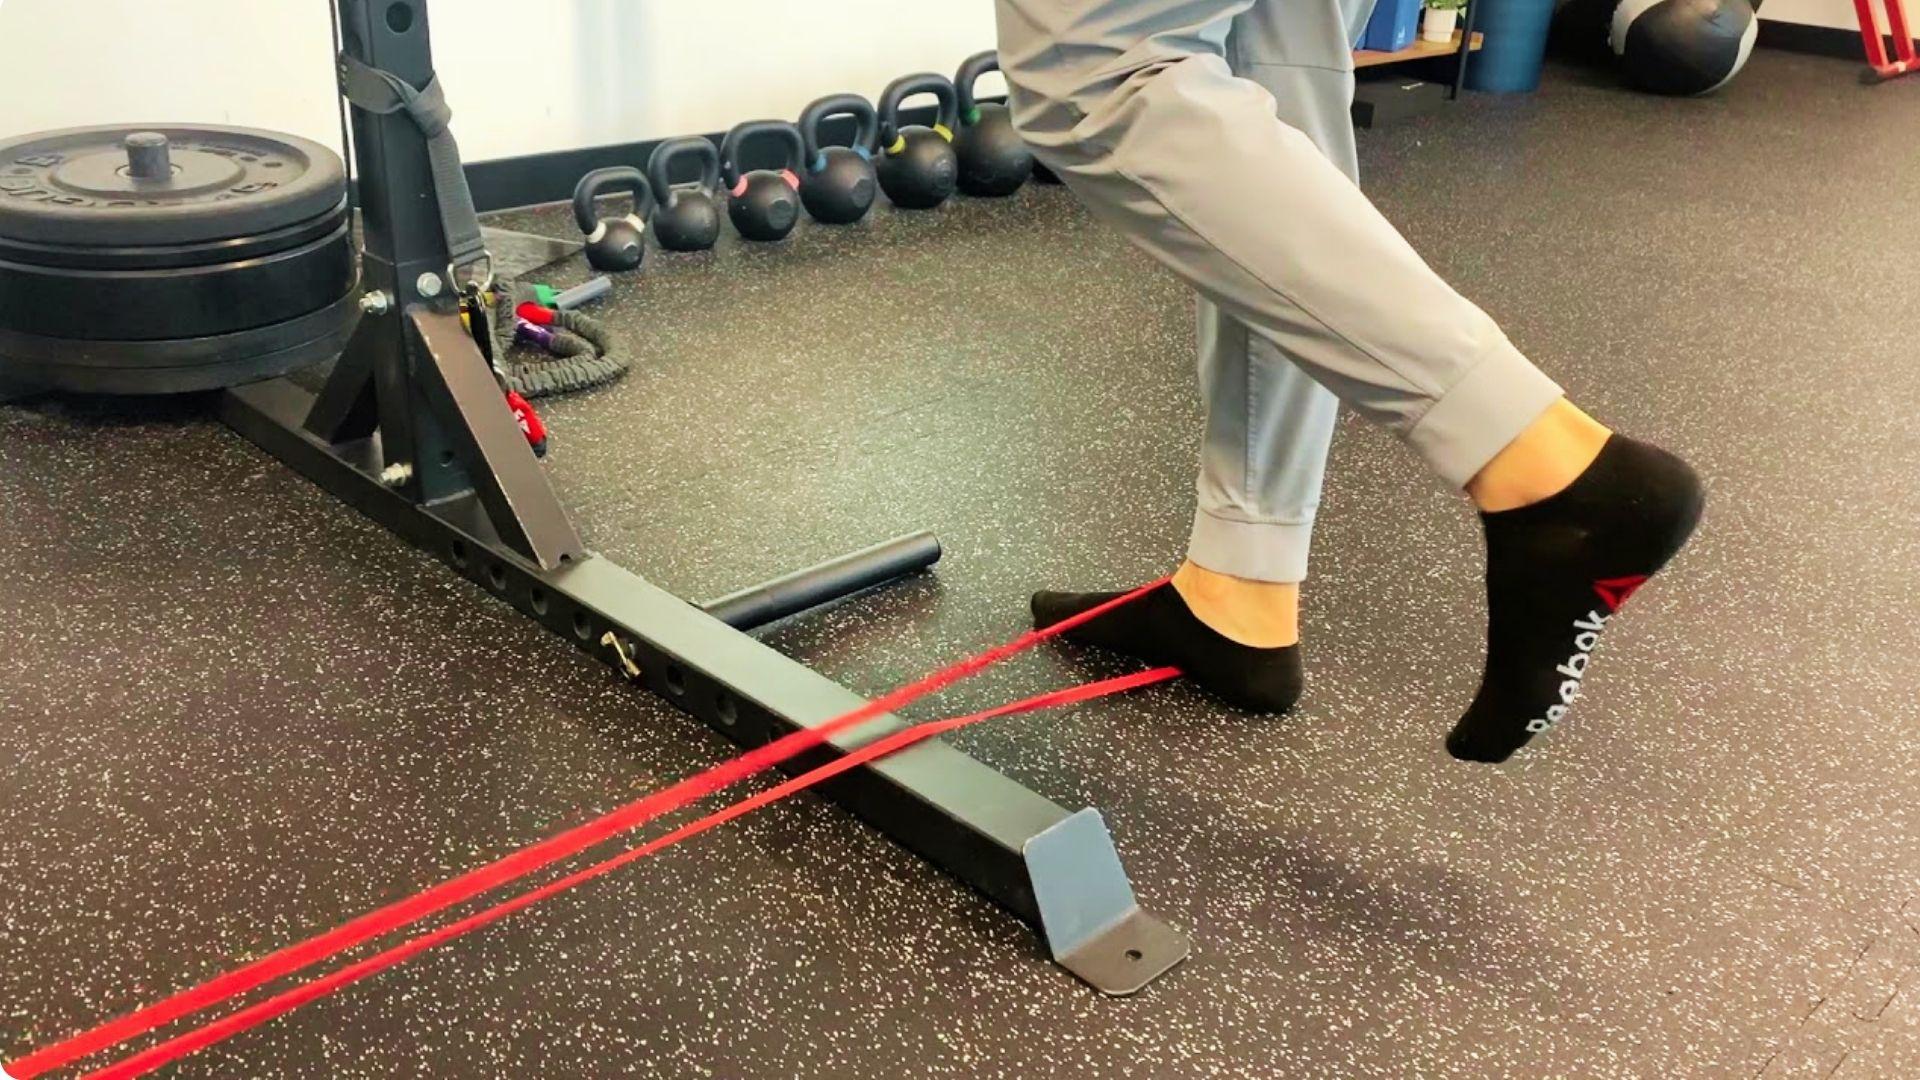
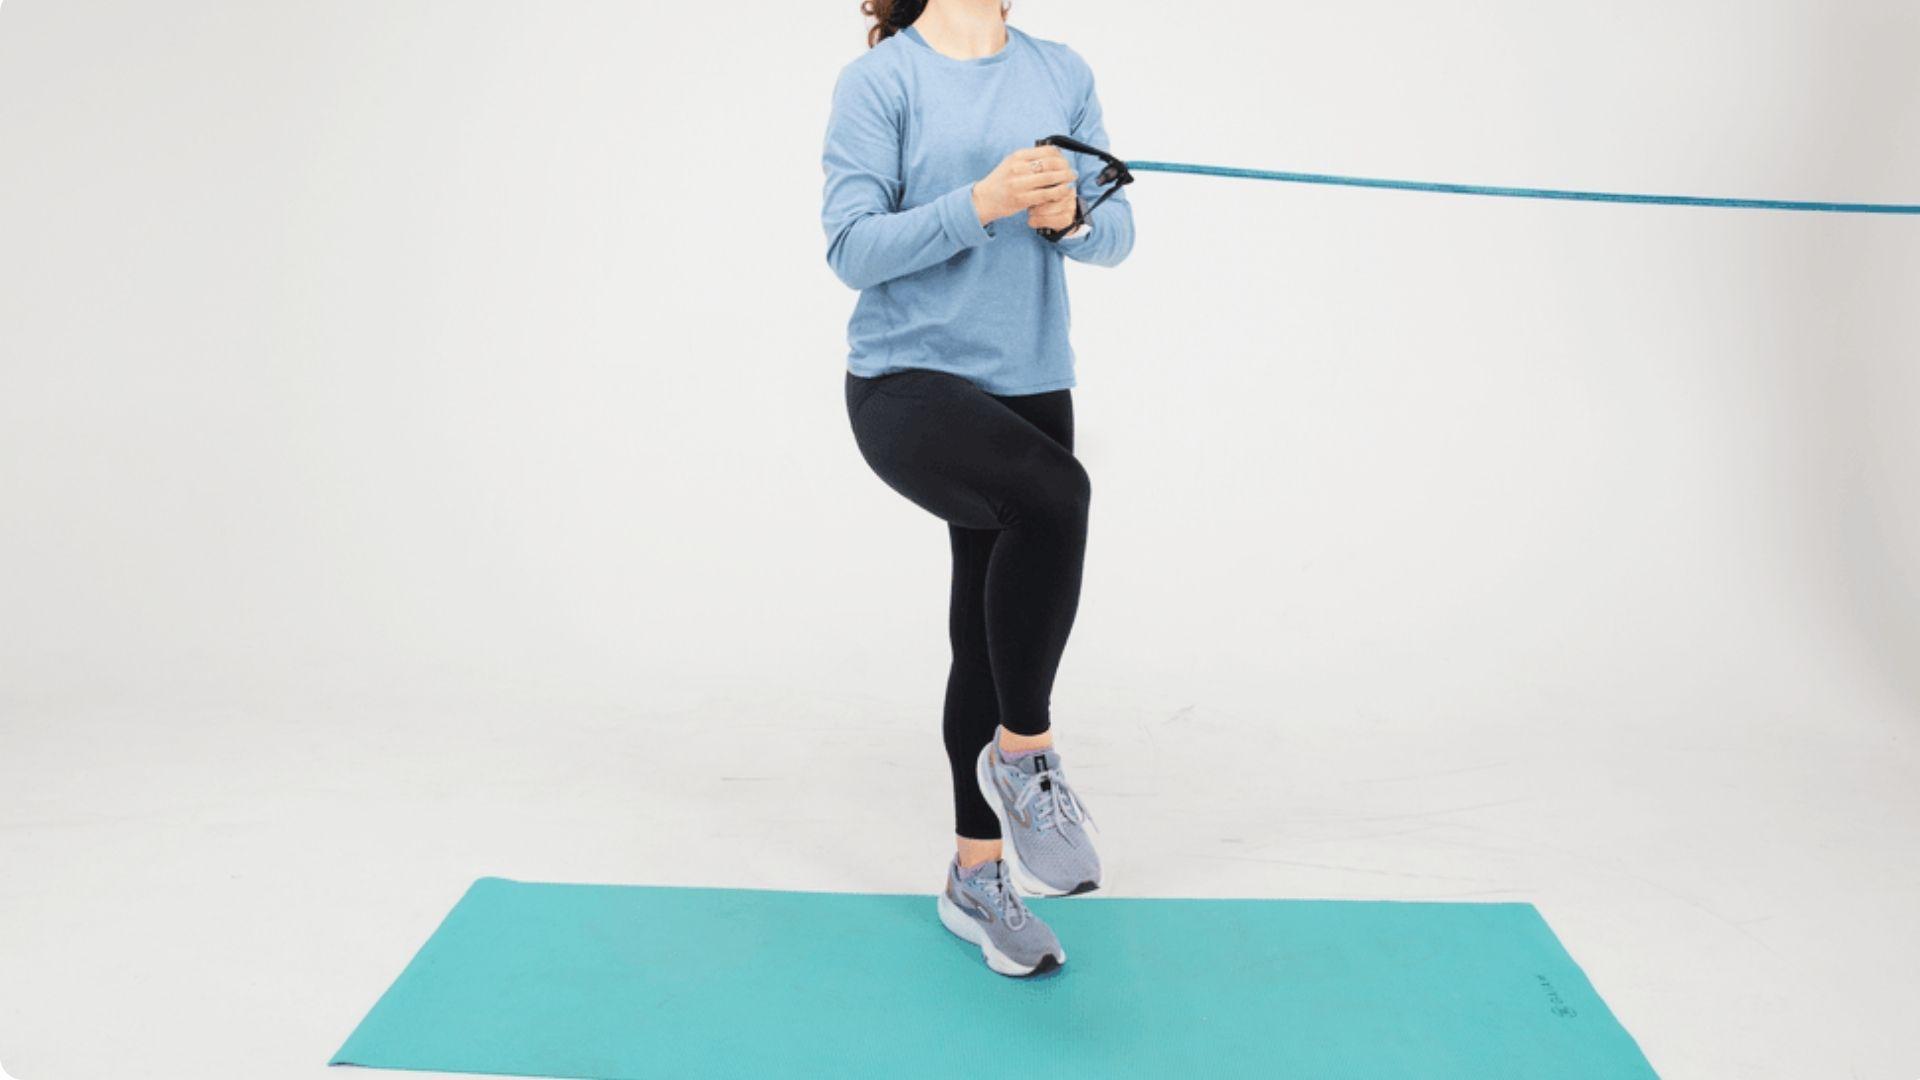
6. Resistance Band Foot Inversion
How to Do It: Use a resistance band to pull your foot inward against resistance.
Benefits: Strengthens muscles that support the arch and ankle.
Recommended Repetitions: Perform 2–3 sets of 10–15 reps.
7. Arch Lifts (Short Foot Exercise)
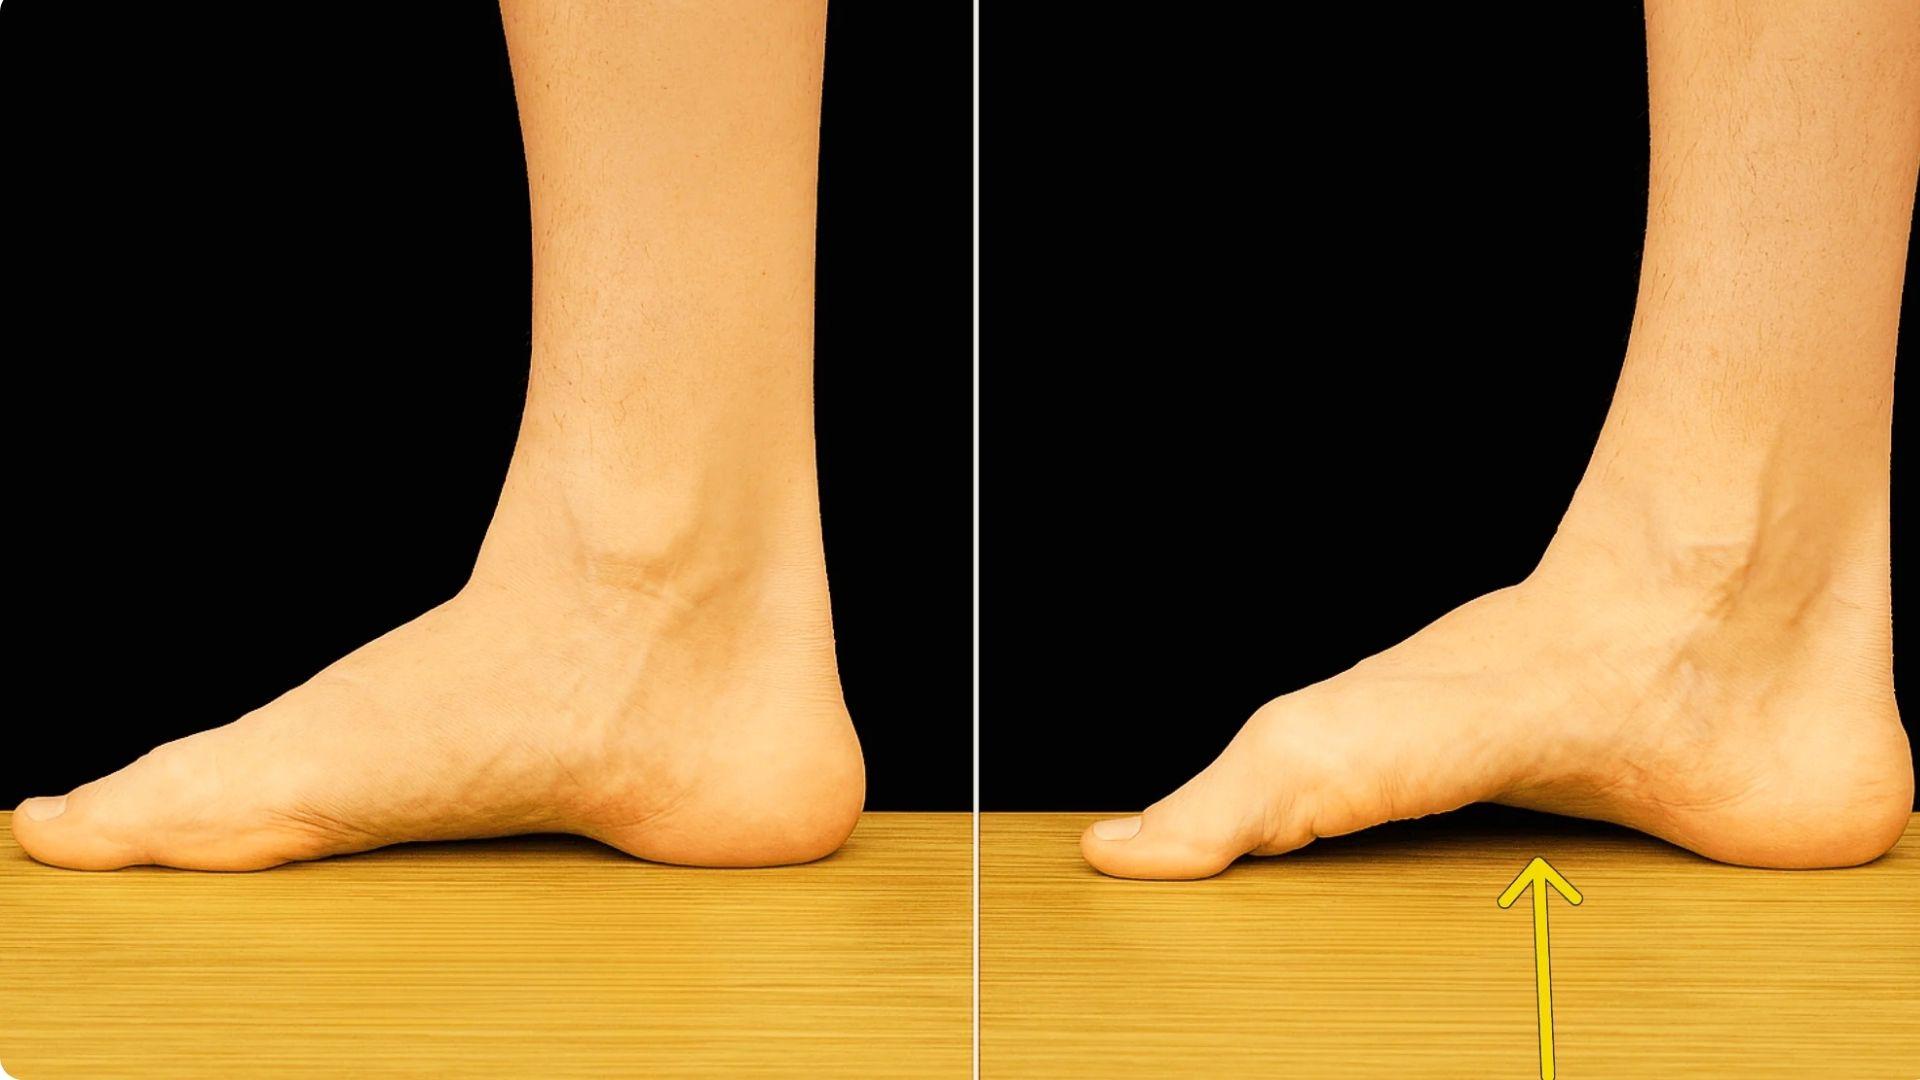
How to Do It: Gently lift your arch without curling your toes.
Benefits: Improves foot strength and arch support.
Recommended Frequency: Perform 2–3 sets of 10–15 reps daily.
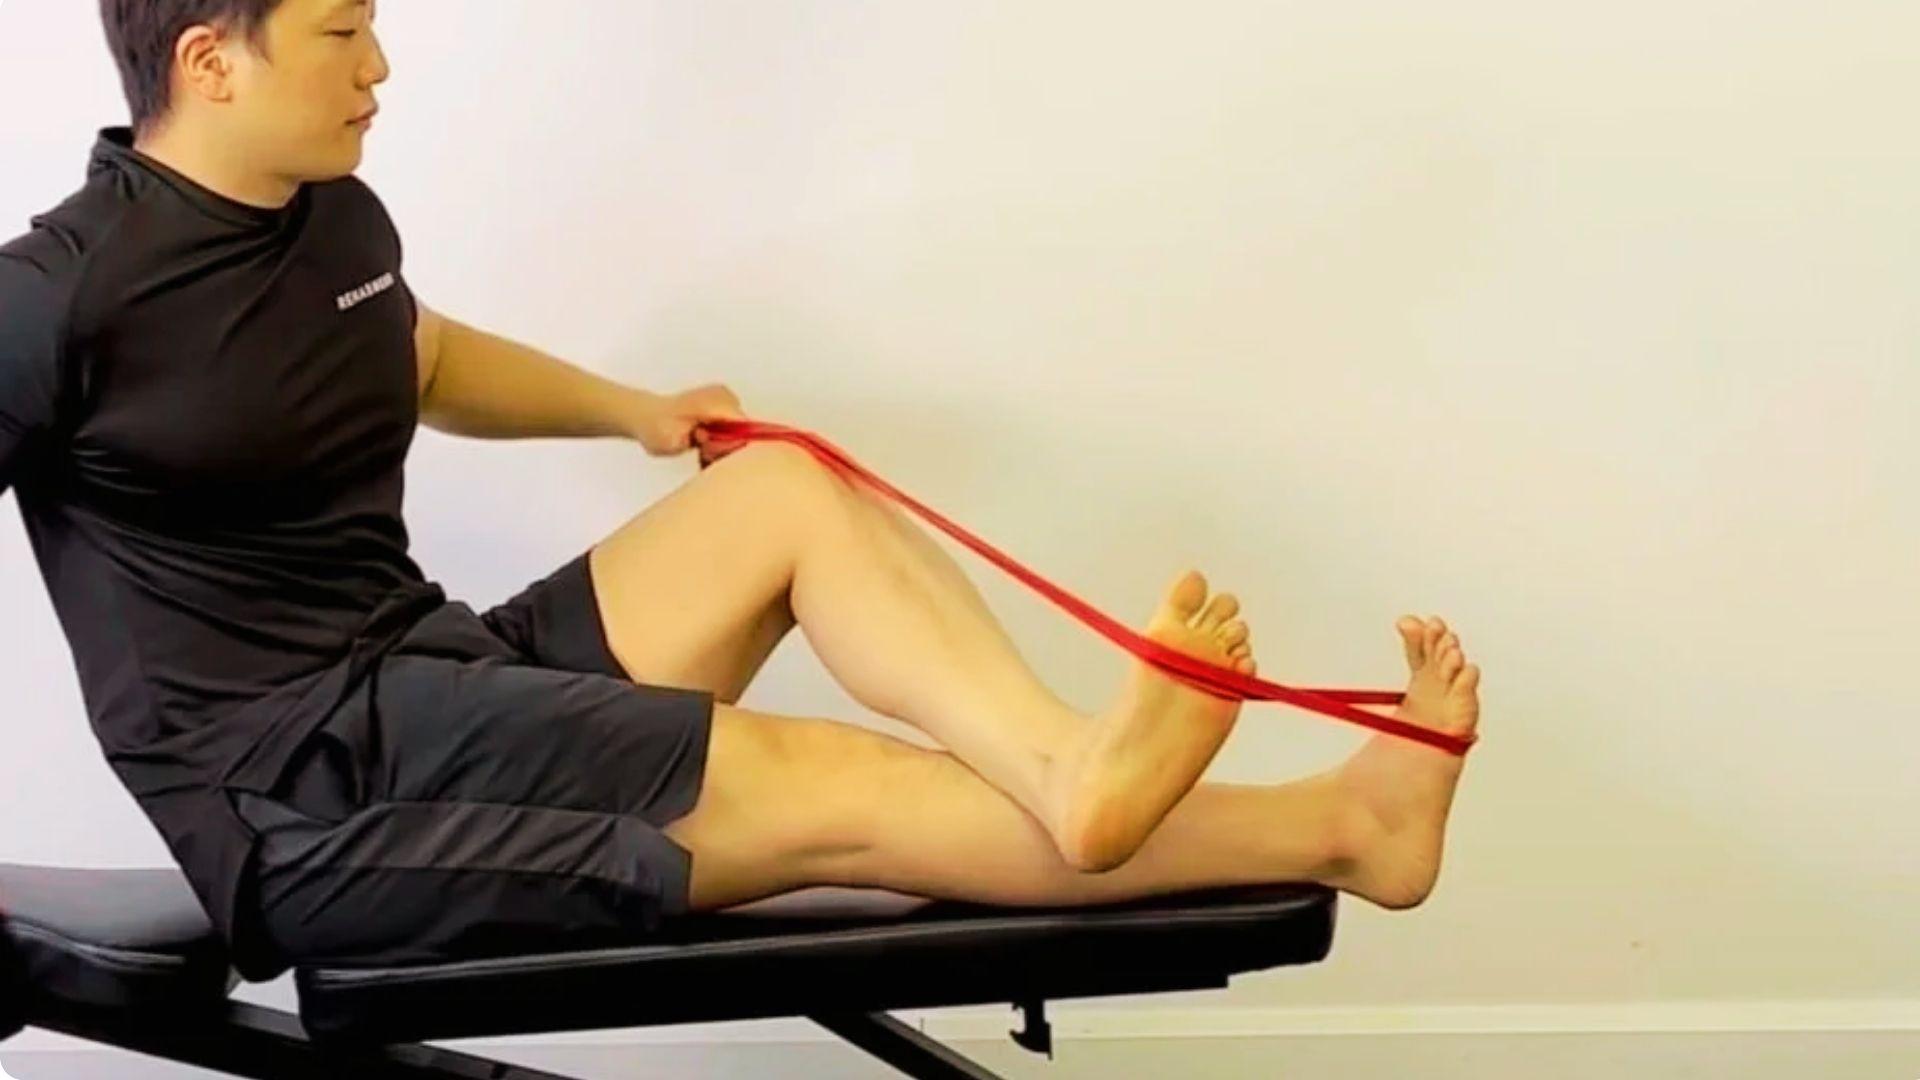
8. Toe Curls With a Towel
How to Do It: Use your toes to pull a towel toward you across the floor.
Benefits: Strengthens the small muscles of the foot.
Recommended Repetitions: Perform 2–3 sets until the towel is gathered.
9. Balance Exercises
How to Do It: Stand on one leg while maintaining steady posture and control.
Benefits: Enhances ankle stability, coordination, and balance.
Recommended Duration: Hold for 20–30 seconds and repeat 2–3 times per side.
Sample Posterior Tibial Tendonitis Exercise Routine
This beginner routine focuses on gentle mobility, flexibility, and light strengthening exercises to support foot and ankle function without placing excessive stress on the tendon.
| Exercise | Sets | Reps/Duration | Rest |
| Ankle Alphabet | 1–2 | Complete alphabet once per foot | 30 seconds |
| Towel Stretch | 2–3 | Hold 20–30 seconds per side | 30 seconds |
| Calf Stretch | 2–3 | Hold 20–30 seconds per side | 30 seconds |
| Arch Lifts (Short Foot Exercise) | 2 | 10–15 reps | 30 seconds |
| Toe Curls With a Towel | 2 | 10–15 reps | 30 seconds |
| Balance Exercise (Single-Leg Stand) | 2 | 20–30 seconds per side | 30–45 seconds |
Beginner Tips:
- Perform this routine 3–4 times per week.
- Move slowly and focus on proper form during each exercise.
- Mild muscle fatigue is normal, but stop if you experience sharp or worsening pain.
- Increase repetitions gradually as your strength and comfort improve.
- Wear supportive footwear during daily activities to help reduce stress on the tendon.
Goal:Improve ankle mobility, strengthen the muscles that support the arch, and build a foundation for more advanced strengthening exercises as recovery progresses.
Common Mistakes to Avoid
Avoiding these common mistakes can help you exercise more safely and support steady progress during recovery.
- Progressing Too Quickly: Increasing exercise intensity, duration, or resistance too fast can place extra stress on the tendon and slow recovery.
- Ignoring Pain Signals: Mild discomfort may occur, but continuing through sharp or worsening pain can aggravate the condition.
- Skipping Warm-Ups: Beginning exercises without preparing the muscles and joints may increase stiffness and reduce movement quality.
- Using Poor Exercise Form: Incorrect technique can shift stress to other areas and reduce the effectiveness of the exercises.
- Neglecting Footwear Support: Wearing unsupportive shoes may place additional strain on the foot and ankle during daily activities.
When to See a Healthcare Professional
While many cases improve with proper care, some symptoms require professional evaluation and guidance.
- Symptoms Are Getting Worse: Increasing pain, swelling, or weakness despite following a recovery plan should be assessed by a healthcare professional.
- Persistent Pain Despite Exercise: Ongoing discomfort that does not improve after several weeks may indicate the need for further evaluation.
- Difficulty Walking or Standing: Trouble bearing weight, walking normally, or standing for extended periods can be a sign of a more serious issue.
- Changes in Foot Shape or Arch Height: A noticeable flattening of the arch or changes in foot alignment should not be ignored.
- Need for Individualized Treatment: A healthcare professional can create a personalized treatment plan based on your symptoms, activity level, and recovery goals.
Conclusion
Recovering from foot and ankle discomfort takes patience, but small, consistent steps can add up over time.
These posterior tibial tendonitis exercises are designed to help improve strength, mobility, and stability while supporting healthier movement.
In my experience, focusing on proper form and gradual progress often works better than trying to do too much at once.
Start with the exercises that feel comfortable and build from there.
If you found this guide helpful, leave a comment below, share it with someone who may benefit, or try more recovery and mobility resources.
Frequently Asked Questions
How often should I perform posterior tibial tendonitis exercises?
Most beginners can start with 3–4 sessions per week. Consistency is usually more helpful than doing long or intense workouts.
Can walking make posterior tibial tendonitis worse?
Walking may increase symptoms if the tendon is already irritated. Supportive footwear and proper activity levels can help reduce stress.
Which exercise is best for strengthening the posterior tibial tendon?
Heel raises and resistance band foot inversion are commonly used to build strength. They target muscles that support the arch and ankle.
Should I stop exercising if I feel pain?
Mild discomfort can sometimes occur, but sharp or increasing pain is a sign to stop and reassess the activity. Listen to your body's response.
How long does it take to see results from these exercises?
Results vary from person to person, but many people notice gradual improvements with regular practice and proper progression over several weeks.