Do you ever catch yourself with your neck stretched forward, staring at your phone or laptop? I know I do.
That little habit can lead to neck pain and stiffness over time, and it sneaks up on you without warning.
The good news is, there's a simple fix that takes just a few minutes a day.
In this post, I'll walk you through the chin tuck exercise. You'll learn what it is, why it works, and how to do it step by step.
I'll also cover the key cues that keep you safe, plus a few easy variations to try once you get the basics down.
By the end, you'll have a simple tool you can use anywhere, anytime, to ease that tight, achy feeling in your neck.
Let's get started.
What Is a Chin Tuck Exercise?
A chin tuck exercise is a simple movement where you pull your chin straight back, like making a small double chin on purpose.
It looks small, but it works the muscles that support your neck and head. The main purpose is to fix forward head posture and ease neck strain.
People often use this exercise after long hours at a desk, during physical therapy for neck pain, or as part of a daily stretching routine.
It's quick, needs no equipment, and you can do it almost anywhere. Many people add it to their morning or evening routine to build better posture habits over time.
How to Do a Chin Tuck Exercise: Step-by-Step
Follow these simple steps to get the movement right.
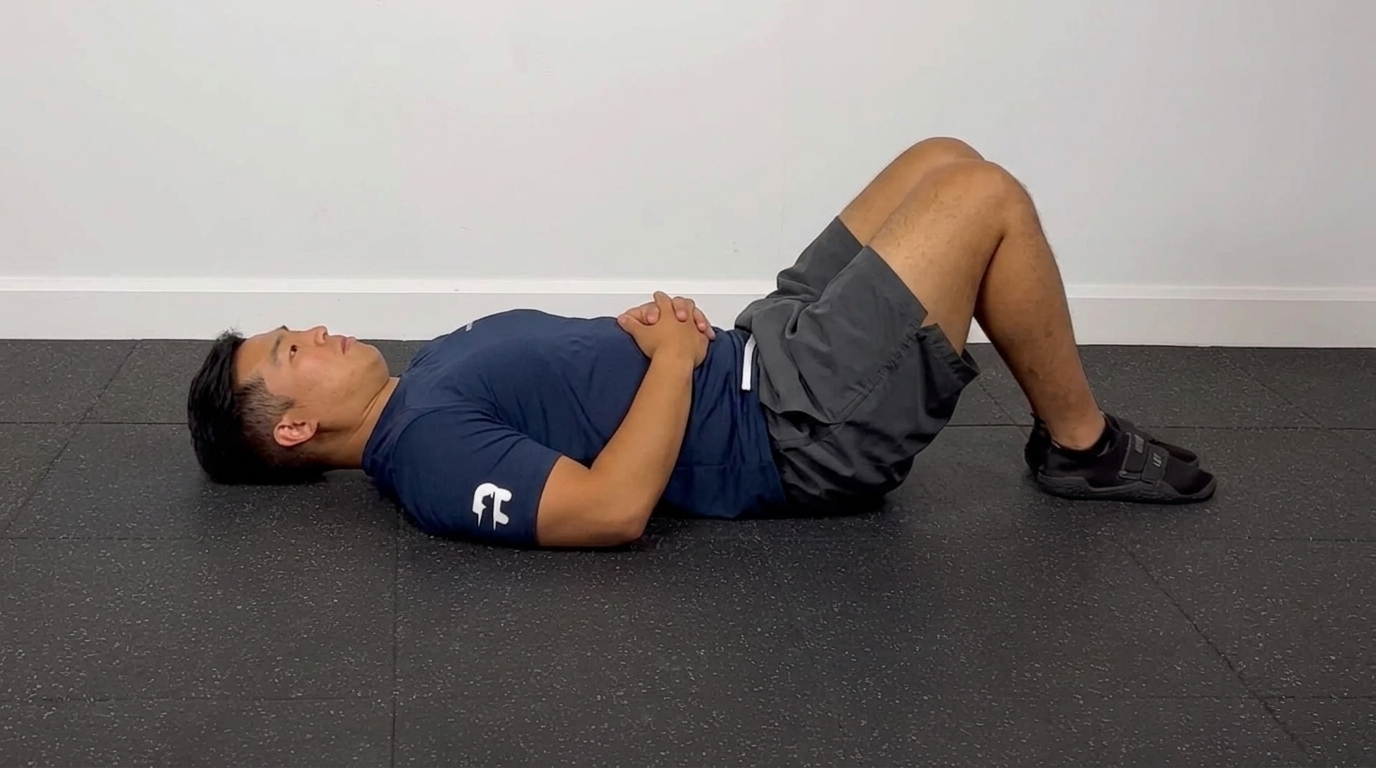
Start in a Seated or Standing Position
Find a comfortable spot to sit or stand. Keep your back straight and shoulders relaxed. Good posture matters here, so don't slouch.
This sets the base for the whole movement. If you're sitting, make sure your feet rest flat on the floor. Standing works just as well if that's easier for you right now.
Keep Your Eyes Facing Forward
Look straight ahead the entire time. Don't tilt your head up or down. This keeps your spine in a neutral position.
Your eyes act as a guide, helping you stay aligned. If you find yourself drifting, pause and reset your gaze before continuing the movement.
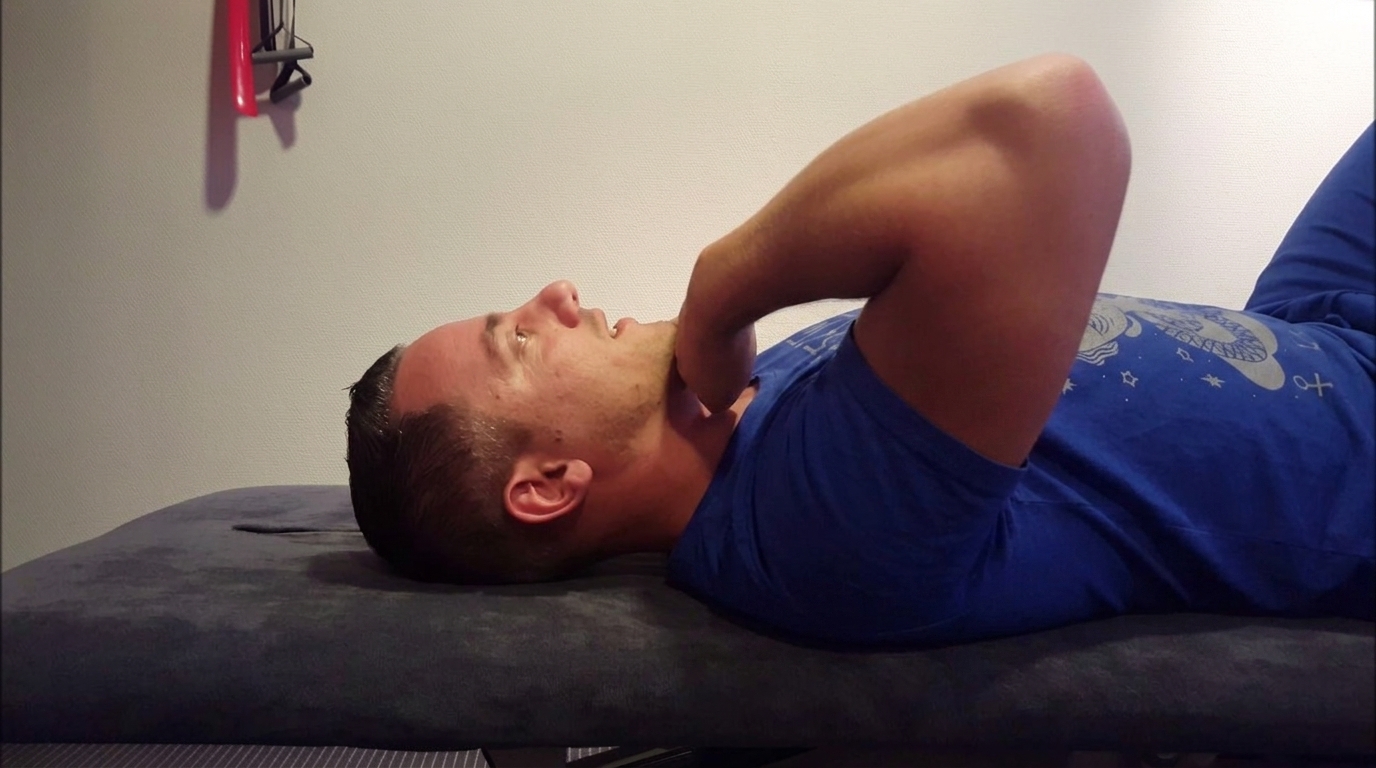
Gently Pull Your Chin Straight Back
Now, slowly draw your chin backward, like you're trying to make a double chin. Keep the motion smooth and controlled.
You should feel a gentle stretch at the base of your skull. Avoid pushing too hard or moving too fast. This part is the heart of the exercise.
Hold the Position Briefly
Once you reach the back position, hold it for a few seconds. Breathe normally while you hold. Don't tense up your shoulders or jaw.
This short pause helps activate the right muscles and builds strength over time.
Return to the Starting Position
Slowly release and bring your head back to its normal spot. Move with the same care you used going back.
Don't let your head snap forward. A smooth return helps avoid strain and keeps the movement safe.
Repeat With Controlled Movement
Do the exercise for about 5 to 10 reps, depending on your comfort level. Keep each repetition steady and slow.
Quality matters more than speed here. Over time, you'll notice the movement feels more natural.
Key Technique Cues for Safe Execution
Keep these points in mind for a safe, effective chin tuck exercise.
- Keep your head level throughout the movement, don't let it tilt up or down.
- Retract the chin backward, not downward: the motion is horizontal, not a nod.
- Relax your shoulders and jaw, tension here reduces the benefit of the stretch.
- Move slowly and avoid jerking, smooth control protects your neck.
- Stop if you feel sharp pain: mild stretch is fine, pain is not.
Chin Tuck Exercise Variations
Try these variations to keep things interesting and match your needs.
1. Seated Chin Tuck
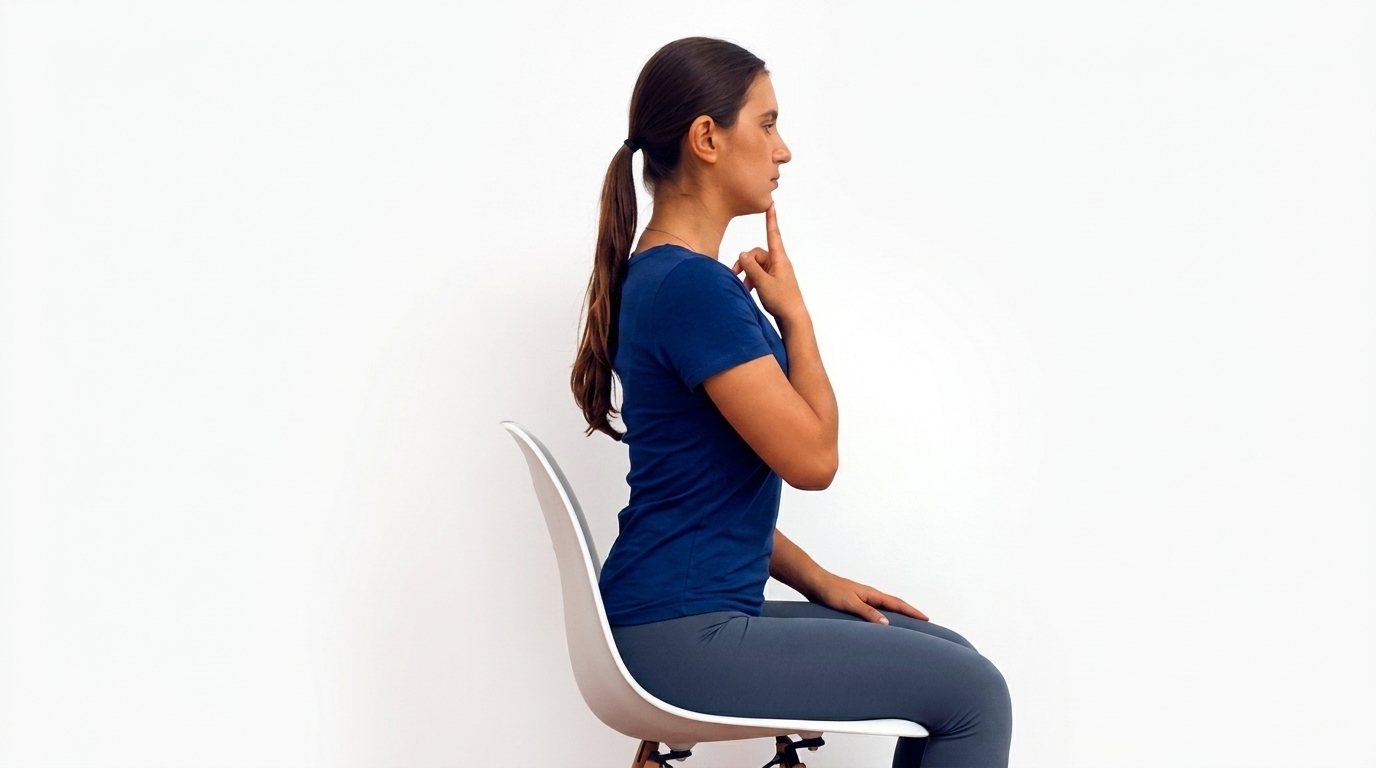
This is the most common version. Sit with your back straight, feet flat on the floor. Pull your chin back gently and hold for a few seconds.
It's easy to do at your desk during a work break. No equipment is needed, just a chair and a few minutes of focus.
2. Standing Chin Tuck

This version works well if you've been standing for a while. Stand tall, keep your shoulders relaxed, and pull your chin back the same way.
It's a great option if you want to add the exercise into a standing stretch routine or while waiting in line.
3. Wall Chin Tuck

Stand with your back against a wall, heels and shoulders touching it. Pull your chin back so the back of your head moves toward the wall.
The wall gives you feedback, helping you check your posture. This variation is great for beginners learning the correct form.
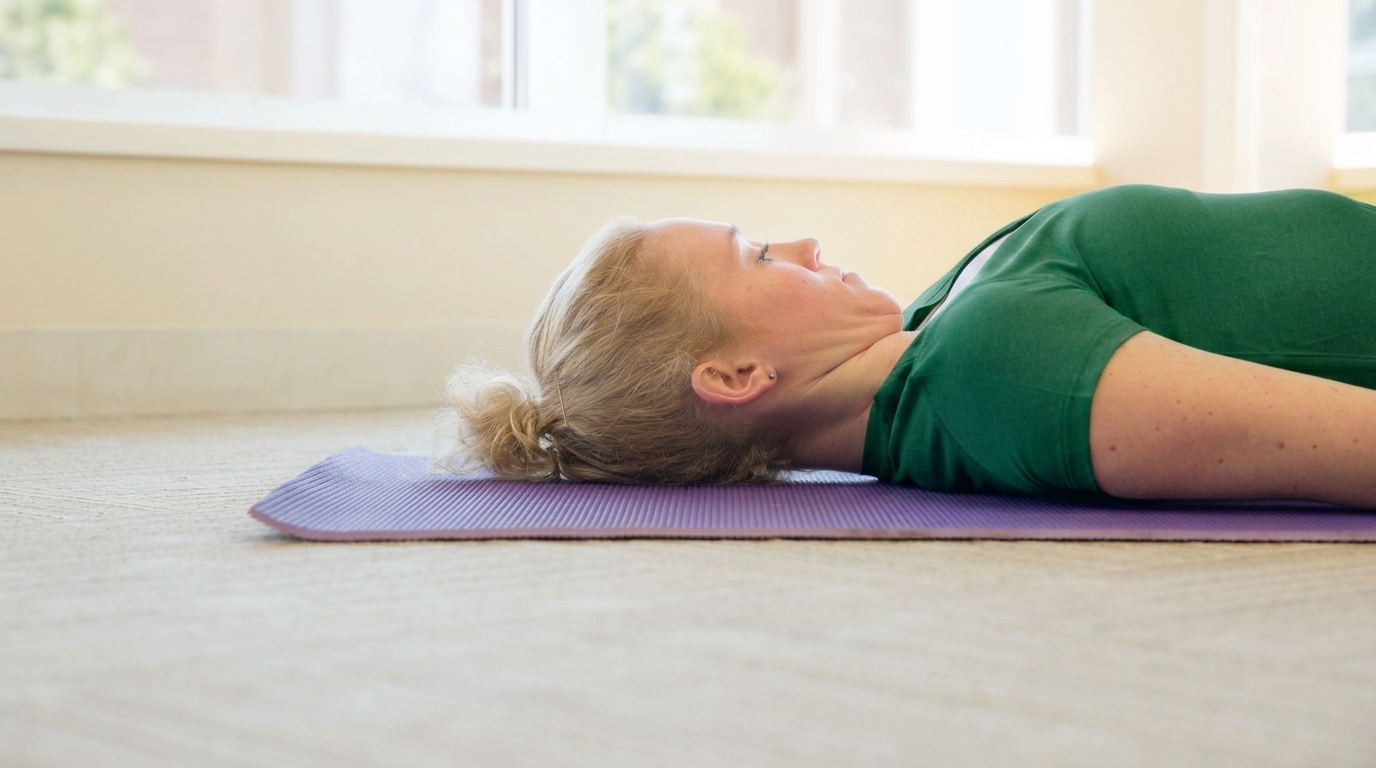
4. Supine (Lying) Chin Tuck
Lie flat on your back with your knees bent. Gently press the back of your head into the floor or a pillow, tucking your chin in.
This version removes gravity's pull, making it gentler. It's often used in physical therapy settings for people recovering from neck injuries.
5. Resistance Band Chin Tuck
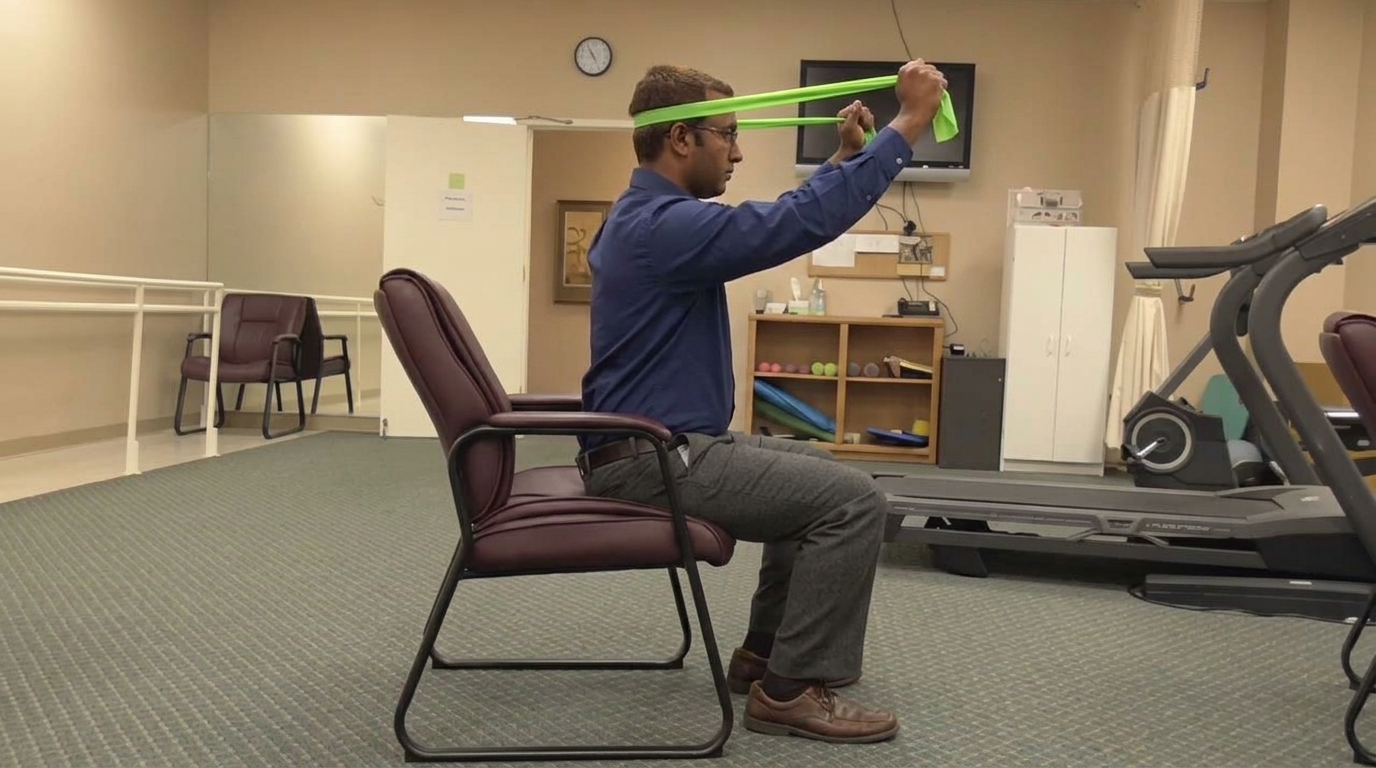
Loop a resistance band around the back of your head and hold the ends in front. Pull your chin back against the band's resistance.
This adds a strength element to the movement. It's a good next step once the basic chin tuck feels easy and you want more challenge.
Chin Tuck Exercise Safety Tips
Keep these tips in mind to do the exercise the right way.
- Avoid forcing the movement, let it happen naturally, without pushing past comfort.
- Stop if sharp pain occurs, pain is a sign something isn't right.
- Maintain proper posture throughout, good alignment makes the exercise work better.
- Progress gradually as technique improves, add reps or resistance slowly over time.
- Breathe normally during each rep, holding your breath adds extra tension you don't need.
Conclusion
So, that's the chin tuck exercise broken down into simple steps.
I started doing this a few months back after my neck felt stiff every evening, and honestly, it made a real difference within a couple of weeks.
Give it a try today, even just five reps during a break. Notice how your neck feels afterward.
If this helped you, drop a comment below and let me know how it goes. Feel free to share this post with someone who spends their day hunched over a screen too.
Frequently Asked Questions
How often should I do chin tuck exercises?
I recommend doing them 2 to 3 times a day, with 5 to 10 reps each session.
Can chin tucks help with neck pain?
Yes, they can ease neck pain caused by poor posture, especially from sitting too long.
Is it normal to feel a stretch during chin tucks?
Yes, a mild stretch at the back of your neck is normal and expected.
How long does it take to see results?
Most people notice better posture and less stiffness within a few weeks of daily practice.
Can I do chin tucks if I have a neck injury?
You should check with your doctor or physical therapist first, especially if you have an existing injury.