Building stronger glutes matters for more than looks. Strong glute muscles support your lower back, improve your posture, and help prevent injuries. I’ve been training clients with resistance bands for years, and I know they work.
This guide shows you where to place resistance bands for glutes to get the best results. You’ll learn the exact placement for different exercises, common mistakes to avoid, and whether home or gym training works better for you.
I’ll cover four band positions, beginner exercises, and tips that actually help. No confusing jargon, just practical advice you can use today.
Understanding Glute Muscles and Activation

Getting familiar with your glute anatomy helps you train smarter and see faster results in strength and stability.
Your glutes have three main muscles. The gluteus maximus powers hip extension. The gluteus medius stabilizes your pelvis. The gluteus minimus assists with hip rotation.
Correct band placement targets the specific glute muscle you want to work. When the band sits too high or low, your quads and hamstrings take over.
This reduces glute activation and limits your progress. The band’s location determines which part of your glutes fires up during each movement.
Where to Place Resistance Bands for Glutes
The four main band positions target different glute muscles and work best for specific exercises and training goals.
Above the Knees

Place the band just above your kneecaps. This position works great for squats, glute bridges, and lateral walks. The band stays secure and doesn’t roll down during movement.
Benefits: This placement activates both the gluteus medius and maximus. It forces your knees to push outward against resistance.
This fires up the outer glutes and prevents knee collapse. You’ll feel the burn in the sides and back of your hips.
I use this position most often with beginners. It feels natural and builds good movement patterns from day one.
Around the Ankles

Wrap the band around both ankles, just above your ankle bones. This position suits donkey kicks, side leg lifts, and standing kickbacks. The lower placement increases the range of motion at your hip joint.
Benefits: Ankle bands isolate the gluteus maximus effectively. They improve hip stability and balance.
The resistance pulls throughout the entire movement, creating constant tension. This builds muscle endurance and strength.
Your glutes work harder to control the movement. Slower reps with ankle bands create serious muscle fatigue.
Below the Knees

Position the band just below your knees, around the lower thigh area. This spot works perfectly for clamshells and seated abductions. The band won’t slip during these exercises.
Benefits: Below-knee placement strengthens the gluteus medius specifically. This muscle prevents knee injuries and hip pain.
The position also improves lateral hip strength. Runners and athletes benefit greatly from this placement.
This placement feels comfortable for longer sets. You can focus on form without adjusting the band constantly.
Around the Thighs

Place the band around your mid-thigh, about halfway between your hip and knee. This works best for hip thrusts and Bulgarian split squats. The thigh position provides strong resistance for powerful movements.
Benefits: Thigh bands add resistance for full glute activation. They build lower-body power and muscle size.
The higher placement allows for heavier resistance levels. You’ll develop strength across all three glute muscles.
This position challenges advanced beginners ready for more intensity.
Beginner-Friendly Exercises Using Bands
These five exercises target your glutes effectively and can be done anywhere with just a resistance band.
Band Squats
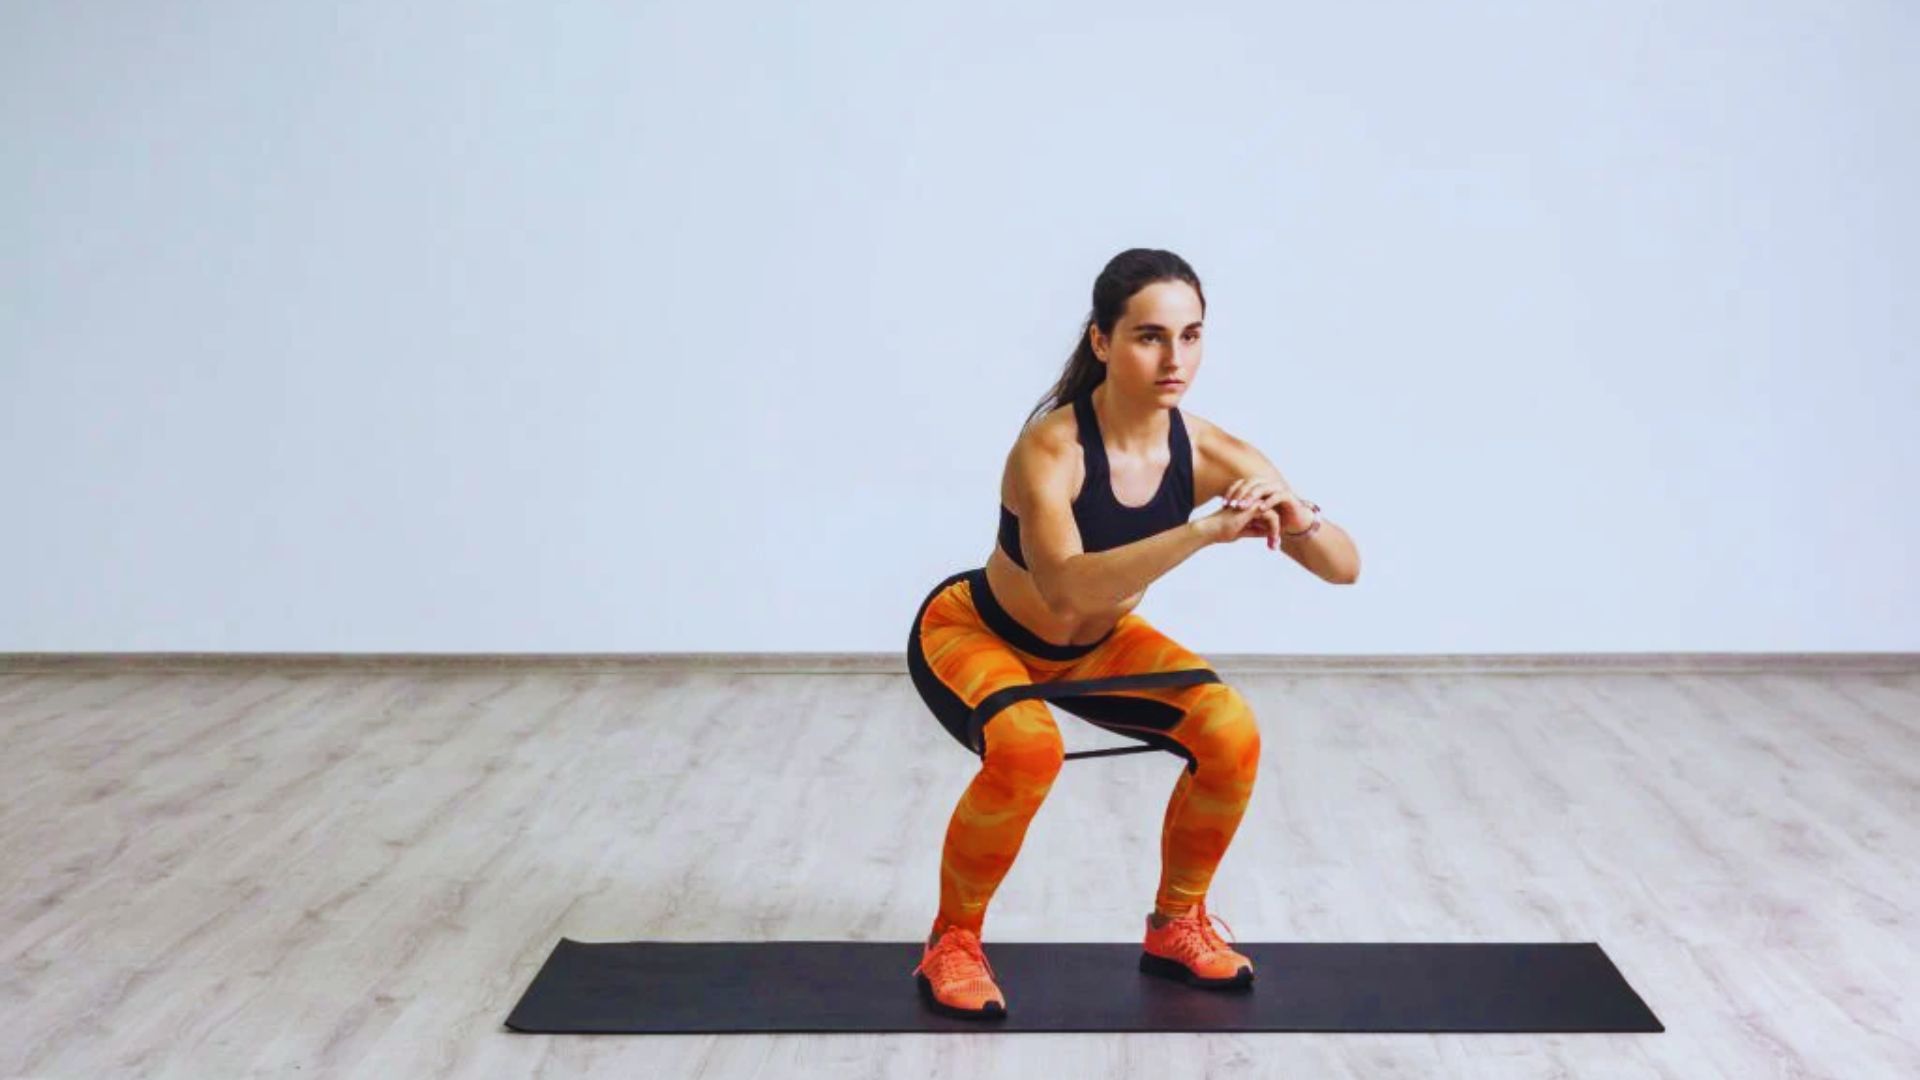
Place the band above your knees. Stand with feet hip-width apart. Push your knees out against the band as you squat down. Keep your chest up and core tight. Return to standing by driving through your heels.
This exercise works at home or in the gym. Start with 10 to 12 reps for three sets. The band forces proper knee alignment during the squat.
Glute Bridges
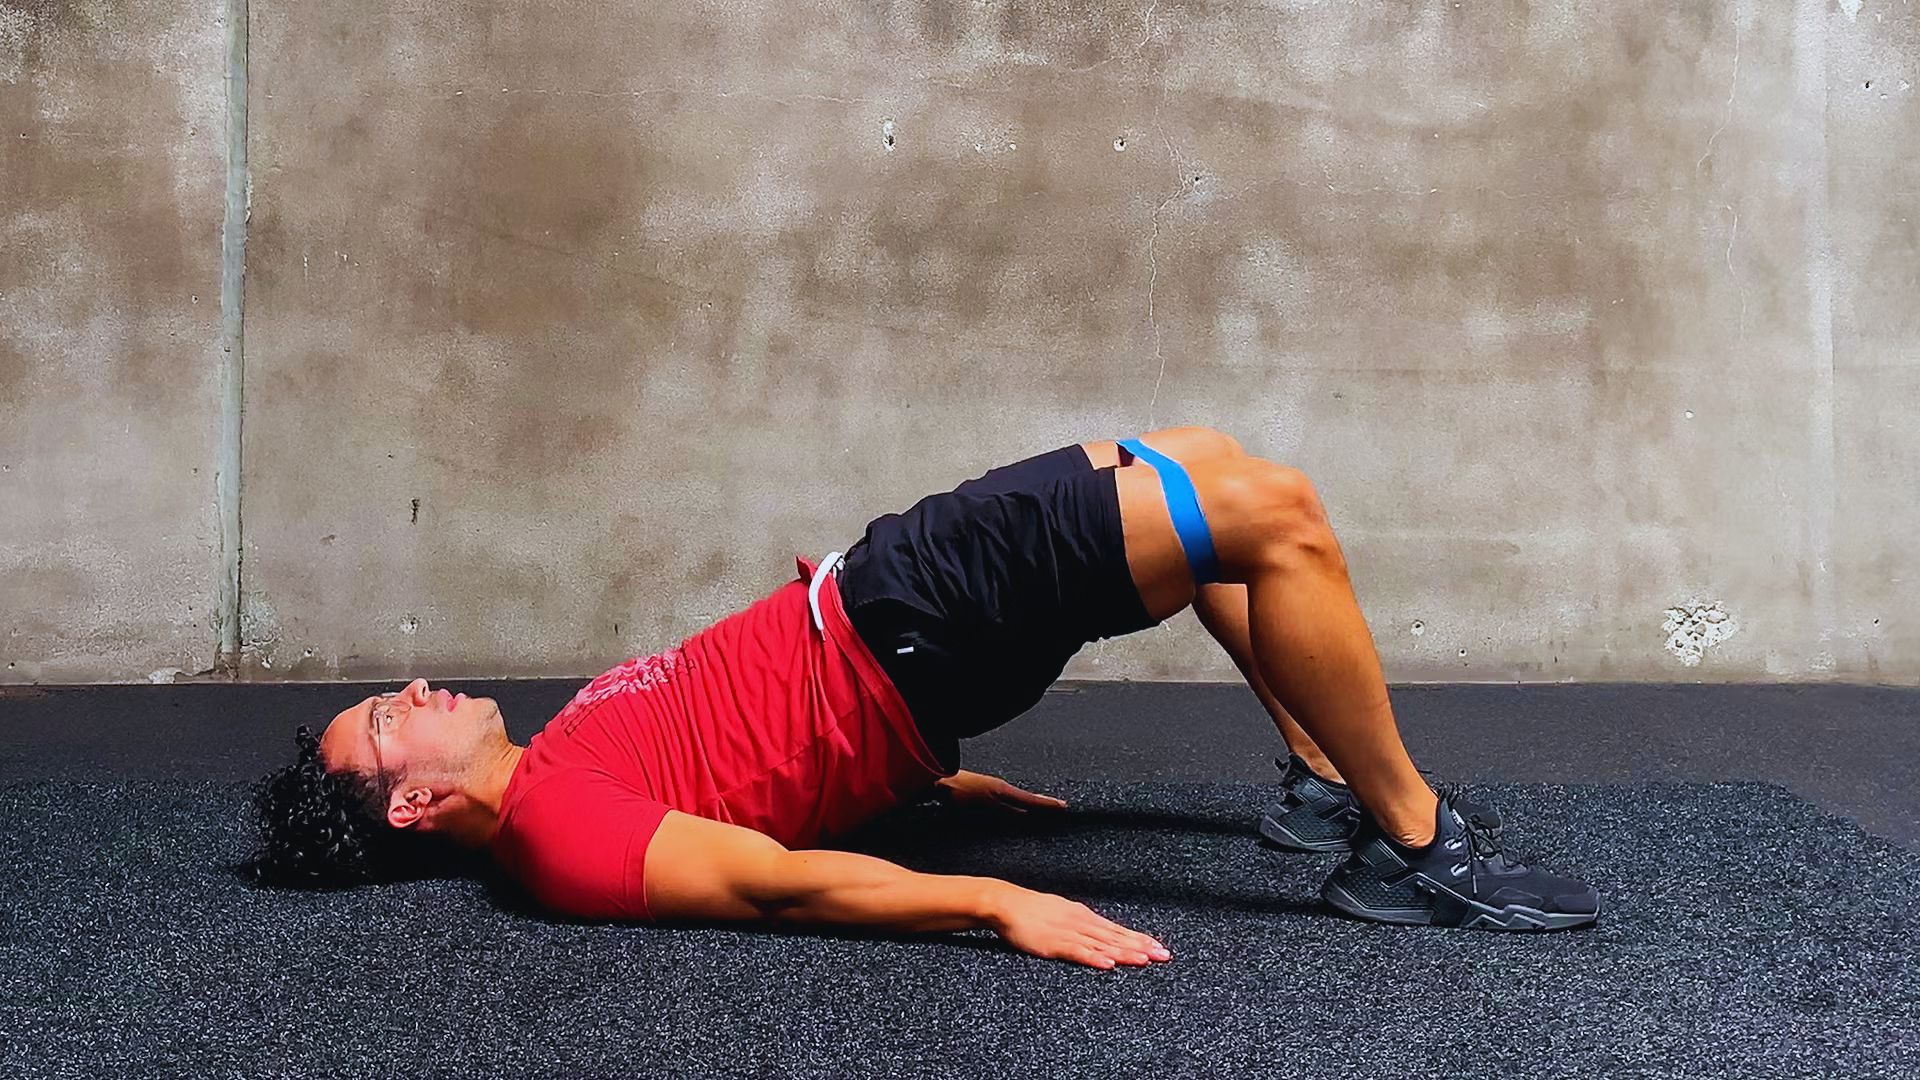
Lie on your back with knees bent. Position the band above your thighs. Lift your hips toward the ceiling while pushing your knees outward. Squeeze your glutes at the top. Lower slowly and repeat.
This movement is effective in home workout and gym settings. I recommend 12 to 15 reps for muscle activation. Bridges build the mind-muscle connection quickly.
Donkey Kicks & Sidekicks

Get on all fours with the band around your ankles. For donkey kicks, lift one leg behind you, keeping the knee bent. For sidekicks, lift your leg out to the side. Both target the gluteus maximus intensely.
Control the movement on the way down. Do 10 to 12 reps per leg. These exercises isolate one glute at a time for balanced development.
Clamshells

Lie on your side with the band below your knees. Keep your feet together and lift your top knee upward. Your hips should stay stacked. Lower with control.
This stabilizes your hips and prevents injury. Do 15 to 20 reps per side. Clamshells fix muscle imbalances that cause hip and knee pain.
Lateral Band Walks

Place the band above your knees or around your ankles. Take small steps sideways in a quarter-squat position. Keep tension on the band throughout. Walk 10 steps right, then 10 steps left.
This improves hip mobility and glute strength. Your gluteus medius works hard to move you sideways. Athletes use this exercise to prevent ACL injuries.
Tips for Maximizing Glute Activation
Follow these guidelines to get stronger glutes faster while staying safe and avoiding common training mistakes.
- Start with the correct resistance level and progress gradually over weeks, not days.
- Focus on form and slow, controlled movements. Slow down the lowering phase to create more time under tension.
- Engage your core during every exercise to improve stability and protect your lower back.
- Mix different band positions throughout the week so your glutes adapt to new challenges.
- Track your progress in a notebook with sets, reps, and resistance levels to stay motivated.
Home Workout vs Gym for Glute Band Training

Both training locations offer benefits, and your choice depends on your lifestyle, goals, and personal preferences.
Benefits of Home Workouts
Home training offers convenience you can’t beat. You work out whenever you want without commuting. No membership fees or crowded spaces to deal with. You need minimal equipment, just bands and maybe a mat.
Privacy matters to many beginners. You can learn exercises without feeling watched. Home workouts suit busy schedules perfectly. Resistance band routines deliver results in your living room.
I started my fitness path at home. The flexibility helped me stay consistent during difficult weeks.
Benefits of Gym Workouts
Gyms provide access to weights, machines, and professional guidance. Trainers can check your form and suggest improvements. You’ll find barbells and heavier resistance for advanced training.
The gym environment motivates some people. Seeing others work out pushes you harder. You can combine bands with other equipment for comprehensive programs. Cable machines and free weights add variety to your glute training.
Group classes offer community and accountability. Many gyms now include band-based classes specifically for glutes.
Which is Better for Beginners?
The answer depends on personal goals, space, and consistency. Home work if you’re self-motivated and have limited time. The gym suits you if you need structure and guidance.
Consider your budget, too. Bands cost $10 to $30 while gym memberships run monthly. Think about what keeps you showing up week after week. Consistency matters more than location.
Start where you feel most comfortable. You can always switch later as your needs change.
Common Mistakes to Avoid
Watch out for these errors that limit your results and can lead to poor form or injury.
- Placing the band too high or too low reduces effectiveness. A band at the wrong position changes which muscles work.
- Using too much resistance causes poor form. Choose a band that allows 10 to 15 controlled reps.
- Skipping warm-up or stretching before band exercises increases injury risk. Spend five minutes doing leg swings and hip circles.
- Not using a full range of motion limits glute activation. Move through the complete motion each time.
- Rushing through sets wastes your time and effort. Quality beats quantity in strength training.
Conclusion
I’ve spent years helping people build stronger glutes with simple resistance bands. The secret isn’t complicated equipment or fancy programs. It’s knowing where to place resistance bands for glutes and staying consistent with your training.
Start with one or two placements this week. Try the exercises that feel right for your body. Home or gym, both work when you show up regularly.
Which band position will you try first? Drop a comment below and share your experience. Your glutes will thank you in a few weeks.
Frequently Asked Questions
How tight should the resistance band be around my legs?
The band should feel snug but not cut off circulation. If it slides down constantly, go one size smaller or adjust the placement slightly.
Can I use resistance bands every day for my glutes?
Your glutes need 48 hours to recover between intense sessions. Train them three to four times weekly for best results.
What resistance level should beginners start with?
Begin with light to medium resistance that allows 12 to 15 controlled reps. Increase resistance when exercises feel too easy.
How long until I see results from band training?
Most people notice strength improvements within two to three weeks. Visible muscle changes typically appear after six to eight weeks of consistent training.
Do I need different bands for different placements?
One medium-resistance loop band works for most placements initially. As you progress, having light, medium, and heavy bands gives you more options.