Looking to build stronger, shapely glutes without leaving home? Hip thrusts at home are one of the most effective exercises you can do with minimal space and simple equipment.
I’ve worked with beginners and experienced lifters, and I’ve seen real results when the movement is done correctly and consistently.
In this guide, you’ll get quick insights into proper setup, variations to match your level, and tips from fitness experts to make every rep count.
By following these steps, you can safely boost strength, shape, and glute activation, making your at-home workouts more effective and rewarding.
Let’s get started learning everything you need to know.
Understanding Hip Thrusts

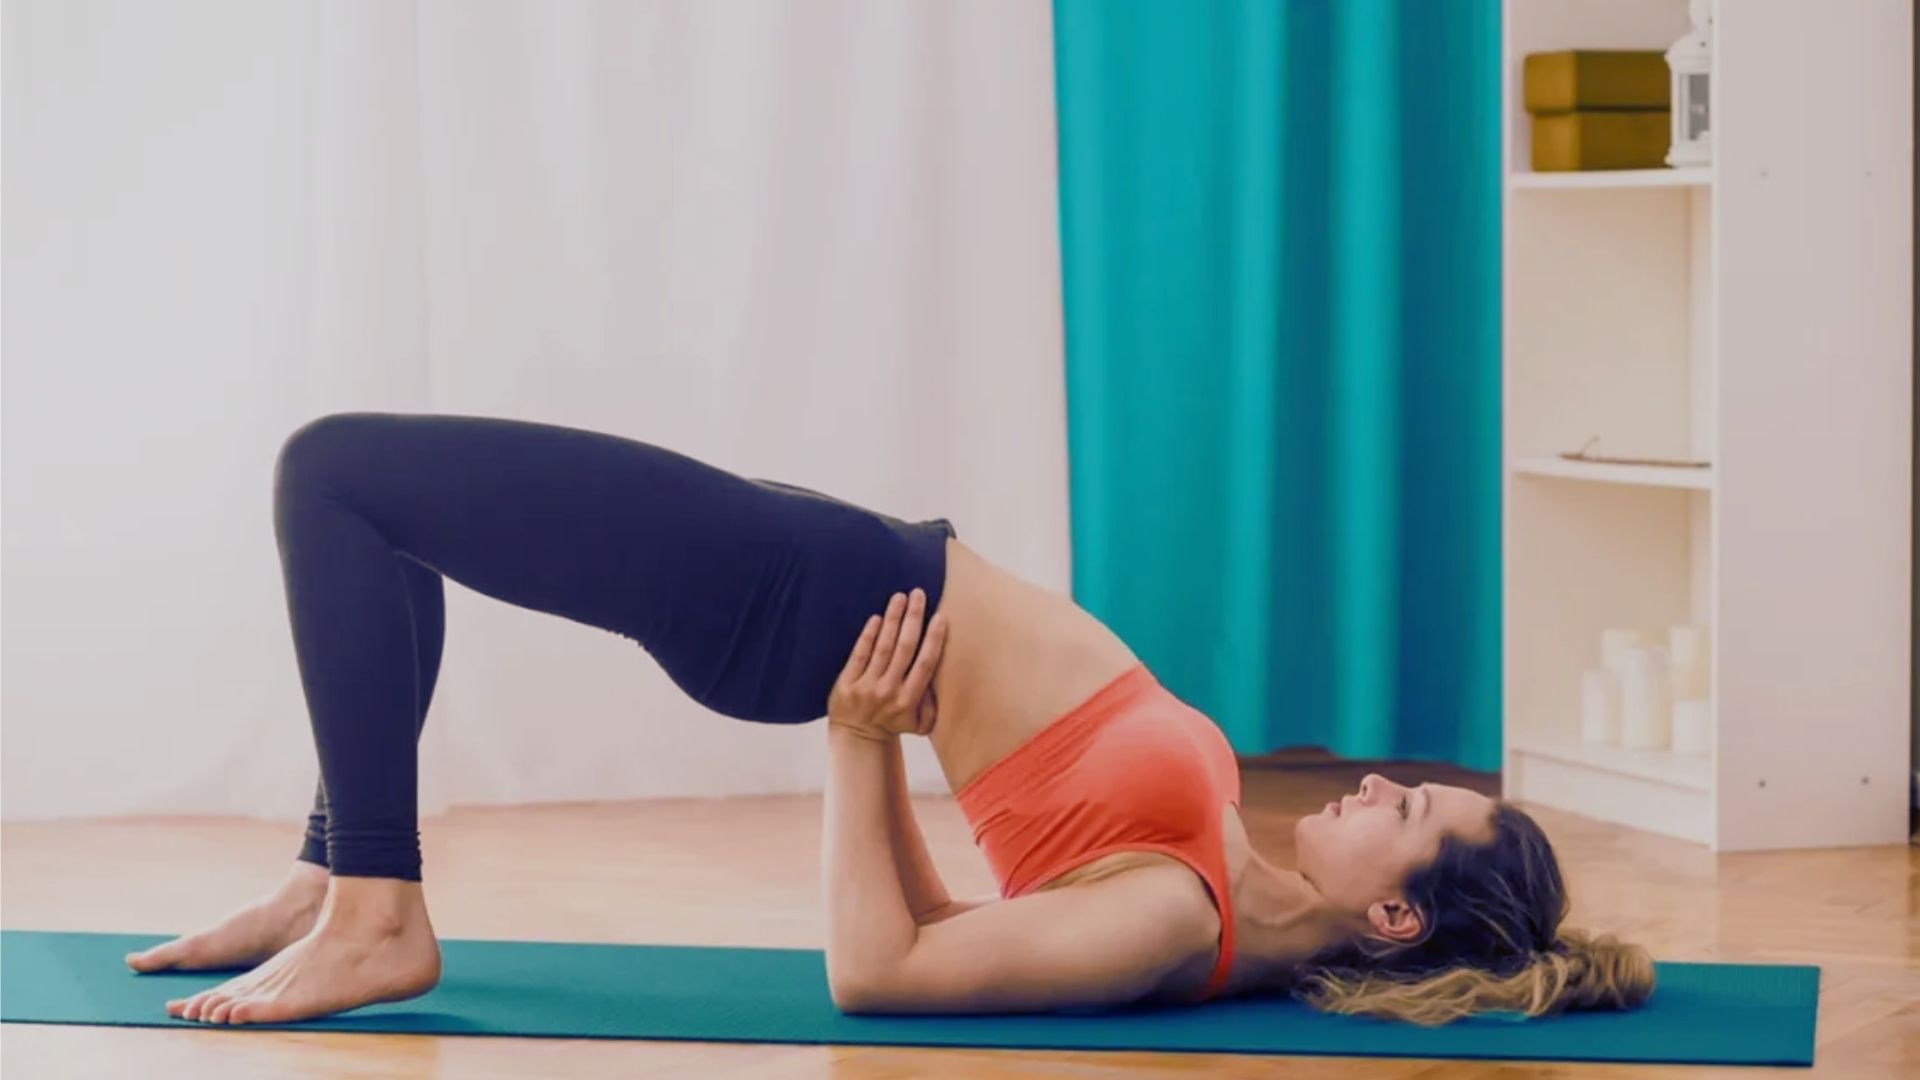
Hip thrusts are a lower-body exercise where your upper back rests on a bench, couch, or sturdy surface, and your feet stay flat on the floor.
You lift your hips until your body forms a straight line from shoulders to knees, then squeeze your glutes at the top.
This movement mainly targets the gluteus maximus. It also works the hamstrings, core, and lower back to keep your body stable.
Compared to glute bridges, hip thrusts allow a bigger range of motion because your back is elevated.
Squats train more muscles overall, especially the quads, while hip thrusts place more focus on the glutes.
They are great for home workouts since they need little space and simple equipment like a couch, chair, dumbbell, backpack, or resistance band.
How to Do Hip Thrusts at Home

Good form helps you target your glutes safely. Move with control and focus on how the muscles feel.
Proper Setup
Sit on the floor with your upper back resting against a couch, chair, bed, or ottoman. The edge should sit just below your shoulder blades.
Place your feet flat and hip-width apart with toes slightly outward. At the top, your knees should form about a 90-degree angle. Keep the surface stable.
Execution
Press through your heels to lift your hips upward. Raise them until your body forms a straight line from shoulders to knees.
Squeeze your glutes at the top for one second. Keep your chin slightly tucked and avoid arching your lower back. Lower slowly with control.
Breathing Tips
Breathe steadily during each rep. Inhale as you lower your hips toward the floor. Exhale as you press through your heels and lift your hips up.
Do not hold your breath. Controlled breathing helps you stay stable and maintain proper form throughout the movement.
Focus on slow, controlled reps to get the most out of every hip thrust at home.
Hip Thrusts at Home Without Equipment
You do not need weights to train your glutes. Your bodyweight alone can be enough when you focus on form and control.
Bodyweight Hip Thrusts
Bodyweight hip thrusts are great for beginners. Sit with your upper back on a couch or sturdy surface and feet flat on the floor.
Lift your hips until your body forms a straight line, then squeeze your glutes at the top. Move slowly to increase muscle tension.
Floor Glute Bridges
If you do not have furniture, floor glute bridges work well. Lie on your back with knees bent and feet flat.
Press through your heels and lift your hips upward. The range of motion is smaller than hip thrusts, but it still activates the glutes effectively.
Single-Leg Variations
Single-leg hip thrusts or bridges increase intensity without adding weight. Keep one foot planted and extend the other leg forward.
Lift your hips using the working leg only. This improves balance and increases glute activation on each side.
Safety Tips
Keep your spine neutral and avoid arching your lower back. Move with control and do not rush reps.
Push through your heels, not your toes. If you feel pain in your lower back, reset your form before continuing.
Bodyweight training can still build strong glutes when done consistently and correctly.
Hip Thrust Variations for Every Level
You can adjust the movement based on your strength level. Increase difficulty as your glutes get stronger.
Beginner: Floor hip thrusts and glute bridges are performed on the ground with knees bent and feet flat. They help build basic glute strength and improve hip drive with controlled movement.
Intermediate: Weighted hip thrusts use a dumbbell or a backpack placed across the hips. Added resistance increases muscle tension and supports strength growth.
Advanced: Single-leg hip thrusts train one side at a time and improve balance. Pause-and-squeeze reps increase time under tension. Enhancing the feet increases the range of motion and difficulty.
Choose the variation that matches your level and progress gradually as you get stronger.
Structuring Your Home Hip Thrust Workout

A clear plan helps you see results faster. Keep your routine simple and consistent.
Recommended Sets and Reps:
Perform 3 to 4 sets of 10 to 15 reps. Rest for 45 to 60 seconds between sets. Choose a variation that feels challenging by the last few reps while maintaining good form.
Progressive Overload at Home:
To keep improving, slowly increase difficulty. Add weight with a dumbbell or backpack. Increase reps. Slow down the tempo. Or elevate your feet to increase the range of motion.
Sample Routines:
Beginners can perform 3 sets of 12 floor glute bridges. The intermediate level can complete 4 sets of 12 weighted hip thrusts.
An advanced level can perform 4 sets of 10 single-leg hip thrusts on each leg.
Combine With Other Glute Exercises:
Pair hip thrusts with donkey kicks, reverse lunges, or Romanian deadlifts for a balanced lower-body workout.
Train consistently and increase difficulty over time to build stronger glutes.
Common Mistakes and How to Avoid Them
Small mistakes can reduce results and cause strain. Use this table to quickly check and correct your form.
| Mistake | What Happens | Fix |
| Overarching lower back | Lower back takes the load | Stop at a straight line. Keep the core tight. |
| Pushing through toes | Less glute focus | Press through heels. |
| Feet too close or far | Quads or hamstrings dominate | Adjust for 90° knee angle at top. |
| Uneven weight distribution | Hips tilt | Keep hips level and aligned. |
Check your form regularly to avoid these common errors.
Expert & Community Tips
Learn tips from experts and the fitness community to make your at-home hip thrusts safer and more effective.
Trainer advice: Bret Contreras says keeping the chin tucked, ribs down, and squeezing glutes at the top protects the lower back.
Pausing 1-2 seconds increases glute activation, with many clients seeing results in 4-6 weeks.
Reddit and forum advice: Users report that placing a couch against the wall, using a towel for hip comfort, and adding a resistance band above the knees improves glute engagement at home.
Safety and recovery: Stretching hip flexors and hamstrings, foam rolling glutes and thighs, and doing light glute bridges before heavier sets reduces soreness and improves performance.
Apply these adjustments consistently for better results and faster glute gains.
Final Thoughts
Hip thrusts at home are an effective way to build strong, toned glutes with minimal equipment. From bodyweight bridges to weighted variations, proper form and consistency are key.
Gradually increasing difficulty, focusing on controlled reps, and including recovery routines help prevent injury and boost results.
I’ve seen beginners and advanced lifters both improve strength, shape, and balance by following these steps. Small, consistent efforts lead to noticeable glute gains.
Try a short hip thrust session today and track your progress for faster results!
Frequently Asked Questions
What Is The 8-8-8 Rule For Glutes?
Perform 8 regular reps, 8 reps with a hold at the top for 8 seconds, and 8 slow lowering reps. It increases time under tension for better glute activation.
How Many Hip Thrusts Should I Do Per Day?
For beginners, 2-3 sessions per week. During advanced, it’s 3-4 sessions with rest days in between.
How Fast Will I See Glute Growth?
With consistent training and progressive overload, improvements appear in 4-6 weeks. Results vary by effort and nutrition.
Can I Do Hip Thrusts Without A Bench?
Yes, use floor glute bridges or single-leg variations. Furniture is optional for support.
Are Hip Thrusts Safe For Lower Back Pain?
Yes, if you keep a neutral spine, core engaged, and avoid arching the lower back. Proper form prevents strain.