Your upper back feels stiff. You can’t look over your shoulder without your whole body turning. Maybe your neck hurts after sitting at your desk. Sound familiar?
This article breaks down the quadruped T spine rotation exercise step by step. You’ll learn exactly how to do it, why it works, and how to avoid common mistakes. I’ve used this move with clients for years, and it consistently delivers results when done correctly.
Proper form instructions, modifications for different fitness levels, and tips to make this exercise work for your body. If you are dealing with tightness from desk work or want better rotation for sports, this guide has you covered. No complicated jargon. No equipment needed. Just a simple, effective movement that actually improves your mobility.
Benefits of.Quadruped T Spine Rotation
Once you master the basic three directions, you can add these variations. They hit your hips from different angles and keep your training fresh. I rotate these in when my clients plateau or need more challenge.
- Standing adduction: Move your leg across your body’s midline instead of out to the side. This targets your inner thigh and hip adductors, building strength for lateral stability and better movement control.
- Standing circles: Draw large circles with your leg in both directions, clockwise and counterclockwise. This works your hip through its full range of motion and improves coordination in ways that straight-line movements can’t match.
- Knee drive holds: Lift your knee toward your chest and hold it there for 5-10 seconds per rep. This builds serious hip flexor strength and tests your standing leg’s balance under longer tension.
- Hip hikes: Keep both feet on the ground, but lift one hip toward your ribcage, then lower it below the level. This isolates your glute medius and quadratus lumborum for pelvic stability you need during walking and running.
- Resistance band walks: Add a mini-band around your ankles and take lateral steps or forward walks. This combines hip strength with real movement patterns, making your gains transfer better to sports and daily life.
How to Perform the Quadruped T Spine Rotation (Step-by-Step Guide)?
I’ll break down each step so you get this right. This movement looks simple, but form matters. Do it correctly, and you’ll feel the difference in your upper back immediately.
Starting Position
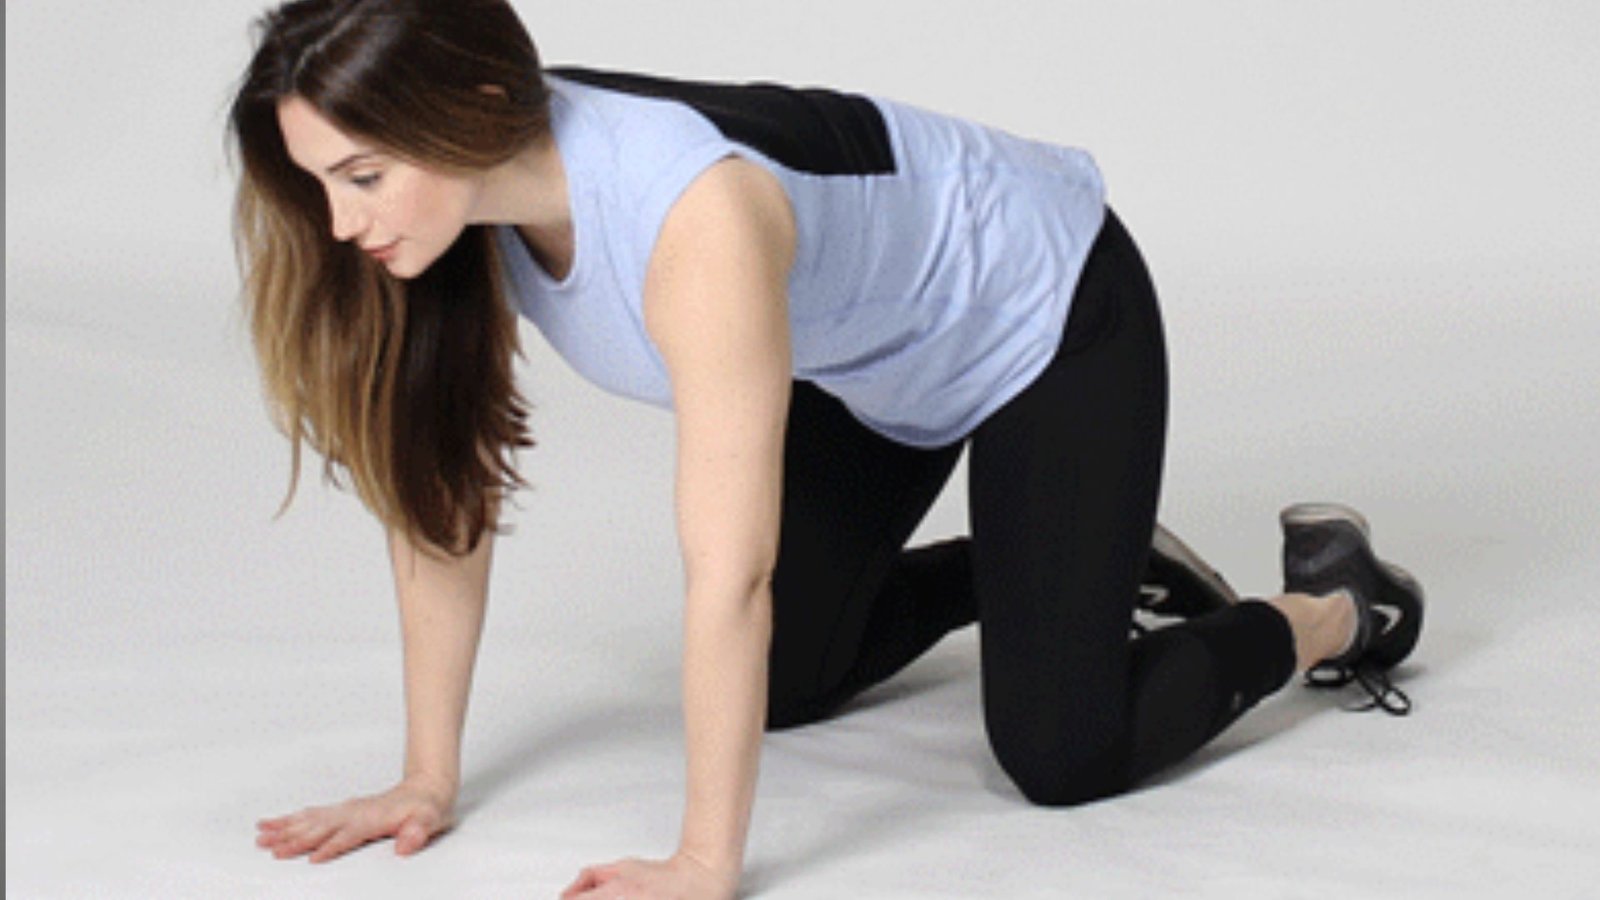
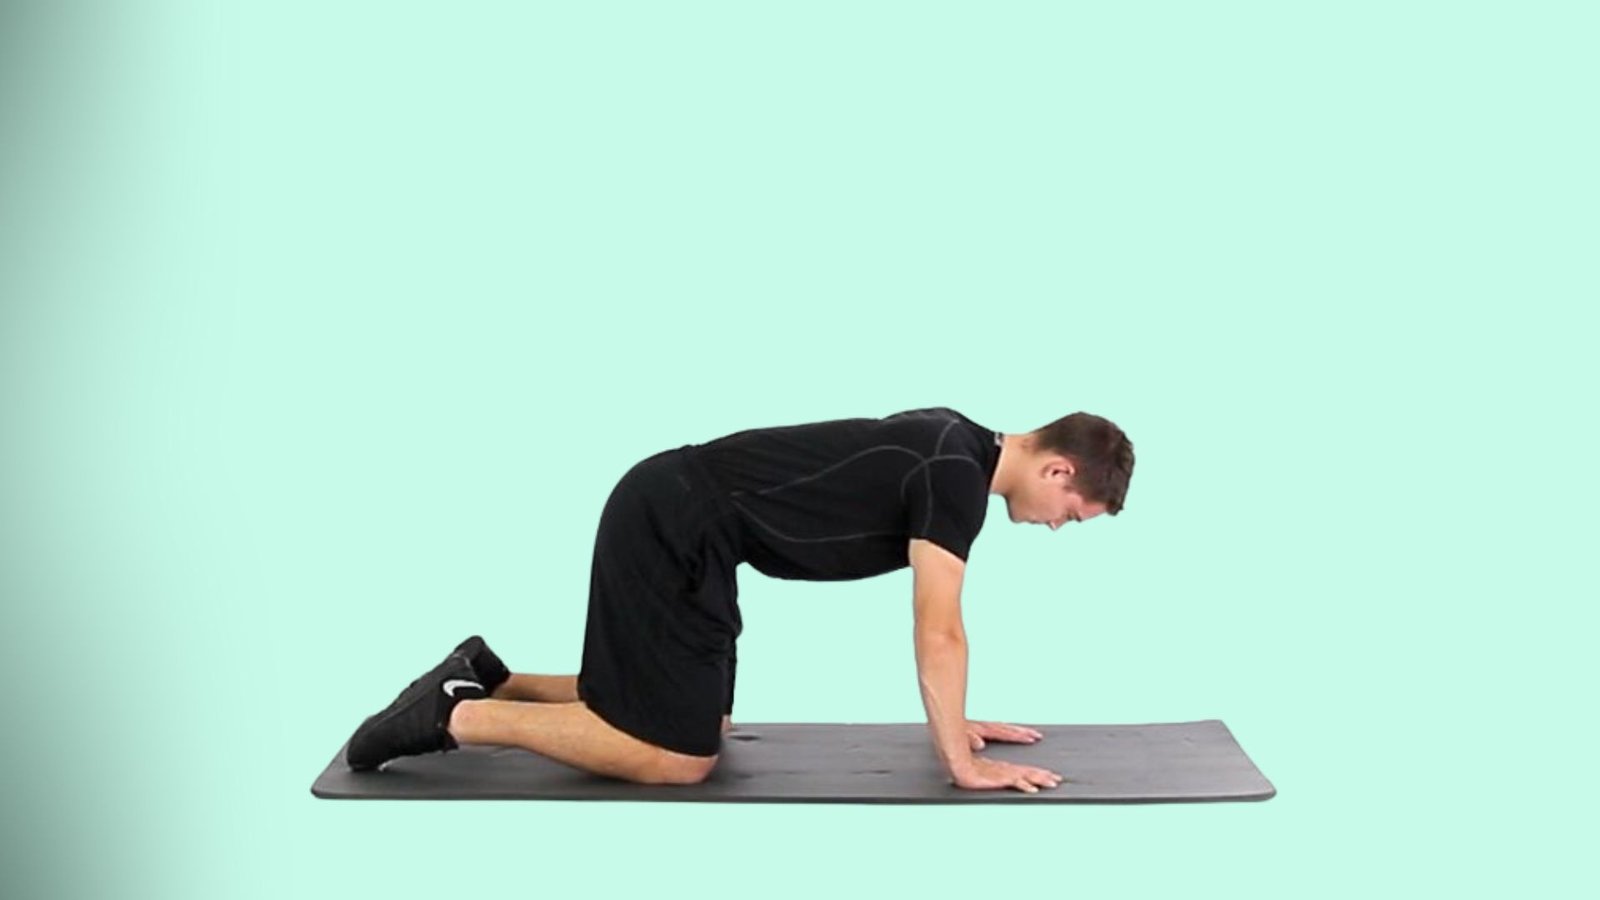
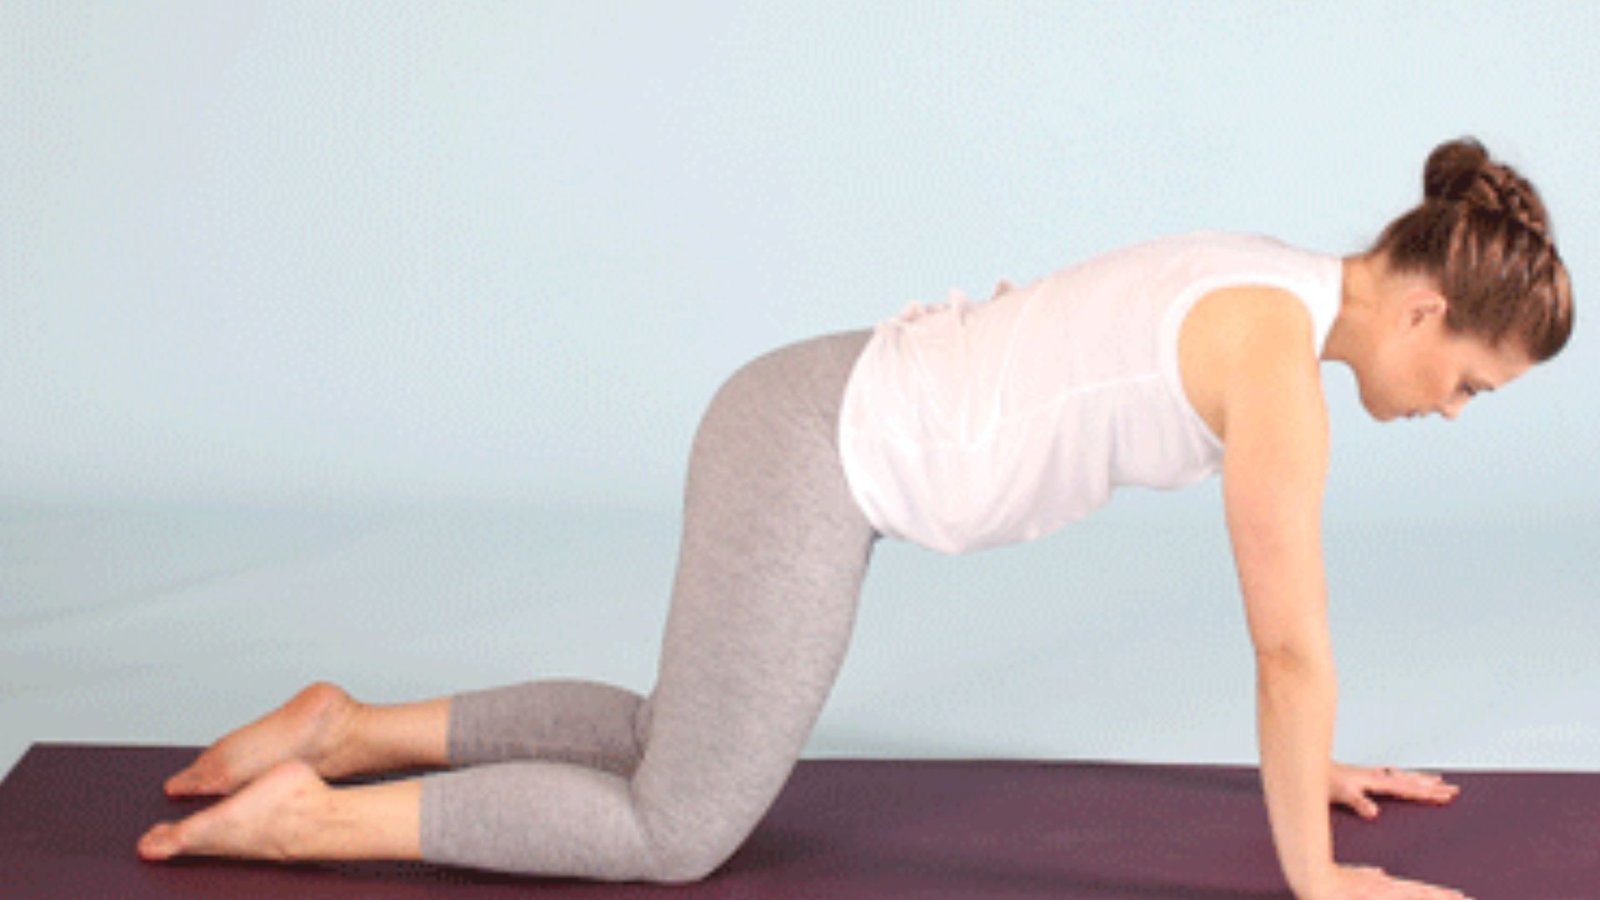
Get down on your hands and knees. This is called the quadruped position. Set yourself up properly before you start rotating.
Check these key points.
- Wrist alignment: Place your wrists directly under your shoulders
- Knee placement: Put your knees directly under your hips
- Spine position: Keep your back flat, not arched or rounded
Your body should form a stable table position. Don’t let your hips sway side to side. Keep everything still except the part that’s supposed to move, your upper back.
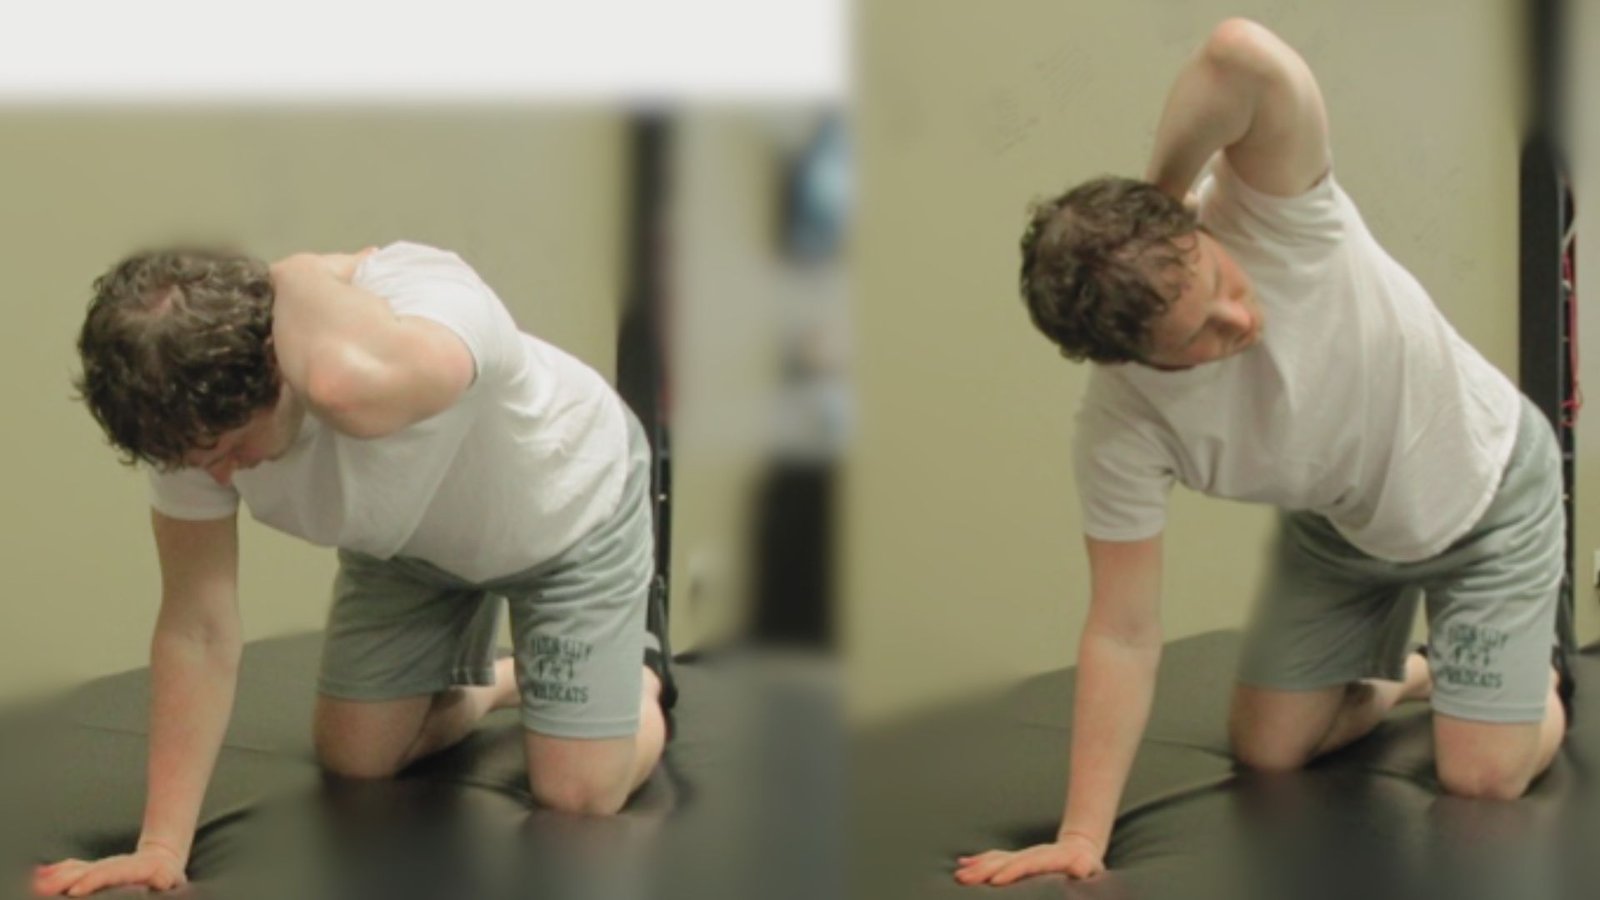
Step 1: Set the Arm Position
Place one hand behind your head with your elbow pointing out to the side. This is the standard position most people use. Your fingertips should rest lightly on your head. Don’t pull on your neck.
For a harder version, put your hand on your lower back with your palm facing up. This advanced option requires more rotation range. Stick with the hand-behind-head version if you’re new to this movement.
Step 2: Rotate Downward
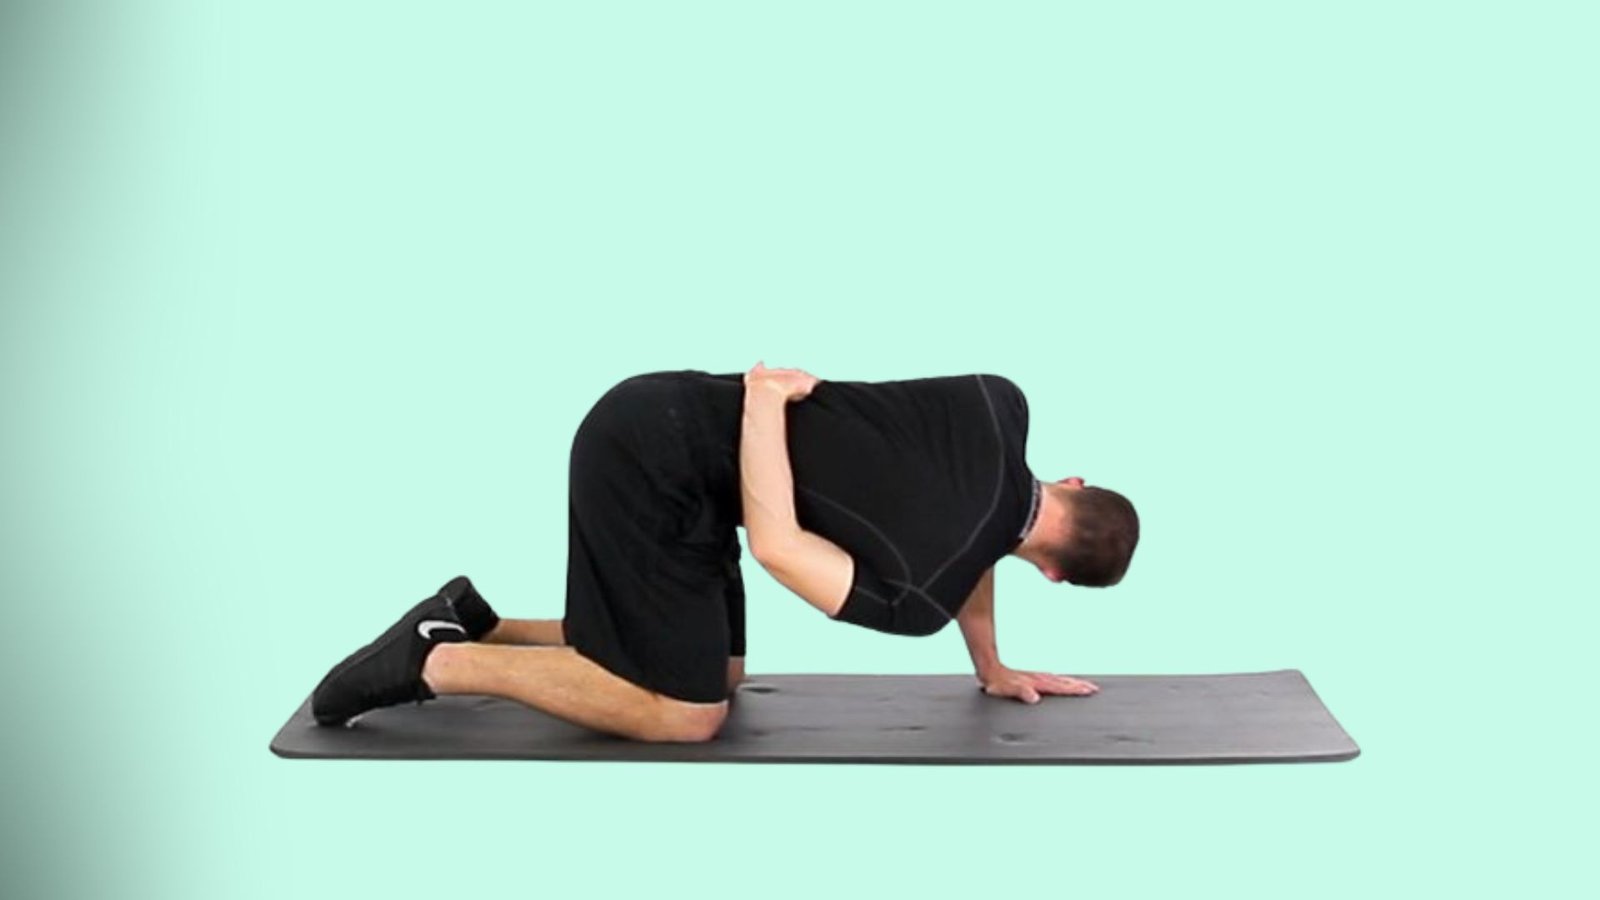
Start the rotation with your eyes first. Then let your head follow. Finally, your shoulder and elbow move. Lead with your eyes, head, and shoulder in that order.
Rotate your elbow down toward the hand that’s planted on the ground. Keep your planted arm completely straight. Don’t let it bend or collapse. Your torso shouldn’t drop or twist. Only your upper back should rotate.
Step 3: Rotate Upward
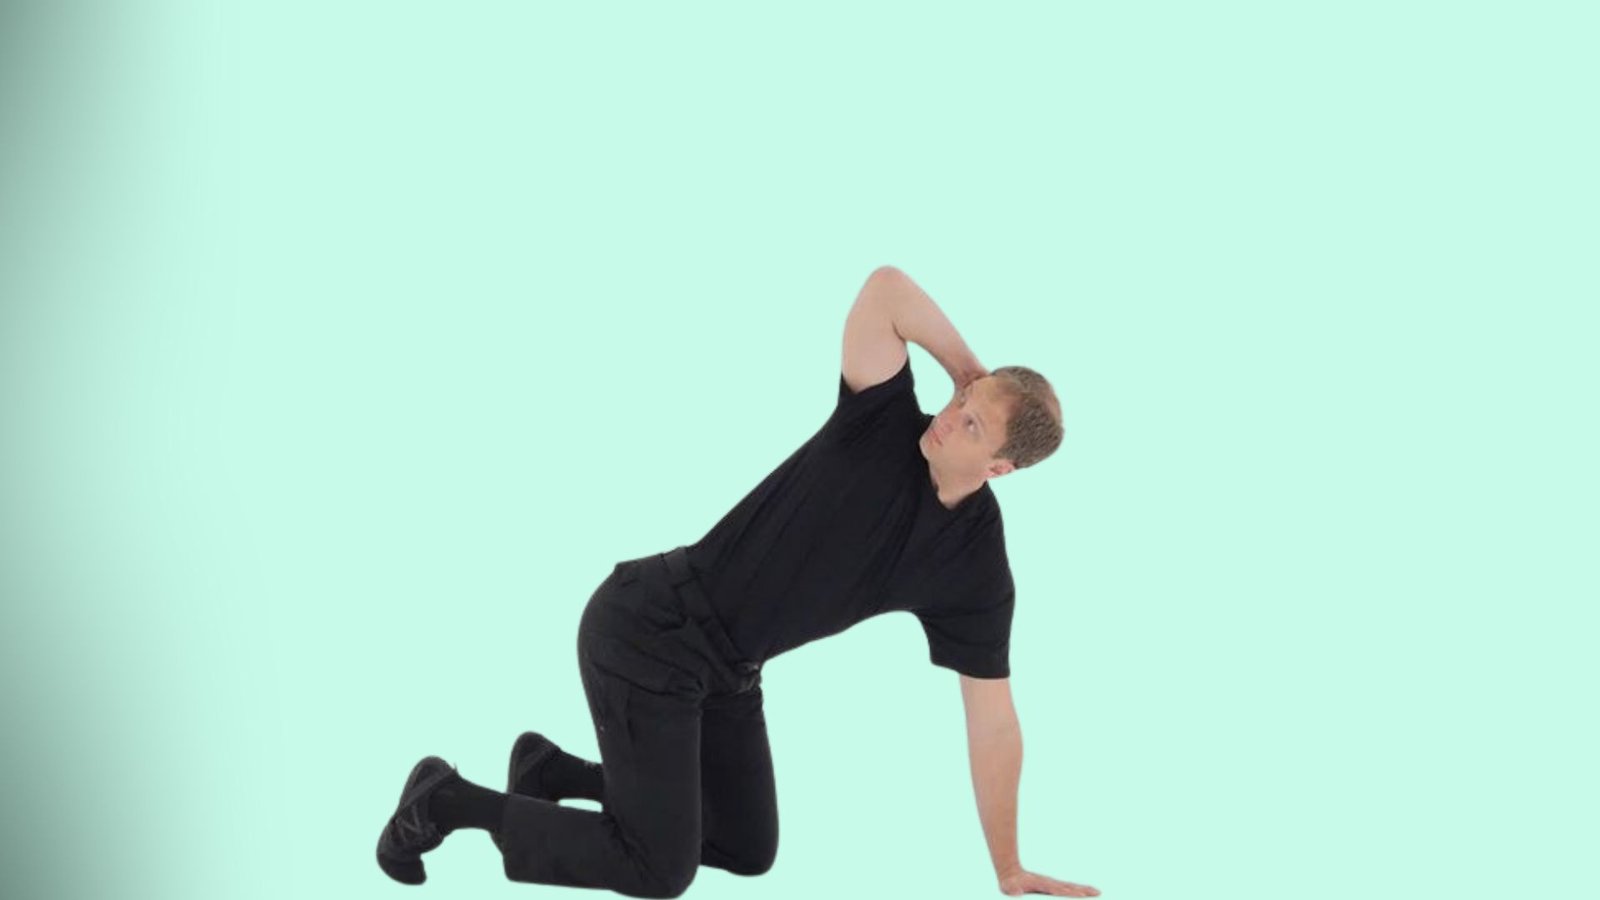
Now reverse the movement slowly. Lift your elbow toward the ceiling while opening your chest. Think about showing your chest to the wall beside you.
Keep your lower back still. All rotation comes from your thoracic spine, not your lumbar region. Your hips shouldn’t move at all. If your lower back twists, you’re doing it wrong and missing the point of the exercise.
Step 4: Breathing Tips

Breathe in as you rotate downward. Your ribs need air to create space for the rotation. Don’t hold your breath or you’ll stay tight and stiff.
Breathe out as you open upward. The exhale helps you rotate further and deeper. Proper breathing makes this exercise twice as effective. Match your breath to your movement every single rep.
Step 5: Repetitions & Sets

Do 8-12 slow, controlled reps on each side. Quality beats quantity here. One good rep is worth more than five sloppy ones.
Perform 1-2 sets as part of your warm-up or daily mobility routine. This works great before upper body workouts or after sitting for hours. Do it every day if your upper back is really stiff. You can’t overdo mobility work like this.
Video Demonstration Guide
Written instructions only go so far. Sometimes you need to see the movement in action. I always recommend watching a good demo video before you try this exercise for the first time.
What to Look for in a Good Demonstration Video
Not all exercise videos are created equal. You need clear angles and proper form shown from start to finish. Look for videos that actually teach, not just show off.
Find videos with these key features that include the hands under the shoulders and the knees under the hips, no guessing about alignment.
- Slow movement: Controlled rotation with zero twisting in the lower back, not rushed reps
- Camera angles: Close-up shots of the upper back so you see exactly where the rotation happens
- Multiple options: Both hand-behind-head and hand-on-low-back positions were demonstrated clearly
A good video will pause at key points to explain what you should feel. Bad videos just rush through reps without teaching you anything. Watch the video twice before you try the movement yourself.
Why Videos Help
Seeing the movement helps your brain understand the sequence. You watch how the eyes lead, then the head, then the shoulder follows. Words can’t capture that flow the way visual learning does.
Videos catch form mistakes you’d never notice on your own. You see what “no lumbar twisting” actually looks like. You understand why your hips shouldn’t move. This is huge for beginners who struggle with body awareness and don’t know what “neutral spine” feels like yet.
Variations of Quadruped T Spine Rotation
Once you master the basic version, these variations add new challenges. They target your upper back from different angles and solve specific problems. I use these with clients who need extra mobility work or have wrist issues.
- Thread-the-needle combo: Start by threading your arm under your body in a stretching motion, then reverse into an open rotation. This creates a fuller range of movement that hits both directions of thoracic rotation in one fluid sequence.
- Low-back hand: Place your rotating hand on your lower back with palm facing up instead of behind your head. This increases the rotational demand significantly and improves cross-body coordination while your shoulder blade moves more freely.
- Elevated platform: Rest your supporting hand on a yoga block or small platform to raise it higher. This takes pressure off your wrist and makes the position more comfortable, perfect for beginners with wrist sensitivity.
- Slow tempo: Hold the top position for 2-3 seconds instead of moving continuously through reps. This deeper hold increases the stretch and teaches your body to stabilize in the rotated position.
- Add resistance: Hold a lightweight in your rotating hand to increase the challenge for your upper back muscles. Start with just 2-3 pounds. His variation builds strength, not just mobility, in your thoracic spine.
Common Mistakes to Avoid
Even simple exercises can go wrong with bad form. I see these mistakes all the time with new clients. Fix these issues, and you’ll get better results without risking injury.
- Lower-back twist: Your lumbar spine moves when it should stay still. Keep your core engaged and rotate only from your mid-back to protect your lower spine.
- Neck pulling: Yanking on your head causes neck strain and reduces upper-back activation. Rest your hand lightly on your head without gripping or pulling.
- Hip shifting: Your hips rock side to side instead of staying level. Squeeze your glutes lightly and widen your knee stance to lock your hips in place.
- Speed rushing: Moving fast reduces the mobility benefit. Slow down to 3-4 seconds per rotation for real results.
- Collapsed torso: Your supporting arm bends, and your body sags toward the floor. Keep that arm straight and your shoulders active throughout the movement.
Conclusion
Quadruped T Spine Rotation is one of those exercises that looks simple but delivers real results. A few minutes of practice each day can free up your upper back, reduce stiffness, and improve how your body moves. You don’t need fancy equipment or a gym membership.
Start slow. Focus on your form. Be patient with your body as it adapts. The tightness you’re feeling didn’t happen overnight, and it won’t disappear overnight either. But with consistent practice, you’ll notice the difference.
Give this exercise a try for the next week and see how you feel. If it helps you, share it with someone else who might need it. Have questions about your form or want to share your progress? Drop a comment below. I’d love to hear how it goes for you.
Frequently asked questions
What is Quadruped T Spine Rotation?
Quadruped T Spine Rotation is a mobility exercise performed on your hands and knees. You place one hand behind your head and rotate your upper body, moving your elbow toward the floor, then up toward the ceiling. This targets the thoracic spine, improving rotation and reducing stiffness in your upper back.
What are the benefits of Quadruped T Spine Rotation?
This exercise improves upper back mobility, reduces neck and shoulder tension, and enhances rotational movement. It helps counteract the effects of sitting and poor posture. Regular practice can decrease pain, improve athletic performance, and make everyday movements like looking over your shoulder feel easier and more comfortable.
How often should I do Quadruped T Spine Rotation?
Perform this exercise daily for the best results. Start with 5-10 rotations per side, once or twice per day. You can do it as part of your warm-up, cool-down, or during work breaks. Consistency matters more than intensity with mobility work, so even two minutes daily helps.
Who should avoid Quadruped T Spine Rotation?
Avoid this exercise if you have acute back injuries, severe spine conditions, or recent surgery. People with wrist pain may need modifications. If you experience sharp pain, dizziness, or numbness during the movement, stop immediately and consult a healthcare professional before continuing. Listen to your body always.
How do I know if I’m doing it correctly?
Your movement should feel smooth, not forced. Keep your hips stable and avoid rocking side to side. The rotation should come from your upper back, not your lower back or neck. Start with small ranges and gradually increase. You should feel a gentle stretch, not pain.