Horizontal pull exercises involve pulling the weight straight toward your body, usually in a row. They strengthen the upper and mid-back muscles that support shoulder stability and everyday movement. These exercises help correct muscle imbalances from push-heavy routines and improve posture.
This guide shows the most effective horizontal pull exercises. You’ll learn how each one works and how to add it to your routine. Options include gym equipment, bodyweight, or simple home setups. Following proper form ensures safety and better results.
By including these exercises, you can build a stronger back, support shoulder health, and create a balanced training program. Start with beginner-friendly variations. Progress gradually as your strength improves. Each pull matters for a healthier, stronger upper body.
What Are Horizontal Pull Exercises?

Horizontal pulls are rowing movements where you pull the weight straight toward your body. The resistance moves parallel to the floor, not up and down. These exercises build your back muscles in ways that vertical pulls can’t match.
Benefits of Incorporating Horizontal Pulls
Horizontal pulls balance out all the pushing exercises you do, creating a stronger, healthier body with better posture and less pain.
- Corrects muscular imbalances by counteracting excessive pushing exercises, strengthening your back, and preventing chest tightness
- Improves posture quickly by pulling your shoulders back into proper alignment, with noticeable improvements within weeks
- Reduces pain by alleviating neck and shoulder discomfort through balanced muscle development between the chest and back
- Enhances other lifts as a stronger back supports heavier squats, safer deadlifts, and better bench press form
- Builds an impressive physique by developing upper back thickness and width for the coveted V-shape appearance
The Best Horizontal Pull Exercises for Strength and Muscle Growth
These six exercises form the foundation of back training. Some use free weights while others use machines or their bodyweight. Pick the ones that match your equipment and experience level.
1. Chest-Supported Dumbbell Rows
This is my go-to exercise for beginners. The bench supports your chest and takes stress off your lower back. You can focus completely on pulling with your back muscles instead of worrying about balance.
Lie face down on an incline bench set at about 45 degrees. Let the dumbbells hang straight down with your arms fully extended. Pull the weights toward your hips while keeping your chest lifted slightly. Squeeze your shoulder blades together at the top, then lower slowly. Control matters more than weight. I recommend this for anyone with back issues or those learning proper rowing mechanics.
2. Seated Cable Rows

Cables keep constant tension on your muscles. Unlike dumbbells, where tension drops at certain angles, cables pull against you through the entire movement. This makes every inch of the rep productive.
Sit at the cable station with knees slightly bent and back straight. Pull the handles toward your midsection while squeezing your shoulder blades together. Your elbows should travel straight back alongside your body. Take three seconds to lower the weight back down. The lowering phase builds serious muscle. Don’t lean back and forth with momentum. Keep your torso stable and let your back do the work.
3. Single-Arm Dumbbell Row
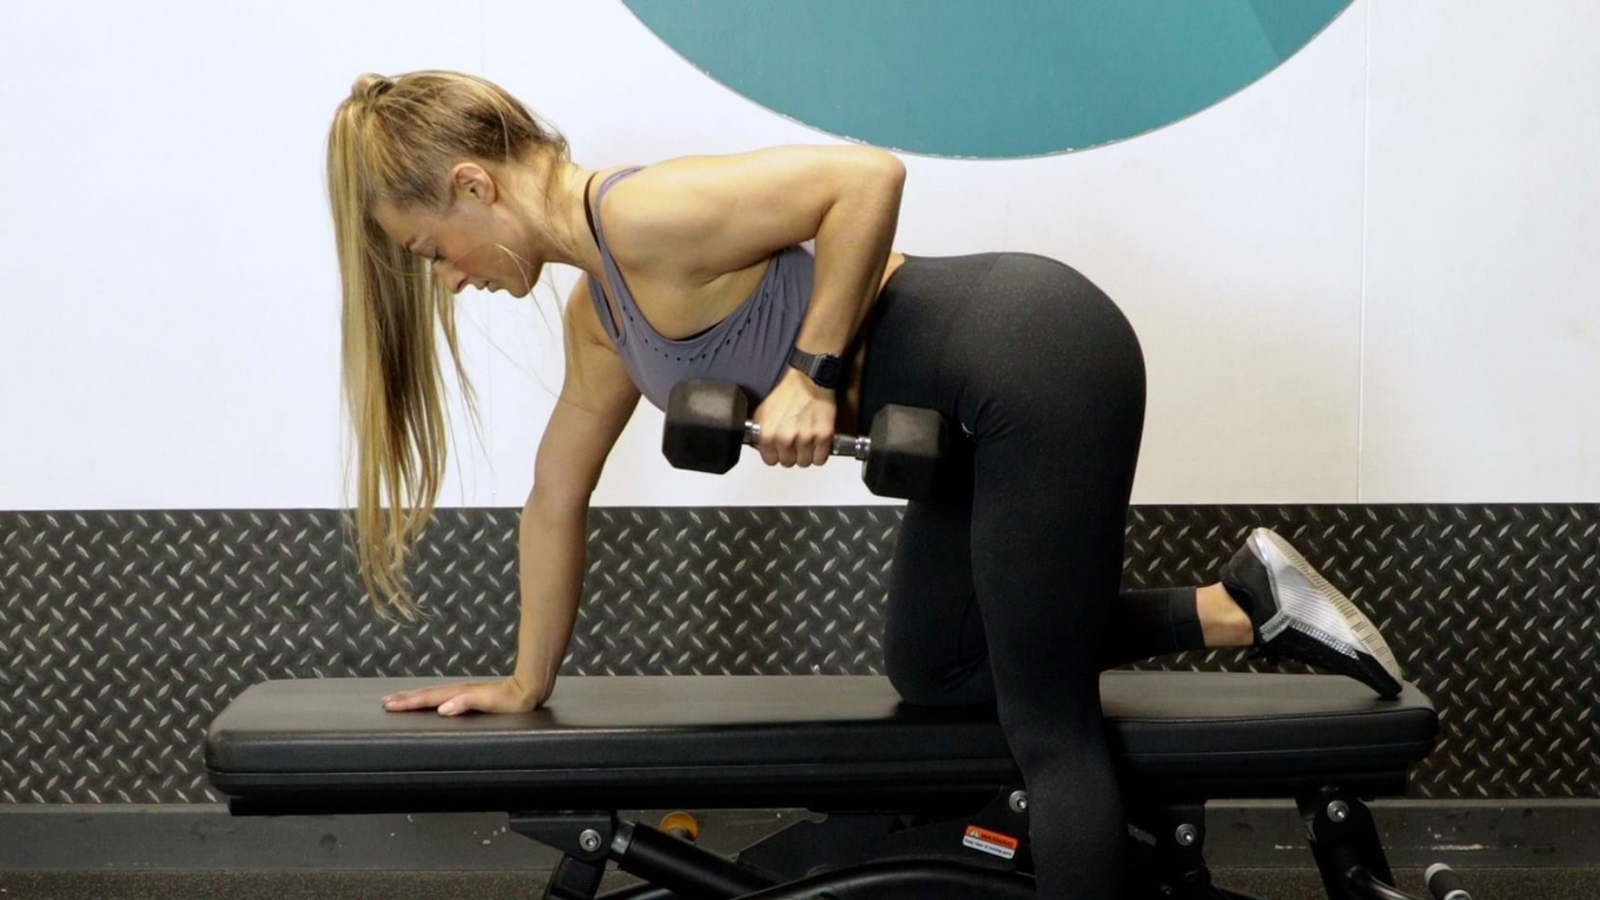
One arm at a time fixes strength imbalances. Your stronger side can’t compensate for your weaker side as it does with barbell rows. Each side must pull its own weight.
Place your left hand and knee on a flat bench with your right foot on the floor. Hold a dumbbell in your right hand and let it hang straight down. Row the weight up to your side while keeping your torso completely stable. Don’t twist or rotate. The instability forces your core to work hard to prevent rotation. Switch sides after finishing your reps.
4. Bent-Over Barbell Row
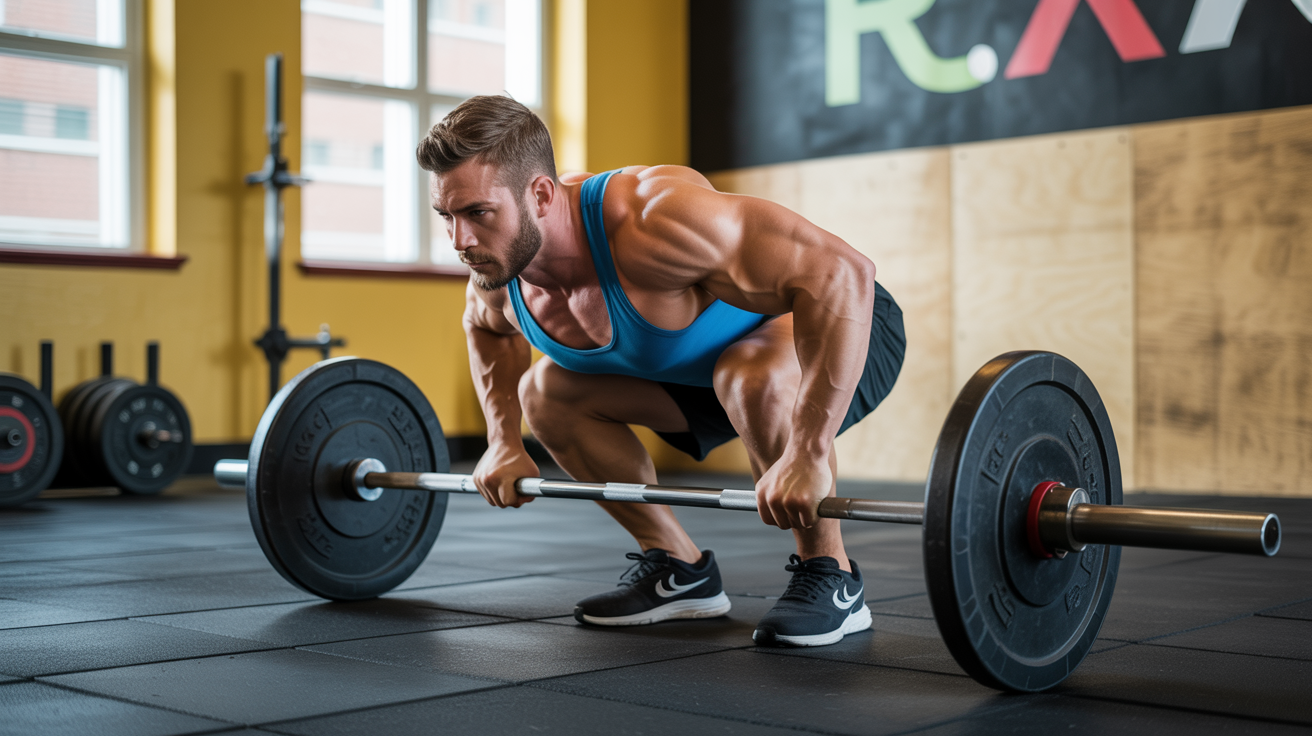
This is the king of back builders. You can load heavy weights and work multiple muscle groups at once. It’s demanding but incredibly effective for building size and strength.
Stand with feet hip-width apart, holding a barbell. Hinge forward at your hips until your torso is at a 45-degree angle. Keep your spine neutral, no rounding. Pull the bar toward your lower ribs, driving your elbows back. Lower with control. Your form will break down when you go too heavy, so use an appropriate weight. Try different grips: underhand hits your biceps harder, while Pendlay rows (resting the bar between reps) build explosive power.
5. TRX or Ring Rows
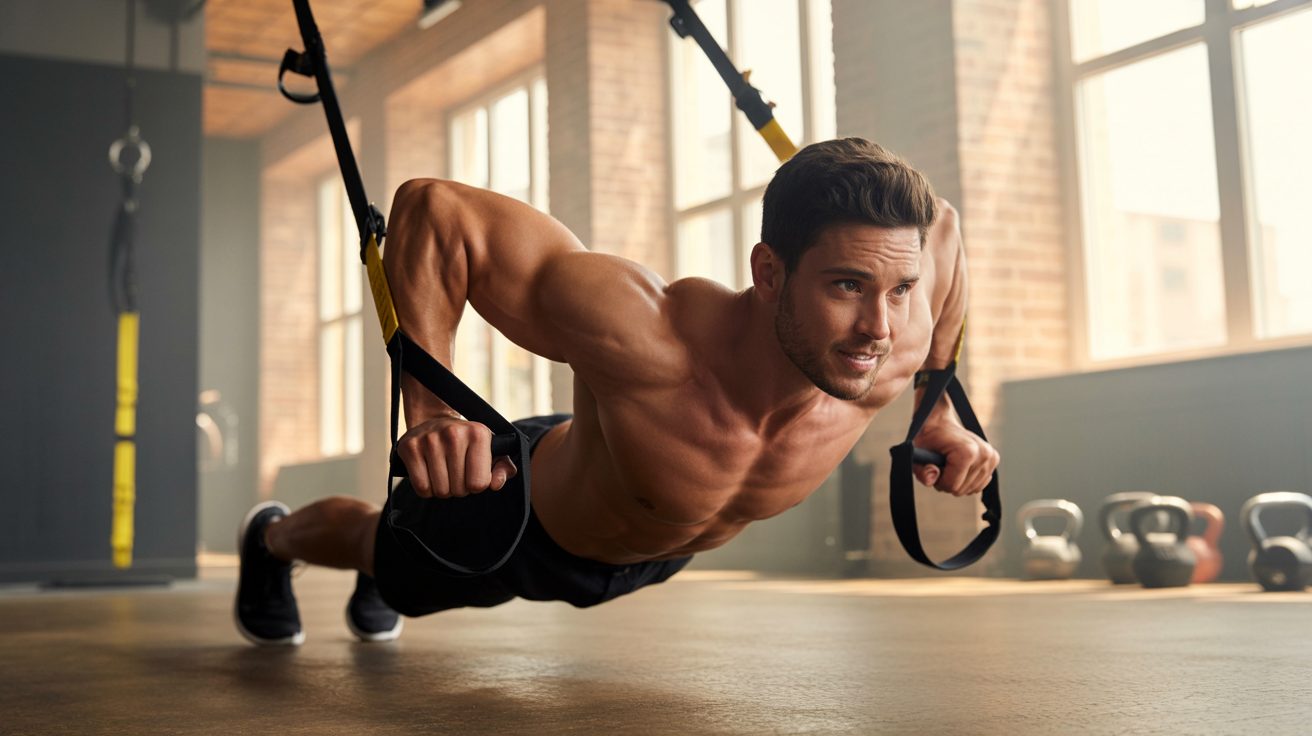
Bodyweight rows are harder than they look. Suspension trainers create instability that forces every stabilizer muscle to fire. You can do these anywhere with minimal equipment.
Set the handles at chest height and grab them. Walk your feet forward until your body forms a straight line. Keep your body rigid like a plank. Pull your chest up toward the handles while keeping your elbows close to your body. The further you walk your feet forward, the harder it gets. These develop coordination and scapular control better than machine rows. Great for athletes and home training.
6. Low Row Machine

Machines get a bad reputation, but this one deserves respect. The fixed path lets you focus purely on pulling without worrying about balance. You can load a heavier weight safely.
Sit at the machine with your chest against the pad. Pull the handles back toward your body. The machine guides the movement, so your only job is to squeeze hard and control the negative. Here’s my favorite tip: use one arm at a time, even though it’s designed for both. This gives you a fuller range of motion and better mind-muscle connection. Safe and effective for both beginners and advanced lifters.
Additional Horizontal Pull Variations to Try
Once you master the basics, these variations add new challenges by hitting your back from different angles. They keep training interesting and help break through strength plateaus.
- Inverted Rows: Use bodyweight and a bar at waist height, where you pull your chest up while lying underneath, perfect for home workouts.
- T-Bar Rows: Anchor one end of a barbell in a corner and row the weighted end toward your chest, hitting your entire back with a natural neutral grip.
- Kettlebell Gorilla Rows: Involve rowing one kettlebell from a push-up position while the other stays grounded, building explosive power and anti-rotation core strength.
- Landmine Rows: Create a diagonal pulling path by straddling an anchored barbell, allowing heavy loading while engaging your core for breaking plateaus.
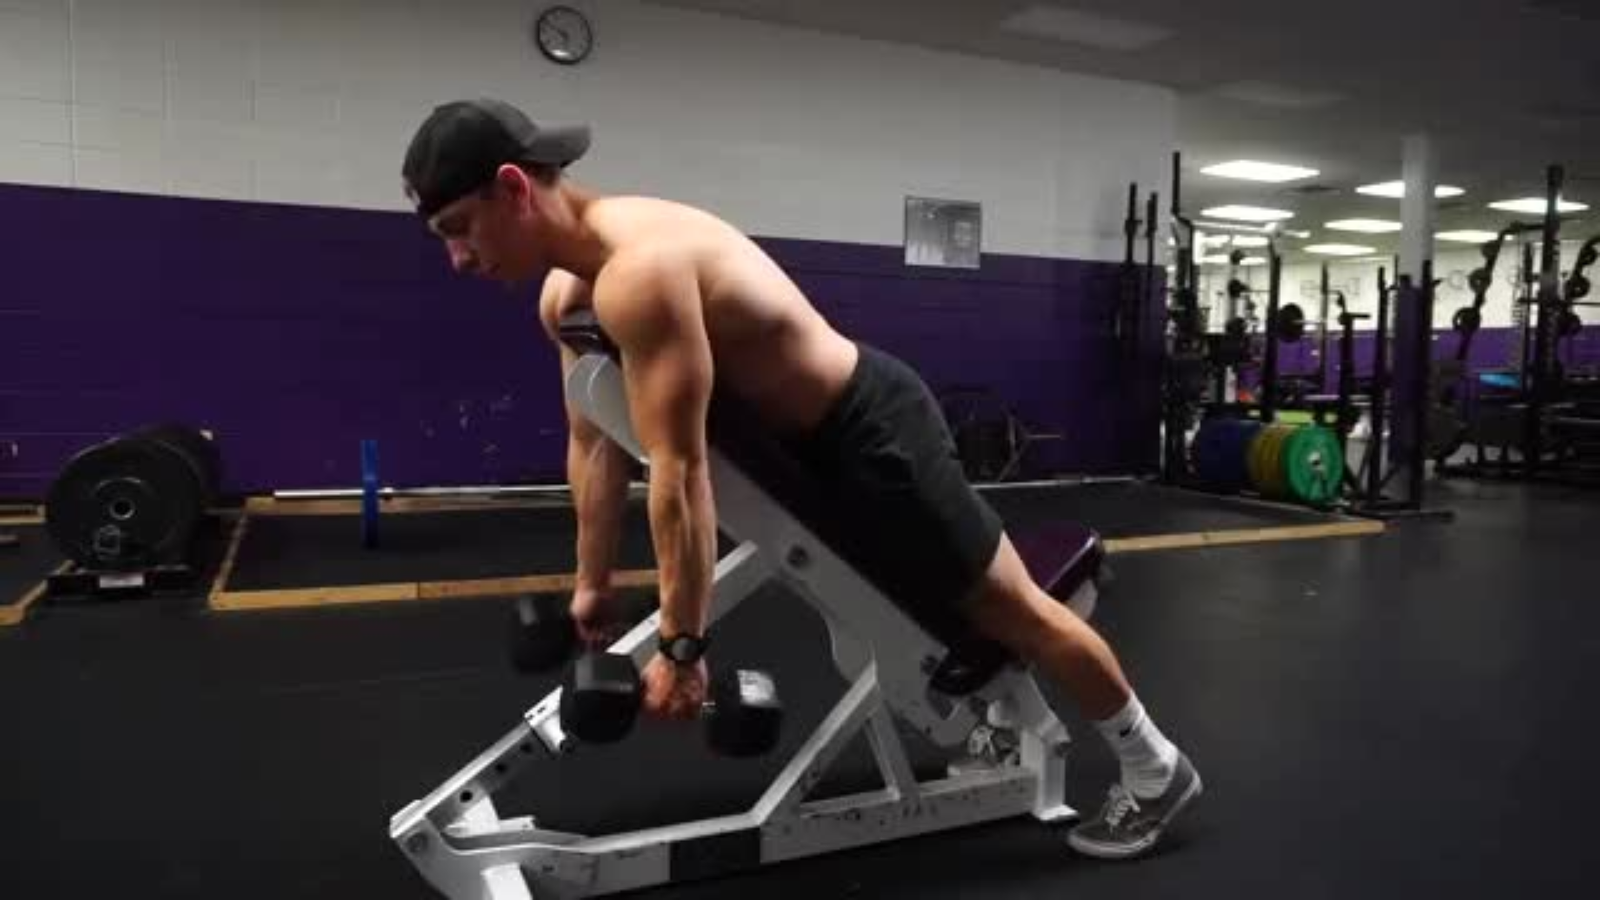
- Dumbbell 3-Point Rows: Place your forehead on an incline bench for stability, taking pressure off your lower back so you can lift heavier safely.
- Front Lever Rows (Advanced): Combine horizontal pulling with core work by holding your body parallel to the ground while hanging from a bar, requiring serious strength.
How to Progress Horizontal Pull Exercises?
Building a strong back takes time and smart progression. You can’t jump straight to heavy barbell rows if you’ve never trained your back before. I’ll show you how to advance safely from beginner to advanced levels.
- Start with beginner exercises like vertical pulls, inverted rows with bent legs, TRX rows, and chest-supported dumbbell rows to build baseline strength.
- Master each movement before progressing by spending at least two to four weeks at each level for proper muscle adaptation.
- Progress to intermediate exercises like elevated inverted rows, single-arm dumbbell rows, and seated cable rows to build real strength and handle instability.
- Correct strength imbalances by staying at the intermediate level for three to six months until both sides feel equally strong.
- Advance to heavy compound movements like bent-over barbell rows, Pendlay rows, and weighted inverted rows once you’ve mastered proper form.
Horizontal Pull Technique Tips
- Keep your spine neutral: Throughout the movement, with no rounding or arching, maintain its natural curve from start to finish.
- Lead with your elbows, not your hands: By driving them straight back to activate your back muscles instead of relying on your arms.
- Keep your shoulders down and back: By squeezing your shoulder blades together to protect your joints and maximize muscle activation.
- Control the weight on every rep: With no jerking, pulling smoothly for two seconds, and lowering for three seconds.
- Engage your core: Like bracing for a punch to keep your torso stable so all the force goes into your back muscles.
Programming Horizontal Pulls in Your Routine
Knowing the exercises isn’t enough. You need a plan for how often to do them and how they fit with your other training. I’ll show you how to program horizontal pulls for maximum results.
Balancing Push and Pull Movements

Most people push way more than they pull. For every set of bench press, you should do at least one set of rows. Better yet, do two sets of pulling for every set of pushing. This 2:1 pull-to-push ratio fixes the imbalance most lifters have.
Pair your pushing exercises with pulling exercises in the same workout or week. If you bench press on Monday, do rows on Monday too. If you do push-ups at home, follow them with inverted rows. This keeps your shoulders healthy and prevents rounded-forward posture.
Sets, Reps, and Frequency
Your experience level determines your volume. Beginners need less work to grow, while advanced lifters need more stimulus. Beginners should do 3 sets of 10-12 reps, training horizontal pulls 2-3 times per week. Intermediate lifters can do 3-4 sets of 8-10 reps and add weight gradually. Advanced lifters should do 4-5 sets of 6-8 reps for strength or higher reps (12-15) for muscle size.
Don’t jump to advanced volume until you’ve trained consistently for at least a year. Quality reps with good form beat high volume with sloppy technique every time.
Integrating with Full Training Split
Horizontal pulls belong on upper-body or pull days. If you train your whole body in one session, include at least one horizontal pull exercise. If you split your training, put horizontal pulls on the same day as other back work.
Combine horizontal pulls with vertical pulls like pull-ups or lat pulldowns. Horizontal pulls build thickness while vertical pulls build width. Together, they create complete back development. I typically program one horizontal pull and one vertical pull per workout, for example, barbell rows and pull-ups in the same session. This hits your back from both angles and maximizes growth.
Common Mistakes to Avoid
- Rounding your lower back or hunching your shoulders: Shifts the load from your back muscles to your spinal discs, causing injury and using the wrong muscles.
- Using momentum to swing the weights: Doesn’t build muscle since your muscles grow from tension and control, not jerking movements.
- Rushing the lowering phase: Wastes half the exercise, so take three to four seconds to lower the weight for maximum muscle growth.
- An imbalanced pushing-to-pulling ratio: Creates shoulder problems by making your chest tight and back weak, so match or exceed your pulling volume to your pushing volume.
- Skipping the warm-up: Leads to poor form and injury risk, so spend five minutes on band pull-aparts or light rows to activate your muscles.
At-Home Horizontal Pull Options
You don’t need a gym membership to build a strong back. Simple household items work surprisingly well for horizontal pulls. I’ve trained clients who built impressive back muscles using nothing but creative home setups.
Towel rows are your simplest option. Wrap a towel around a sturdy pole, door handle, or banister. Hold both ends of the towel and lean back until your arms are straight. Pull yourself forward by rowing your elbows back. The instability of the towel makes this harder than it looks. Adjust difficulty by changing how far you lean back.
Table rows use furniture you already have. Lie on your back under a sturdy table or desk. Grab the edge with both hands. Keep your body straight and pull your chest up to the table bottom. Your heels stay on the ground while your body stays rigid. This is basically an inverted row using your table. Make sure the table can support your weight before you start.
Resistance bands are cheap and effective. Anchor a band around a doorknob, pole, or fence post at chest height. Hold both ends and step back until there’s tension. Pull the band toward your midsection just like a cable row. Bands cost about ten dollars and provide variable resistance that increases as you pull harder.
Get creative with weighted objects around your house. Paint cans work great for single-arm rows. Gallon water jugs weigh about eight pounds each. Fill a backpack with books and wear it during bodyweight rows for extra resistance. I’ve seen people use detergent bottles, bags of rice, and even their kids as resistance. If it has weight and you can grip it safely, you can row with it. Start light and focus on perfect form before adding more household weight.
Conclusion
Horizontal pull exercises strengthen your back and improve shoulder stability. They balance push-heavy workouts and support good posture. Adding even one or two of these movements makes a noticeable difference over time.
Focus on proper technique and controlled movement. Gradually increase resistance or difficulty to continue progressing. Home options like towel rows, inverted rows, or resistance bands work well. Gym options include cable rows, dumbbell rows, and barbell rows.
Consistent practice strengthens your back muscles, protects your shoulders, and improves overall performance. Pick exercises that match your level, and add them to your next session. Your upper body will become stronger and more balanced with regular horizontal pull training.
Frequently Asked Questions
What are horizontal pull exercises?
Horizontal pull exercises are movements where you pull the weight toward your torso in a horizontal line, parallel to the floor. Examples include barbell rows, cable rows, and inverted rows. They target your upper and mid back muscles, including lats, rhomboids, traps, and rear deltoids.
How often should I do horizontal pull exercises?
Beginners should train horizontal pulls 2-3 times per week with 3 sets of 10-12 reps. Intermediate lifters can do 3-4 sets of 8-10 reps. Advanced lifters perform 4-5 sets of 6-8 reps for strength or higher reps for muscle growth. Always allow at least one rest day between sessions.
Can horizontal pulls fix rounded shoulders?
Yes, horizontal pulls strengthen the muscles that pull your shoulders back into proper alignment. They counteract tight chest muscles from excessive pushing exercises. Combined with chest stretching, consistent horizontal pulling corrects rounded shoulders and improves posture within weeks of regular training.
What’s better for beginners: rows or pull-ups?
Rows are better for beginners. Horizontal pulls like chest-supported rows and inverted rows are easier to learn and scale. Pull-ups require significant strength that most beginners don’t have yet. Master horizontal pulls first, then progress to vertical pulls like pull-ups for complete back development.
Do I need a gym for horizontal pull exercises?
No, you can train horizontal pulls at home. Use inverted rows under a sturdy table, towel rows on a door, resistance bands, or household items like water jugs and backpacks for resistance. Bodyweight variations work extremely well for building strength without equipment.